Implementing Image and Text Slider With React.js And Optimizations
Designing it from start to finish

In this article, I want to cover the problem you can have in an interview for the Frontend position — implementing Image Slider.
I had 15 onsite interviews last 5 months and had offers from Google, Roku, Microsoft, and others.
You should implement that widget for ~45–50min and tell about optimizations. This information I will try to cover here. The main goal is not to implement Image Slider with a lot of functionality, the goal is to explain how to implement and optimize.
Requirements
Let's start with the requirements of our widget.
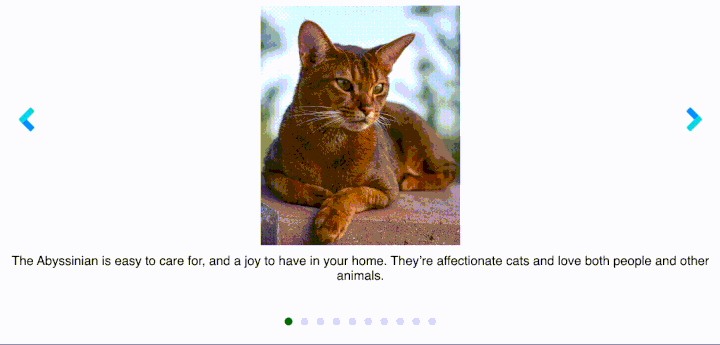
- Displaying images with cats from API with some size limit
- Displaying the description or title for each image
- Possibility to navigate between images with arrows
- Possibility to change slide by touch on mobile devices
- Possibility to jump to any slide
- AutoPlay for slider
- Possibility to customize width and height for slider
- The slider should be responsive
- Slider images should be downloaded efficiently and displayed as fast as possible
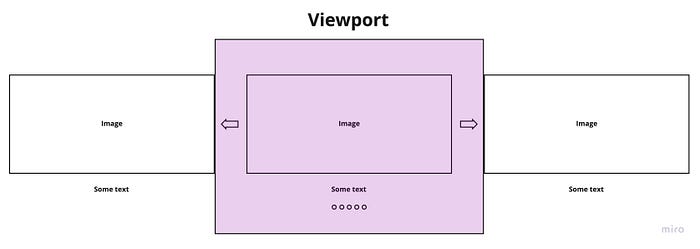
Mockup

Rendering in browser
For the first and simple implementation, we render all slides in the browser and display only parts in the viewport or in the slider element (when we set width or height). These solutions download all images for all slides and have N DOM elements, where N — number of slides.

Component Architecture

Components Implementation
Let’s start with the props of our Slider Component. With that props we can configure our slider.
{ autoPlay: boolean, autoPlayTime: number, width: '%' | 'px', height: '%' | 'px',}
In the Slider component we need to implement the following:
- load images
- implement a method for navigation by arrows
- implement a method for navigation by dots
- implement touch navigation
- autoplay functionality
- rendering slides, arrows, and dots
We will save the current slide number and downloaded images in the component’s local state. To avoid count of props and drilling suggest using Context to provide changing slides methods and current slider information.
As you can see on Component architecture Slider components contain 3 components: SlideList, Arrows, and Dots.
We have 2 arrows on the left and on the right sides.
For displaying arrows on both sides we can style it by CSS
We know the count of slides and can render the correct number of dots.
Each dot looks to follow
For displaying slides in SlideList we can get items from context and render the Slide component with keys and data about the slide.
To achieve such animation need to use transform and translateX in styles. We move our content to the next slide by slide number in our array.
Slide component contains 2 components: SlideImage and SlideTitle. This architecture allows for the addition of new functionality for the future for each slide.
How to optimize the solution?
Imagine that you have a lot of images in the slider and you need to optimize it. Optimization depends on the change slides animation ... yes, animation.
I see here 2 ways to optimize.
- Displaying 3 slides at one-time
- Displaying only one slide at a time
Let's see them.
3 slides at one-time optimization
If you want to use transform for changing slides you can use the following optimization.
Here we display only 3 slides at one time. Our active slide in the middle, and prev and next slides, because the user more frequently can click to prev or next arrows, or in case of autoplay we move forward each time.
When we move to prev or next slide we calculate the new 3 slides and render them.
One slide optimization
If you want to use animation in CSS you can use one slide and each time display one slide with information.

Example of animation effects that can be applied.
For that optimization need to add some changes to our solution.
There is no need to use now SlidesList component, we should render only one Slide component (line 99).
Also, we should control the animation effect and apply it only when changing slide content (line 41).
And the last change, for better user experience we should preload images previous and next ones from the current slide (line 25).
In Slide we need only one change. It’s applying class with animation when slide changing is triggered.
Implementation of fadeIn animation in styles.
Another optimization points
- Correct image size— There is no need to use full HD resolution if you slider with limited size.
- Use WebP format for images — It allows for reducing the size of images. It compresses at least 20–30% better than jpg and png.
- Don't use 100% quality images— There is no need to use 100% quality images. From my experience, 70— 85% of quality looks the same as 100%, but the size of the image is less.
- Minify JavaScript and Styles.
- Use CDN to store images.
- Use Brotli for compression.
The final size of data is less than gzip for 14–21%
Conclusion
There is no special knowledge to implement your own Image Slider. You need to practice doing that without Googling and in limited time.
All code you can see on GitHub.
In the next articles, I will cover the Tree View widget, Star widget, Google doc, and Google sheet system design.
Other articles you can read:
Want to Read More About Front-End Interviews?
My blog
Good luck with your interviews!

