How to Call Any API From a Solidity Smart Contract, Part 2
Making and deploying a Requester contract to request data from the Airnode
This is the second part of the tutorial where we deploy the Requester Contract and request data from the Airnode. Check out the first part here.
In Part I, we successfully integrated and deployed an Airnode through ChainAPI. Now we will code a simple Requester Contract to call and read data from our Airnode.
Before starting, make sure you set up the Airnode Monorepo on your system. Follow through the Readme to install and build all the dependencies and packages to be able to access the Airnode CLI.
Clone the Airnode Monorepo.
$ git clone https://github.com/api3dao/airnode.git .To install the dependencies,
$ yarn run bootstrapTo build all the packages,
$ yarn run buildAn Airnode is a first-party oracle that pushes off-chain API data to your on-chain contract. It makes a request to the on-chain RRP protocol contract (AirnodeRrpV0.sol) that adds the request to the event logs. The off-chain Airnode then accesses the event logs, gets the API data and performs a callback to the requester.

A Requester is a contract that triggers an Airnode request. To do so, the requester needs to be sponsored and make the request using a matching sponsor wallet.
The Requester then calls the protocol contract, which emits a blockchain event with the request parameters. Airnode listens to the events emitted by the AirnodeRrpV0 contract. During the next run cycle, Airnode gets the request parameters from the emitted event.
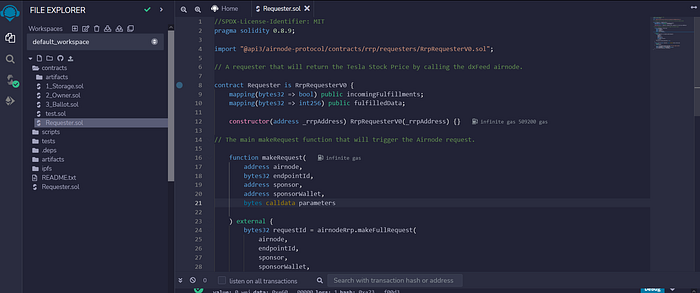
Coding Requester.sol
The Requester Contract will have two main functions, makeRequest() and fulfill(). The makeRequest() function will call the makeFullRequest() function of the AirnodeRrpV0.sol protocol contract which adds the request to its storage. The targeted off-chain Airnode gathers the request from AirnodeRrpV0.sol’s storage and responds using the fulFill() function of AirnodeRrpV0.sol.
Request Parameters
The makeRequest() function expects the following parameters to make a valid request.
airnode(address) andendpointIdspecify the endpoint.sponsorandsponsorWallet(addresses) specify which wallet will be used to fulfill the request.parametersspecify the API and Reserved Parameters (see Airnode ABI specifications for how these are encoded) We will encode the parameters off-chain using@airnode-abilibrary.
Response Parameters
The callback to the Requester contains two parameters:
requestId: First acquired when making the request and passed here as a reference to identify the request for which the response is intended.data: In case of a successful response, this is the requested data which has been encoded and contains a timestamp in addition to other response data. Decode it using the functiondecode()from theabiobject.
Compiling the Contract
To deploy the Requester Contract, we are going to use Remix IDE. It’s an online IDE that allows developing, deploying and administering smart contracts for EVM Compatible Blockchains.
Make a contract and paste in the Requester.sol code.
Now hit compile on the right side of the dashboard and compile the Smart Contract.
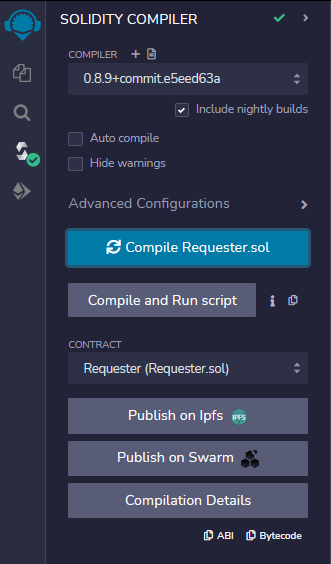
Now we are all set to deploy our Requester.
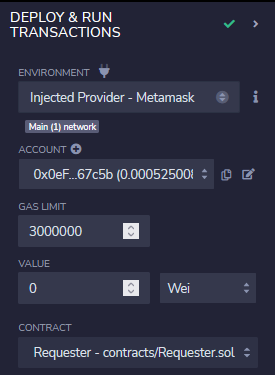
Deploying the Requester
As we are going to deploy the contract on Polygon Mumbai Testnet, make sure you have enough MATIC in your wallet to deploy the Requester and then fund the sponsorWallet later. You can get some from the Mumbai Faucet.
Head to Deploy and run Transactions and select Injected Provider — MetaMask option under Environment. Connect your MetaMask. Make sure you’re on Mumbai Testnet.
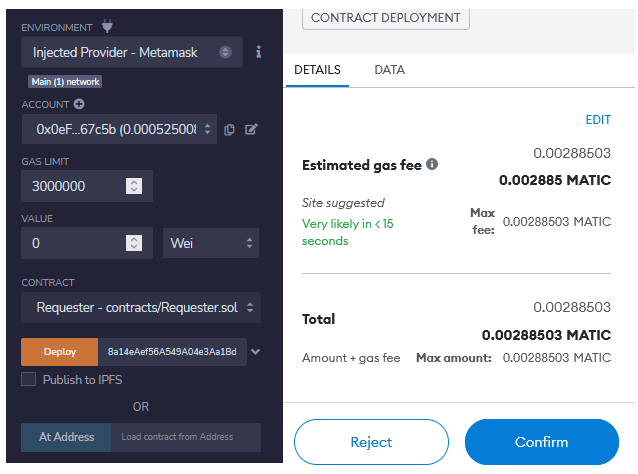
The _rrpAddressis the main airnodeRrpAddress. The RRP Contracts have already been deployed on-chain. You can check for your specific chain here.
Fill in the _rrpAddress and click on Deploy. Confirm the transaction on your MetaMask and wait for it to deploy the Requester Contract.
Calling the Requester
When your Contract gets deployed, head to Deploy & run transactions and click on the dropdown for your Requester under Deployed Contracts.
Now select the makeRequest dropdown to see all the parameters you need to pass in order to make a full request to the Airnode.
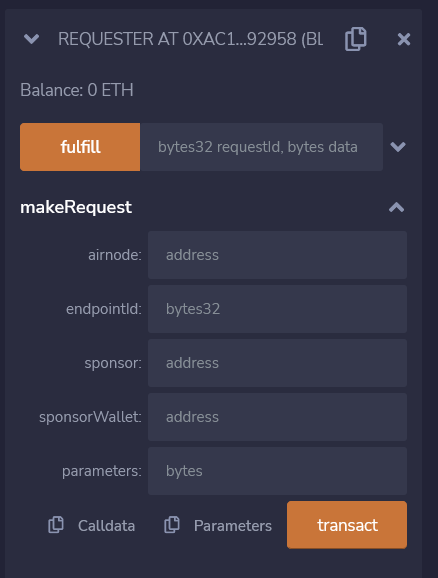
Here, you need to pass in your airnode(Airnode address), endpointID, sponsor(The Requester itself),sponsorWalletand parameters in order to call the makeRequest() function.
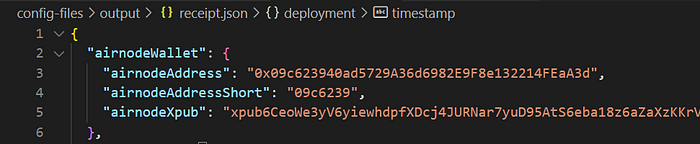
We can find the airnode in the receipt.json under the output directory obtained when we deployed our Airnode.

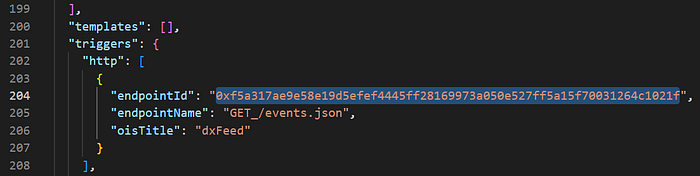
The endpointID can be found under the config.json file.
We need to derive the sponsorWallet through the Airnode CLI command that will make the actual call. We also need to fund it with some MATIC to cover the gas cost.
After you’ve setup the Airnode CLI and installed and built all the dependencies and packages, run the following command to derive your sponsorWallet :
Linux:
npx @api3/airnode-admin derive-sponsor-wallet-address \
  --airnode-xpub xpub6CUGRUo... \
  --airnode-address 0xe1...dF05s \
  --sponsor-address 0xF4...dDyu9
Windows:
npx @api3/airnode-admin derive-sponsor-wallet-address ^
  --airnode-xpub xpub6CUGRUo... ^
  --airnode-address 0xe1...dF05s ^
  --sponsor-address 0xF4...dDyu9
Your airnode-addressand airnode-xpub (The Airnode’s extended public key) can be found in the same receipt.json. The sponsor-address will be the address of the Requester contract itself (the one that you just deployed).
Run the command to obtain your sponsorWallet.

Fund the sponsorWallet with some test MATIC.
The parameters are required to be encoded in bytes32 before you send it. We are going to use the @airnode-abi library for encoding the parameters off-chain and then sending it to the Requester.
You can set it up by cloning this tutorial’s repository.
Run the following command to get your encoded parameters :
node .\src\encodeParams.jsNow you have all the parameters that you require to run the makeRequest function. Populate all the fields and click on Transact.
Note: The sponsor here will be the address of the Requester Contract that you just deployed.

Click on transact, confirm the transaction on MetaMask and wait for the transaction to complete.
Now you can head over to https://mumbai.polygonscan.com and check your sponsorWallet for any new transactions.
You might need to wait for a while as the Airnode calls the fulfill() function in AirnodeRrpV0.sol that will in turn call back the requester contract at fulfillAddress using function fulfillFunctionId to deliver data.
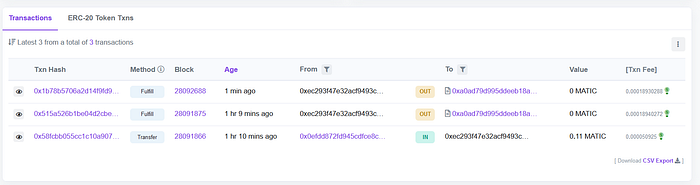
Here, we can see the latest Fulfill transaction.
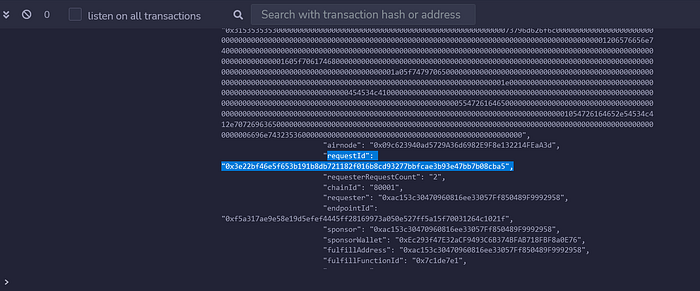
Now go back on Remix and check for requestId under logs for the latest transaction.
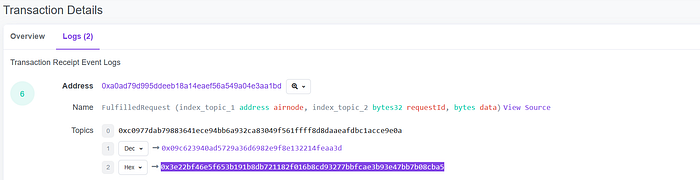
You can also find your requestId under logs in the Polygon Mumbai Block Explorer.
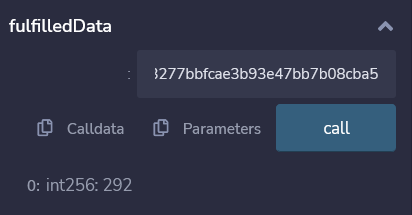
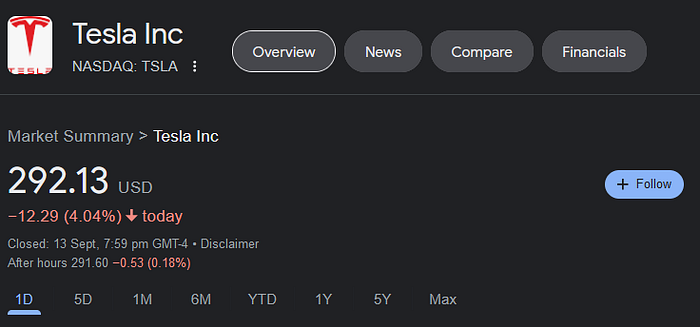
Copy your requestId and paste it on under the fulfilledData method to decode the response. Click on call and you will see the API response. Here, we requested Tesla’s Stock price.
Now you successfully deployed an Airnode and made a Requester Contract to read data from it. You can also refer to this Repo for all the code that I’ve used for this tutorial.
Thanks for reading.
Any questions? Check out API3’s Discord Server and drop your queries there!

