Web3 Game Development With Lens Protocol and ChainSafe’s Unity SDK
Build Blockchain Games with Lens Protocol and Chainsafe’s Unity SDK

A lot of people know Lens Protocol as a decentralized social graph that makes it easy for anyone to build a social network on the Blockchain. As a result, we’ve seen many developers build exciting social applications on Lens.
Some of the ones I find interesting are Lenster (a decentralized, and permissionless social media app), Lenstube (a decentralized video-sharing social media platform), and Lensdrop (an app that lets you airdrop tokens to your followers and those who engage with your posts).
However, one cool use case that hasn’t really been explored by developers is Web3 gaming. I recently won a prize at EthGlobal’s HackFS 2022 Hackathon for building a Web3 Game and Gaming Marketplace on Lens Protocol. Therefore, I decided to create this tutorial for other developers to learn about how they can also build their own Blockchain Games on Lens.
At the end of this tutorial, you should have a basic understanding of how Chainsafe’s Unity SDK works and also be able to integrate Lens Protocol into your Unity Game.
Project Initialisation and Installing Dependencies
For this project, we’ll be building a token-gated game that can only be played by those who have collected our publication on Lens. In case you are not familiar with the Collect Module, here’s a simple explanation from the Lens documentation.
Collects allow creators to monetize their content. Because creators own their content via the Lens Protocol, they are able to allow their followers to purchase that content.
When a user posts a publication to their Profile NFT they have the option to set a Collect Module. This module will allow other users to mint NFTs that link to the publication’s ContentURI. This module can contain any arbitrary logic to apply to the minting process and the resulting NFT.
Install the Chainsafe Unity SDK
Chainsafe’s Unity SDK makes it easy for developers to build Blockchain-enabled games on Unity. Go through the following steps to install the SDK.
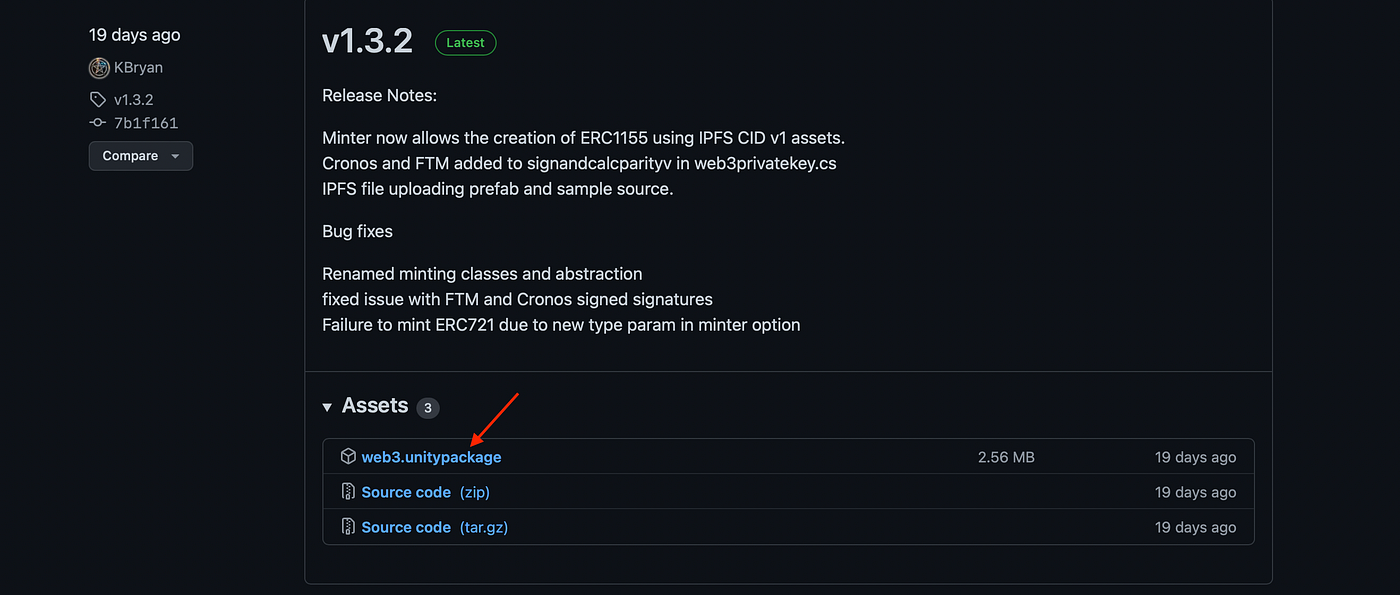
- Visit Chainsafe’s web3.unity release page.
- Click on the web3.unitypackage to install.
Download the Game Asset
You can skip this part if you’d like to build your game from scratch or already have a game that you’d like to integrate with Lens Protocol and Chainsafe.
To avoid building a game from scratch, we’ll be using a Sample Game from the Unity Asset Store. Go to the Unity Asset Store, then click on Add to My Assets to add the game kit to your assets on Unity.

Create your Unity Game
You need to have Unity installed to go along with this tutorial. If you don’t already have it installed, you can do so here.
- Open the Unity Hub application on your computer.
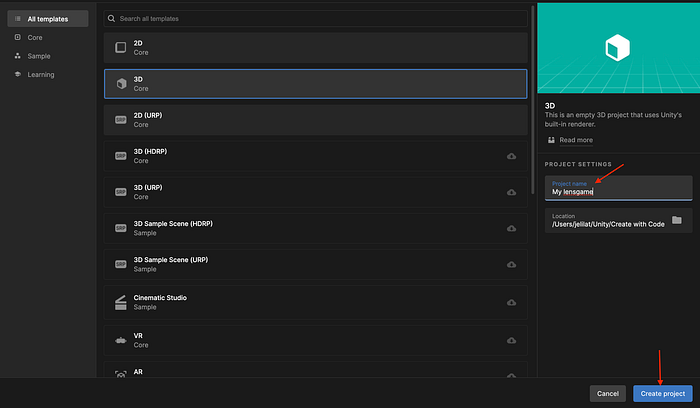
- Navigate to the Projects directory and click on New Project

3. After that, name your project and click on Create project. This should open a new project for you in Unity.
Import Game Assets
1. In the Unity Editor, go to Window>Package Manager. This should show the Package Manager modal.
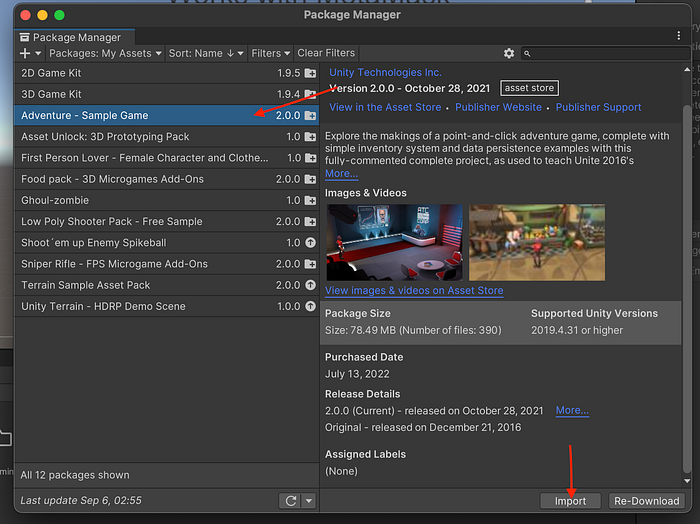
2. Navigate to the My Assets section on the Package Manager to view your assets.

3. Click on the 2D Game Kit, download the asset if you haven’t already done that, then click on Import to add it to your project.
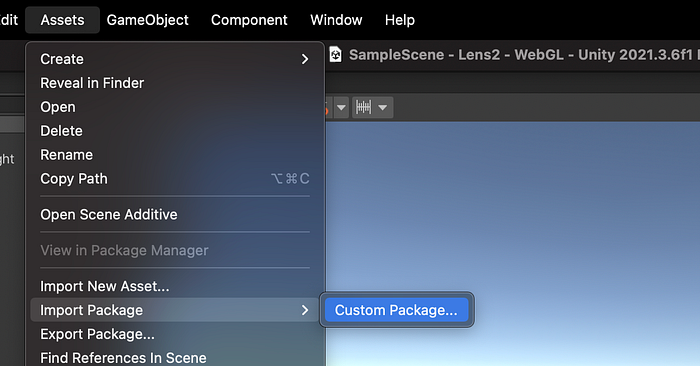
4. Go to Assets>Import Package>Custom Package, then import the web3.unitypackage you installed earlier. This will import Chainsafe’s Unity SDK into your game.
Posting a Collectible Publication on Lens Protocol
Since we’ll be building a game that can only be accessed by those who collected our publication, we need to create the collectible publication on Lens Protocol. There are a few ways to do this.
Lens API
You can post a collectible publication yourself using the Lens API. You can check the documentation for more details.
Lenster
- Go to Lenster, then connect your wallet and sign in with Lens.
- Enter a description and upload an image for your collectible. This image is what will be shown on OpenSea and other NFT Marketplaces.

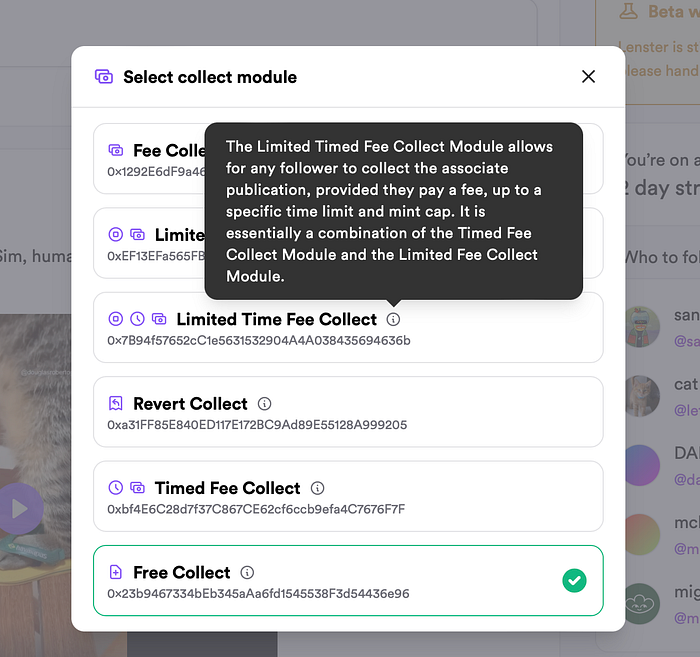
3. Click on the Collect icon to select a Collect Module. In case you’re not sure which module to choose, you can hover on the info icon or visit Lens docs to learn more about each module.
Lensgame Marketplace
- Go to Lensgame Marketplace, then connect your wallet and sign in with Lens.
- Enter a Title, Description, and upload an image for your collectible.
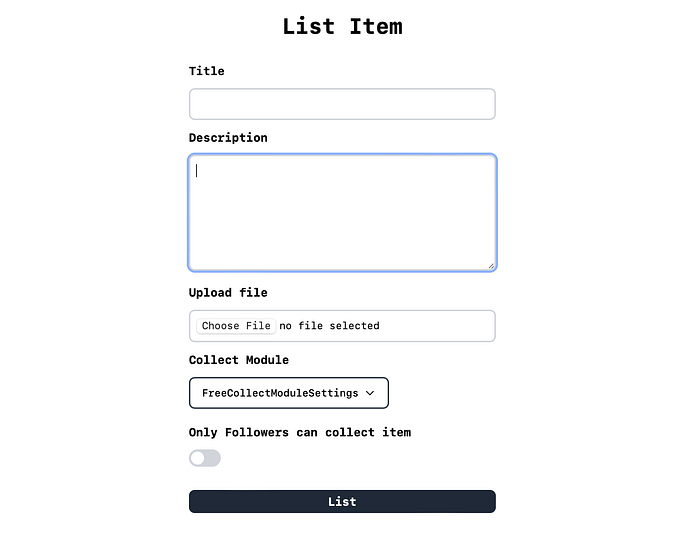
4. Select a Collect module and go ahead to list your item after completing the form.
PS: The Lensgame Marketplace is still in development and the most effective way to post your publication at the moment is Lenster.
Token-Gating your Unity Game
Collect Publication
Open the publication on Lenster, then click on the Collect icon to collect the publication. After collecting the publication, it should appear on your OpenSea profile.

Add Publication to Game
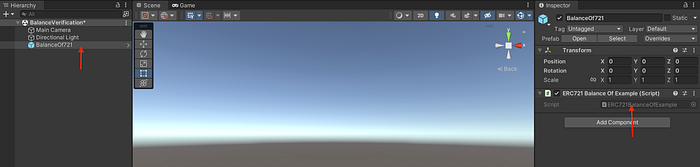
- In the project directory, right-click on Assets and go to Create>Scene to create a new scene. You can name the scene whatever you want, but I named mine BalanceVerification. Double-click on the new scene to view it.
2. Go to Assets>Web3Unity>Prefabs>ERC721, then drag and drop BalanceOf721 into the scene. Double-click on the ERC721BalanceOfExample Script and it’ll automatically open the file in your code editor.
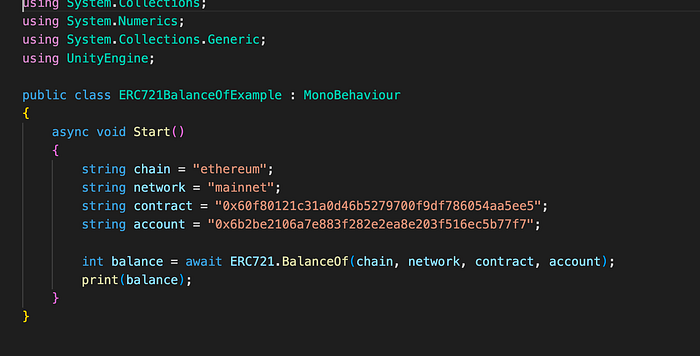
You should see something like this:
3. Now, go to your profile on OpenSea and click on the collected publication. For this tutorial, I’m using this publication posted by Yoginth.
In case you can’t find the collected publication on your OpenSea profile, go to More>Hidden and you should find it there.
Go to Details on the NFT page and copy the contract address.

4. Go back to the ERC721BalanceOfExample Script on VSCode and edit it as follows.
5. Go to Web3GL Templates>Web3GL-2020x, then open the network.js file in your code editor and change the chain id to 137, which is the id for the Polygon network.

6. Add a Canvas with the text “Insufficient token balance” to your scene. Make sure to uncheck it so it’s not active by default.

7. Go to Web3Unity>Scenes and double-click on WebLogin to edit your login scene. You can modify it as much as you want, so it’s more visually appealing for your game.
Publishing your Game
Now that you’ve added the token-gating feature, it’s time to publish your game. In the menu, go to File>Build Settings.
- Click on the “Add Open Scenes” button to add the
WebLoginandBalanceVerificationScenes to your game. Once added, drag and drop the scenes to the top, so they’re at index 0 and 1 respectively.

2. On the Platform menu, click on “WebGL”, then the “Switch Platform” button.
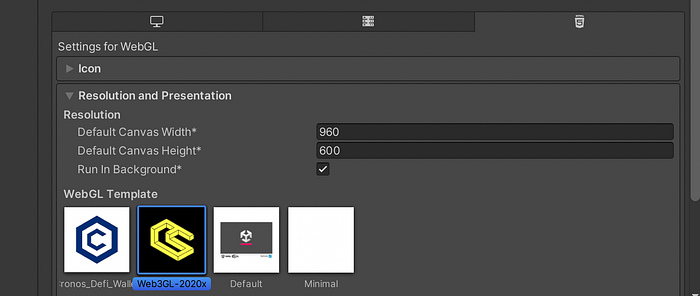
3. Go to “Player Settings”, then select Web3GL-2020x as the WebGL Template.
In case you are getting any errors, go to “Other Settings”, then remove the depreciated WebGL 1.
4. Go back to your Build Settings and click on “Build and Run” to play your game.
Now that your game is ready, you can publish it on itch.io and other similar sites.
Voila! You have successfully built a Web3 Game on Lens Protocol. Share your game and receive feedback from players.
PS: The code associated with this tutorial can be found here. If you prefer watching a video tutorial, you can check this out.

