Using Metal in Swift Playgrounds 4
Two workarounds for making Metal sing like a bird in Swift Playgrounds

Swift Playgrounds 4 was a huge update, bringing along full app development in SwiftUI to the iPad as well as making the app faster and better to use. Although Playgrounds works well for prototyping and working on the go, it is missing some advanced development features—like Metal.
This article will show two ways of making Metal work in Swift Playgrounds 4 both for app projects and playgrounds.
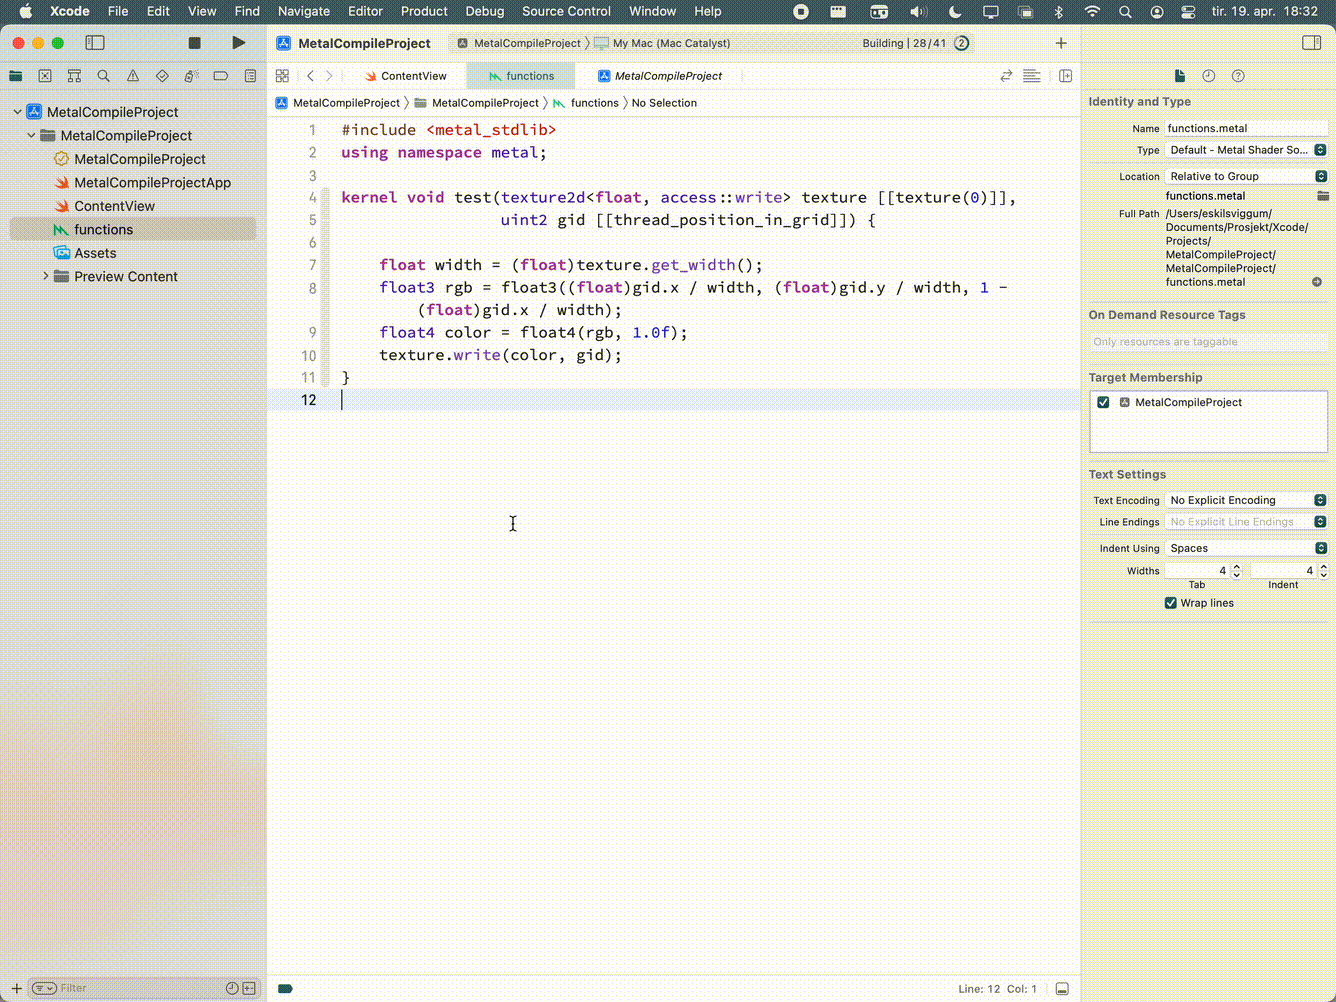
Compiling the Metal-library in Xcode
One option is just to compile the Metal source in Xcode and copy the compiled library to Playgrounds.
This preserves code-completion and syntax-highlighting while working on the Metal source, and is faster to execute. This method can however be quite cumbersome and only works on one platform (the same compiled library will not work on both iOS and macOS).
The procedure is as follows:
- Open a new iOS project in Xcode
- Create a new
.metalfile and write your shaders - Build the project for your platform
- Press Product > Show Build Folder in Finder, and navigate to
Products/Debug-[platform]. For instance, building for Mac Catalyst yields the pathProducts/Debug-maccatalyst. - Right-click on your app and choose
Show Package Contents, then copy the filedefault.metallib(might be located in the Resources folder) - Then in Swift Playgrounds. If you have an app: paste the file in the Resources folder of your app (or drag the file into the playgrounds-app). If you have a playground: paste the file in
Edits/UserResourcesof your playground (or choose the file with a file literal) - Write code to execute your metal function as you would in a normal app, using
device.makeDefaultLibrary()!
Strengths
- Preserve code-completion and syntax-highlighting
- Executes faster (if you really need to optimize)
Limitations
- Cumbersome
- Only works on the platform it was compiled for.
Store the Metal-source as a resource
Another method is to store the Metal-source in plaintext as a resource and compile on-device.
The benefit here is that you can edit the shader in Playgrounds, and the playground will work cross-platform. And if you open the shader in Xcode (or a different editor with the language set to c++), you will get syntax highlighting.
The method goes like so:
- Create a new text file and write your shaders. Note, you may end the file with
.metal, however this will not work in a playgrounds app — the app will fail compilation. - If you have an app: paste the file in the
Resourcesfolder of your app (or drag the file into the playgrounds-app). If you have a playground: paste the file inEdits/UserResourcesof your playground (or choose the file with a file-literal) - Write code to execute your Metal function as you would in a normal app, using
try device.makeLibrary(source: String, options: MTLCompileOptions?)
let file = #fileLiteral(resourceName: "<Name of your metal-source>")

let libraryData = try! Data(contentsOf: file)
let libraryStr = String(data: libraryData, encoding: .utf8)!
let library = try device.makeLibrary(source: libraryStr, options: nil)
Strengths
- Source can be edited in Swift Playgrounds
- Works on any platform
Limitations
- No syntax-highlighting nor code-completion
- Slightly slower to execute
Compiling the library in Xcode will lead to slightly faster execution. I did a test to compare the time it takes to load a metal library in Swift Playgrounds using the two methods above. The test was done in Swift Playgrounds 4.0 on an M1 Mac using a Metal shader counting 11 lines of code. The results are in the magnitude of microseconds (i.e. less than milliseconds), but shows that compiling in Xcode will load the library faster.

These are two methods to make Metal work in Swift Playgrounds. Compiling the Metal-library in Xcode is perhaps preferred if one already has a finished metal library, while storing the Metal-source as a resource is preferred if one needs to edit the source during development in the playground.

