SwiftUI’s matchGeometryEffect in iOS 14 — Animate Grids
Fall in love with this new modifier and build amazing animations
The second iteration of SwiftUI introduced a very cool modifier: matchedGeometryEffect.
This modifier lets you create amazing transitions to animate views across hierarchies. To use it, all you need to do is attach it to the two views you’re looking to animate between and ensure that the same identifier is specified.
It has some mighty powerful use cases — from animating size changes to interpolating position changes of views.
You’ll surely find it handy when creating fancy modal transitions across views, in SwiftUI grids, or when reloading a SwiftUI view with animation.
In the following sections, we’ll explore a bunch of things you can do using the matchedGeometryEffect.
SwiftUI Basic matchedGeometryEffect
Here’s how a simple matchedGeometryEffect modifier is defined:
matchedGeometryEffect(id: "unique", in: namespace)- The
idis a unique identifier that’s set on the pair of views you wish to animate or interpolate. Namespaceis a property wrapper that’s used to differentiate between IDs across views, basically preventing name collisions in SwiftUI.
There are a few more optional arguments that can be passed in the modifier. We’ll discuss them shortly.
Let’s look at a simple example of matchedGeometry in action:

Wow! We managed to animate two Text views displaying numbers across the view reloads. Isn’t that great for demonstrating a visual demo on how to swap two numbers?
You can do the same for n numbers as well. Just ensure that the correct pair IDs are specified.
Animating size and position with matchedGeometryEffect
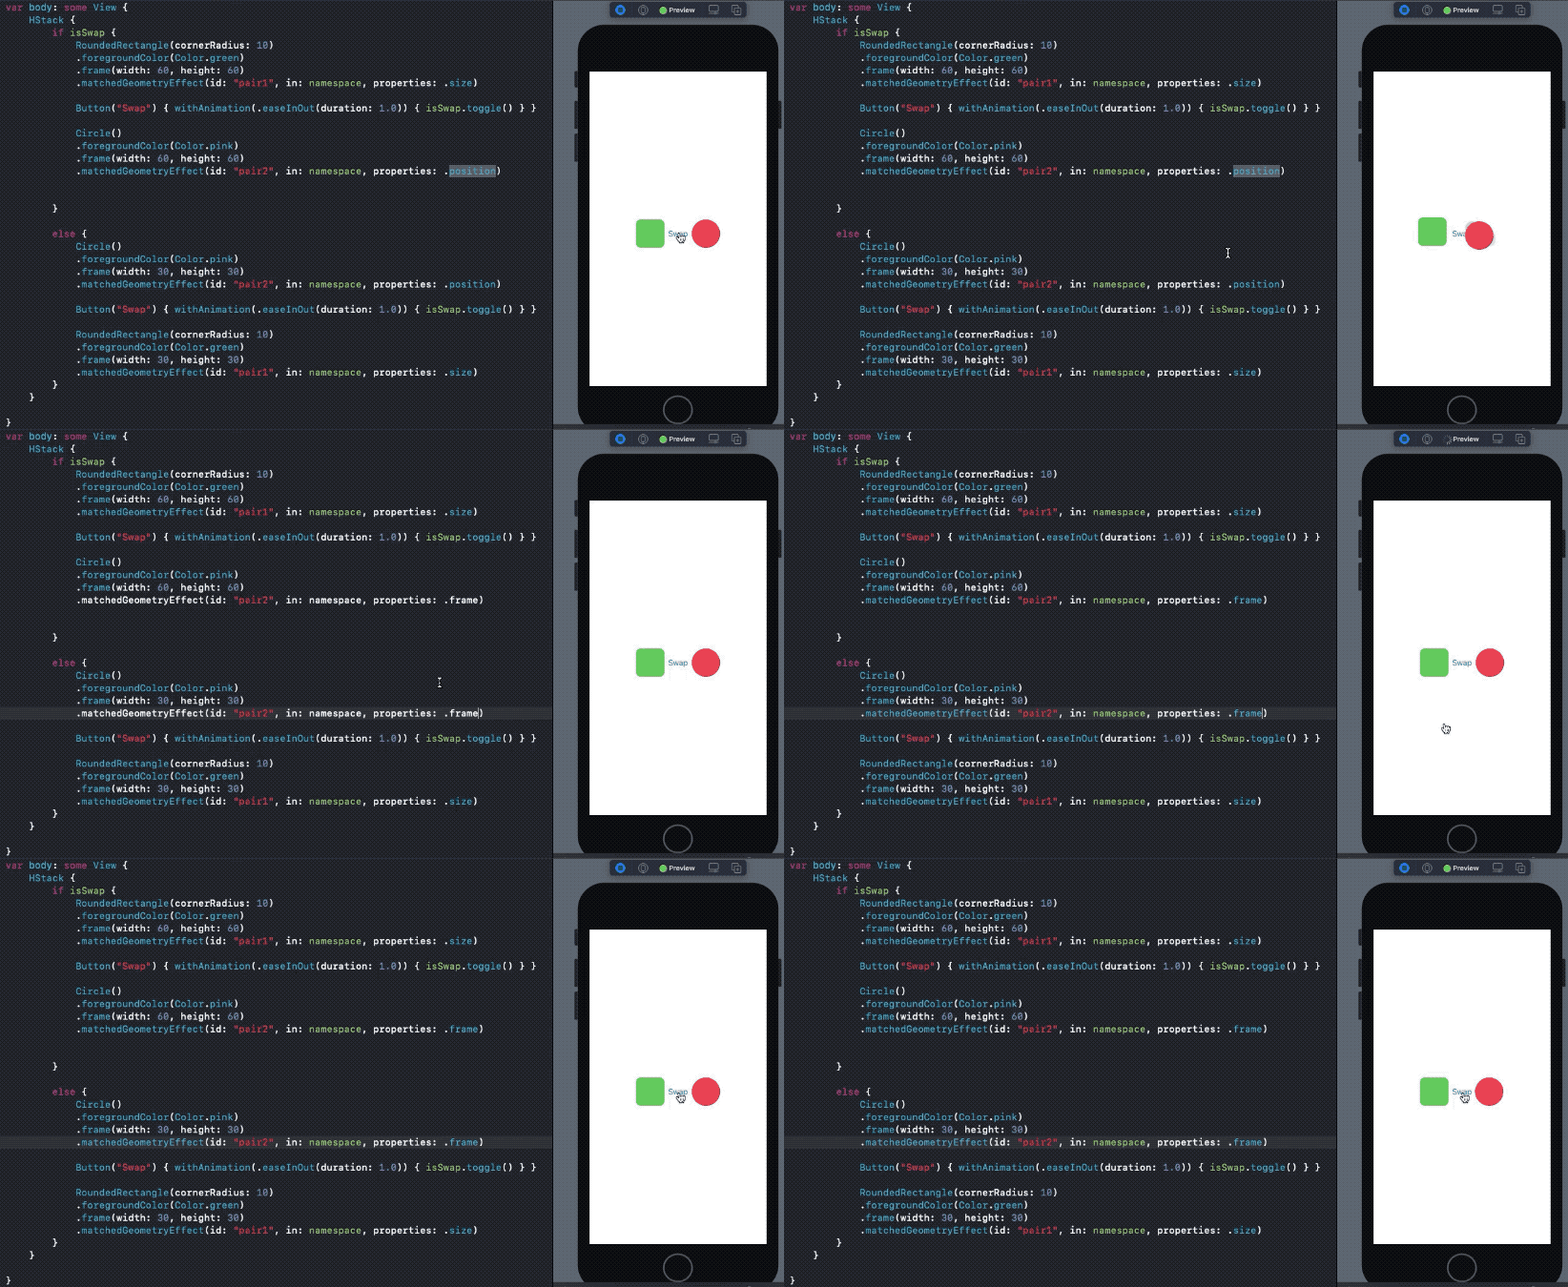
What we saw previously was animating the whole frame. But we can opt to animate only the size and position as well by specifying the appropriate property:
.matchedGeometryEffect(id: "id", in: nSpace, properties: .size)
.matchedGeometryEffect(id: "id", in: nSpace, properties: .position)
This is handy when you only want to show a zoom transition (use size) or when you want to interpolate position.
But make sure you’re setting the property correctly. For example:

As you can see, the rounded rectangle transitions only its size. So, it doesn’t really move from left to right. At the same time, the circle only interpolates its position but doesn’t animate its size until we set the property to frame.
Using Namespace ID
Sometimes, you want to pass around a namespace to child views or in NavigationLinks.
To do so, you need to specify Namespace.ID as the type in the destination views:

SwiftUI Grids With matchedGeometryEffect
Grids were a huge addition in SwiftUI 2.0, and they are a match made in heaven with matchedGeometryEffect.
From transitioning across layouts to hero modal-like animations, we can do it all.
In the following screengrab, we’ve shown how to animate the insertion and removal of items from a SwiftUI grid using matchedGeometryEffect while displaying a list of selected items. Everything in fewer than 50 lines of code:

As you can see, we’ve created two ScrollViews. One holds the LazyVGrid with three column items and the other holds the selected items in an HStack. To select and unselect items, we’ve created an array selectedItemIDs.
The full source code of this animation along with the views and utility methods is available on GitHub.
Conclusion
That’s a wrap. I hope this inspires you to build some cool transitions. Animation in SwiftUI has certainly gotten a whole lot easier, more flexible, and more powerful.
Thanks for reading.

