Implement a Facial Recognition Authentication Using React.js and TailwindCSS
Secure your apps with face authorization

Authentication is the most critical part of a website. If not handled correctly, it can lead to unimaginable circumstances. With recent technological advancements, many different tech stacks and frameworks are created to build the most efficient web application possible. But developers focus very little on improving the authentication system and building something new and innovative in the web authentication domain.
With the advancement of artificial and machine learning techniques, face recognition has become easy to implement and very reliable. Most smartphones nowadays come with optical facial recognition techniques to unlock the phone. But in the web development field, we can’t see the adoption of facial recognition as a means of authenticating a user.
In this article, I am discussing the problems of our traditional authentication systems, how to solve this issue using face recognition, and a detailed step-by-step guide to implement the same using reactjs and taiwindCSS.
Problem with current auth systems
Currently, email password-based authentication is the most popular on the web. But the main drawback of this system is to memorize unique passwords for every website you signed up for. If you forget your password, you need your email address to reset the password. If you lose control over your email, it is almost impossible to recover your account.
To solve all these issues, oAuth comes into the picture. OAuth is a protocol to sign up for a website using an OAuth provider. You may see an option to log in using Google, Facebook, GitHub, etc on various websites. This is an example of oAuth. In our system as a user, you have to maintain only one account and give permission to use the information on other websites. As a developer, you have to trust the OAuth provider to provide the right information.
Nowadays, Passwordless sign-in or magic link authentication is very popular. In this system, you need to enter your email address on the website. Then you receive an email containing a sign-in link. If you browse this link, you are authenticated and signed up on the respective website. This is a very easy system to log in and you don’t need to memorize passwords.
In all the above examples you can find a familiar pattern. All these authentication processes need your email. Email is so crucial in all the above systems that if you somehow lose control over it, you are unable to retain control over all your accounts. This is a major problem in authentication systems. But as problems have a solution, this problem also has some solutions. Let’s discuss it in the next section.
How face authentication solves the issue
To remove email from the authentication stack, we have some options like fingerprint authentication and facial recognition.
The problem with fingerprint authentication is that it requires specialized hardware to work. Fingerprint readers don’t come by default with most computer hardware. As there is no native standardized API on the web to interact with device fingerprint readers, fingerprint authentication is feasible in the near future.
Due to rapid progress in artificial intelligence and machine learning, facial recognition is not very hard. The presence of open-source machine learning libraries makes it easier for developers to quickly develop function AI for their web applications.
But this needs some previous exposure to machine learning. If you don’t have that experience, you can use machine learning SaaS offerings like faceIO to easily create a facial recognition authentication system for your website.
In this tutorial, we are using the FaceIO library to demonstrate face authentication in our web application. Create a free account of FaceIO to follow along.
Creating a Rectjs project with tailwind CSS
We are using vite to create the ReactJs project in this tutorial. Open your terminal and run the following command to scaffold your React project using vite.
npm create vite@latest my-project — — template reactNow follow the terminal prompt to scaffold your project. After you completed this step, open this project in your favorite code editor. The project structure should look like this.
.
├── index.html
├── package.json
├── package-lock.json
├── public
│ └── vite.svg
├── src
│ ├── App.css
│ ├── App.jsx
│ ├── assets
│ │ └── react.svg
│ └── main.jsx
└── vite.config.js
Now, to install tailwind CSS in your vite project, follow these steps carefully.
npm install -D tailwindcss postcss autoprefixer
npx tailwindcss init -p
Now open your tailwind.config.cjs file and add your project source path.
Inside your src/App.css file, add tailwind CSS directives.
Now you have successfully installed tailwind CSS in your React and vite project. Let’s focus on how to integrate face authentication in our project in the next section.
Adding FaceIO auth in React application
The great thing about FaceIO is that they provide a very easy-to-use Javascript library. This library comes with two major functions enroll and authenticate. But before discussing these functions, let’s link the FaceIO library to the react application.
Open the index.html file in your project and link FaceIO CDN to your project.
After successfully linking the FaceIO CDN, open App.jsx file and delete all the boilerplate code inside App component. To initiate our FaceIO library, we add an useEffect react hook. The code inside this hook runs only once when the component is initiated.
You can see we are using an ID as an argument while instantiating the faceIO object. When you signup for a faceIO account, you can access these IDs inside the faceIO console.
All the setup is now completed and let’s focus on authenticating the user using FaceIO.
Register New Users Using FaceIO
FaceIO provides a very simple interface to register new users. We use enroll function to register a new user. As FaceIO needs your webcam permission, do accept the permission dialogue when prompted.
The enroll function has 2 aliases. You can use register and record functions as drop-in replacements for enroll.
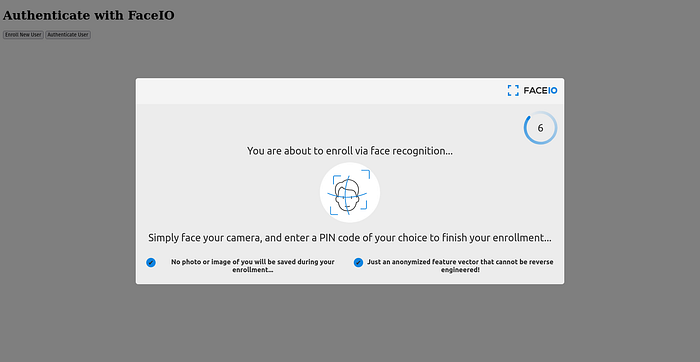
When you run this function in your browser, it launches faceIO widgets. At first, it takes user consent to scan their face, then prompt to accept the webcam permission. If all requirements are satisfied, the faceIO widget opens your camera and scans your face. It converts your face data into an array of floating point numbers.
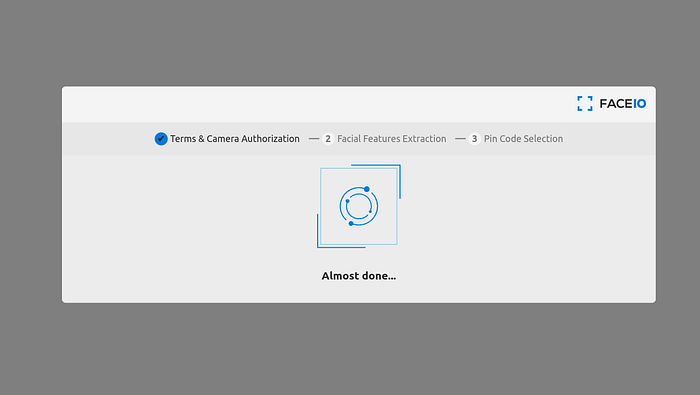
After collecting the facial data, faceIO is prompted to enter a PIN code. This PIN code is used to distinguish users with extremely similar faces. You think of this as a two-factor auth when something goes south.

Let’s add faceIO enroll in our react application. We keep the app very simple. Therefore, let’s create a button called register when someone clicks on that button, we run the enroll function to enroll a new user.
After adding the register button and the javascript handler on the button click, App.jsx file looks like this.
In the above code, you can see I wrap the code inside a try-catch block. If something goes wrong, FaceIO throws some errors. The error messages are very helpful and you can get a complete list of error codes in the official documentation.
The enroll function accepts only an optional parameter object. These optional parameters accept properties to configure the user registration process. In the above example, I define locale and payload properties inside the optional parameter of the enrolling function. the locale property represents the default interaction language of your user. In our case, we provide auto to automatically detect the language.
Inside the payload, you can add any JSON serializable value unique to your user. In this example, we are adding the email of the user as a payload. Whenever use log-in in the future, we can access the email payload from the FaceIO return object.
Enroll function in FaceIO returns a promise. Therefore in the example, I am using the async/await feature of javascript. If you don’t prefer async/await, you can use .then instead.
When the promise completes, it results in an userInfo object. By using the object, we can access the unique facial ID of the user. In addition to this, the userInfo object also provides a details property from which, we can get the probable age and gender of the user.
Authenticate Registered User Using FaceIO
After registering the user successfully, this is the time to authenticate registered users. For this purpose, Pixlab provides the authenticate function. This authenticate function also has 3 aliases, auth, recognize and identify.
The authentication function needs only a single frame for the user to recognize. Therefore, it is very bandwidth friendly. After successful authentication, it returns a userData object. This userData contains the payload you have specifies in the registration and the face of the user.
Inside our App.jsx file, we make another button called Log-in. When a user clicks on this button, it invokes the handleLogIn helper function. This function is ultimately responsible to invoke the “authenticate” function. Let’s see all of these in code.
Inside the handleLogIn function, we use the try-catch block to catch errors if authentication fails. As the authenticate function returns a promise, we have used async await methods to get the value when the promise completes.
The authentication function accepts some optional parameters to customize the faceIO authentication widget. You can mainly customize the timeouts using permissions timeout, idleTimeout and replyTimeout parameters. After the compilation, our web application should look like this.
FaceIO REST API
While creating your account in FaceIO, you will be assigned an API key. You can find this API key in the faceIO console. By using this API key, you can interact with the FaceIO back-end with RESTful API. The base URL of the REST API is `https://api.faceio.net/`.
Currently, the FaceIO REST API supports 3 functions. Deleting the face of a user, setting the additional payload to a faceID, and setting the Pin code for a faceID. Do remember to use those API endpoints from a secured environment or from your backend server. Don’t run those APIs from the client side.
Delete a faceID
To delete a faceID, we have to make a get request to https://api.faceio.net/deletefacialid endpoint. This endpoint has two request parameters. One is the key that accepts the API key, another is the fid which accepts the faceID which you want to delete.
curl — request GET \— url 'https://api.faceio.net/deletefacialid?key=APIkey&fid=FaceID'
As a response, FaceIO returns a status code and a `payload` boolean that tells if the data along with the payload is successfully deleted or not.
Set payload to FaceID
By using this API endpoint, you can set a payload to an already present FaceID. The requested URL is https://api.faceio.net/setfacialidpayload. This endpoint requires 3 request parameters. the key is the API key, fid is the facial ID with which you want to attach the payload with, and the payload is to define your custom payload data.
curl — request POST \— url 'https://api.faceio.net/setfacialidpayload?key=APIkey&fid=FaceID&payload=%22name%3AHrishikesh%22'
As a response, FaceIO returns a status code and a `payload` boolean that tells if the data along with the payload is successfully deleted or not.
Set Pincode to FaceID
During the faceID enrollment section, we discussed the need for Pincode to distinguish between two very similar-looking faces. If you want to modify their Pincode, you can easily do so, by using the https://api.faceio.net/setfacialidpincode endpoint.
Like the previous endpoint, this also requires 3 parameters. One is the API key, another is the faceID and the last one is the PIN. The curl request to the endpoint is as follows.
curl — request POST \— url 'https://api.faceio.net/setfacialidpincode?key=APIkey&fid=FaceID&pin=12345'
FaceIO Webhooks
Webhooks are used as a communication method between servers. FaceIO provides a rich webhook experience that you can use to update your back-end server. FaceIO sends a webhook on 3 events. enroll when a new user enrolls in your system, auth when an already registered user is authenticated using faceIO, and deletion when a faceID is deleted using the REST API we have discussed above.
Each webhook request is a POST request from the faceIO server and a JSON object. The request body looks like this.
Name of the each field is self-explanatory about what value it contains.
Follow these steps to configure the webhook with the faceIO server.
- Connect to your account via the FACEIO Console first.
- On the console main view, visit the Application Manager.
- Select the target application for which you want to set up webhooks.
- Once the target application is selected. Enter your Webhook Endpoint URL for receiving events and save your modification.
- You’re all set. Upon an event is triggered, FACEIO shall make an HTTP POST request to the URL you have configured.
Conclusion
This is an in-depth guide on adding facial authentication to your React application. If you like this guide and want to know more about faceIO, please visit the official documentation page. You can also checkout their FAQ page if you have any questions. If you like my writing, you can read more on my website and I am on Twitter as @hrishikshpathak.

