React Navigation 5: Stack, Tab, and Drawer All in One
Setting up your React Native app’s navigation for seamless screen transitions

React Navigation provides seamless routing and navigation on both iOS and Android for your React Native apps. Having recently taken a course on React Native, I learned that there were a lot of useful features you can add to your app through navigation, much of which I’ll explain here.
What we’ll be doing
- Exploring the stack, tab, and drawer navigators separately
- Combining them to transition through our React Native app’s screens
Note: For this article, I’ll be using React Navigation’s latest stable version, which is v5.
What’s React Navigation?
In the same way going back and forth is handled in a web browser — where routes are pushed and popped — React Navigation pushes and pops your app’s routes. The special thing about it is that it includes the smooth animations we see and love on our phones today when switching between screens.
Install
If you haven’t already done so, let’s install the react-navigation package. You’ll need to run the expo install command as well to install its dependencies if you’re using Expo!
npm install @react-navigation/nativeexpo install react-native-gesture-handler react-native-reanimated react-native-screens react-native-safe-area-context @react-native-community/masked-viewOR if you using yarn:yarn add @react-navigation/native
Setup
In the first instance, we’re going to use a stack navigator. I mentioned earlier React Navigation pushes and pops routes, and it does so to and from a stack.
The stack navigator is a stack containing your app’s routes, where by default your first screen is your root screen. As you transition through your app’s screens, the new screen is placed on top of the stack.
To start using React Navigation, we’ll need to install the react-navigation-stack package separately:
npm install --save react-navigation-stackWe’re now ready to modify our App.js/App.tsx file to make use of the stack.
App.js/tsx
A few notes on the above:
- First, we’re importing all of our screens as you normally would in any React/React Native application
- We’re then initiating our stack using
createStackNavigatorand creating a stack screen for each of our app’s screens using their components - Finally, we’re wrapping our stack screens with
NavigationContainer, which is responsible for managing our app’s state
Usage
HomeScreen.tsx
- Each screen held within the stack will carry navigation as props, thus each will have access to Navigation’s
navigate()function - The
navigate()function’s first parameter refers to the name of the screen (as set inApp.tsx). The second parameter is optional and holds any details we need to pass between screens. In this case, we’re passing a user ID and name.
DetailsScreen.tsx
- In
DetailsScreen, we’re accessing the same route params we passed in fromHomeScreen.tsx.
ContactScreen.tsx
Working Demo
We should now have a React Native app with basic navigation, looking like so:

Extras
So far, we’ve got some basic navigation working for our React Native app through button clicks. There are a few other things we could add, however, so the next section will focus on:
- Header styles
- Navigating through tabs
- Navigating through a side drawer
Let’s get to it!
Header styles
To add some styling to our app’s header, we have two options:
- Add some default styling to the
Stack.Navigator. Any styles added here will apply to all of the stack’s screens. - Add some styling to each screen — useful if you don’t want all of them looking the same.
In the above code, we’ve gone for both options. The styles specified in the HomeScreen will override those specified in the Stack.Navigator. So you should end up with one background color for HomeScreen and another for all other screens.
Tab navigation
Tabs can be found in most, if not all, apps today, and so ours should have some too! As with the stack, we’ll need to install this package separately:
npm install @react-navigation/bottom-tabsORyarn add @react-navigation/bottom-tabs
We then need to modify our App.tsx, as so:
Tab.Navigator’sscreenOptionsprops allow for many configurations, one of them beingtabBarIcon. In the above, we’re assigning an icon depending on the active route.
Drawer navigation
npm install @react-navigation/drawerORyarn add @react-navigation/drawer
- The drawer implementation is pretty straightforward, and as with tabs, you simply replace the content of
NavigationContainerwithDrawer.Navigator.
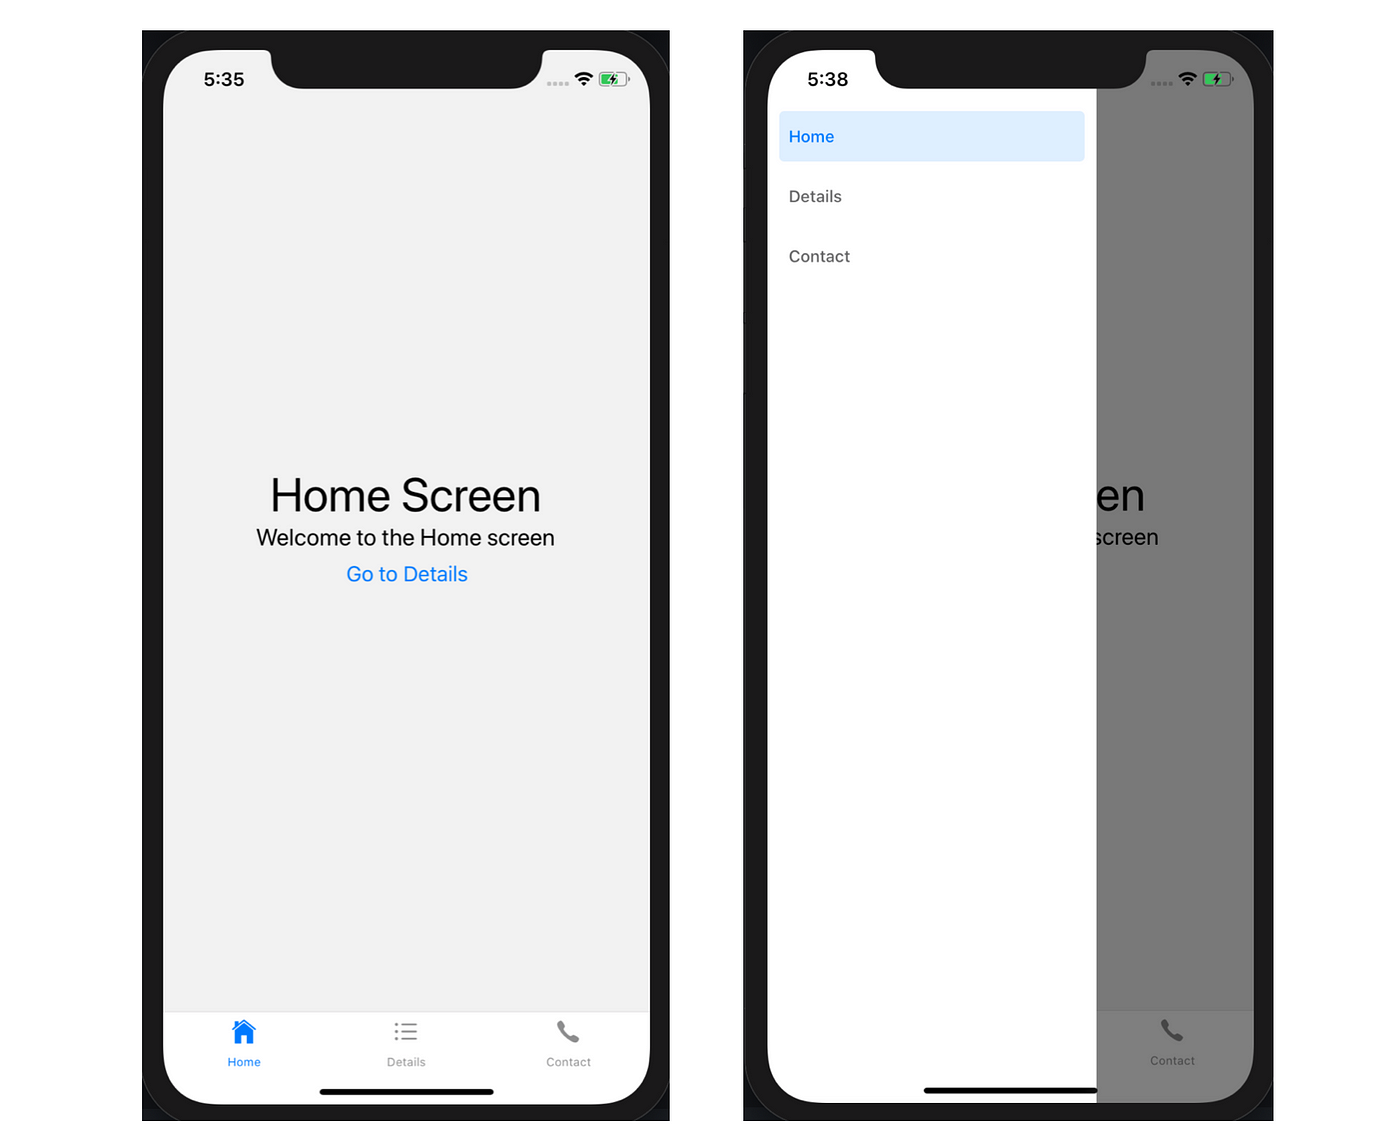
If you now tap and slide from the left, a drawer navigation should appear with the items Home, Details, and Contact.
Putting It All Together
If you’ve made it this far, amazing! So far we’ve looked at how to implement navigation via the three main navigators provided by React Navigation — stack, tab, and drawer. But most apps nowadays use all of these in conjunction, so how can we do that?
If you try adding multiple navigators to the NavigatorContainer, it’ll produce an error saying there’s already an existing navigator.

Our first thought would probably be moving our tab navigator into HomeScreen. This, however, would mean a couple of things:
- Our
HomeScreencontent would be lost, as it would be replaced by the tab-navigator functionality - We could have an endless loop, as
HomeScreenwould be navigating to itself - We’d have to add tab navigators to all screens to make sure they’re not lost when navigating via the tabs
A better option is to create a separate MainScreen component that’ll hold our tab navigator code for Home, Details, and Contact.
Let’s do that now!
MainScreen.tsx
- We also make a slight change to
App.tsxto make sure theHomelabel in our drawer navigation points toMainScreen, which now handles our tabs.
App.tsx
Since our initialRouteName is set to Home, our MainScreen will pick this up and render Home by default.
What about the stack?
Finally, to add our Stack.Navigator into our application, I’ve created two sub contact components and added a Stack.Navigator to our parent ContactScreen:
To the user’s eye, this will simply navigate to ContactA or ContactB. The only difference is behind the scenes, it’ll belong to the stack created in ContactScreen — also a good example of how you can nest navigators.
Final Product
We now have a React Native application making use of stack, tab, and drawer navigators through the React Navigation package.
Summary
React Navigation provides an easy way to handle navigation throughout your React Native app. With the help of stacks, tabs, and drawers, transitioning through screens is a breeze.

