Meet Flows: Postman’s New Cool Feature
While Postman's Flows functionality is still in the development process, we have a chance to play with the Beta version. So, why not, let’s play and explore it
Wait, what the hell is Flows?
Flows is a functionality meant to make it possible to work codeless in Postman. The ones who have worked with chaining multiple requests, sharing values and parameters between requests, and retrieving data from the response, would agree with me that it is not an easy task to carry out and requires at least some basic knowledge of JavaScript. So Postman is going to make life easier for us by making it possible to do things codeless and get away from javascript struggle.
So let’s dive in and see how it works in practice.
To start with, you need to choose Flows from the menu on the right corner, then click on the plus button or the blue colored Create Flow button.

A new flow will be added and the flow designing window will get opened. By default, the new flow contains a start button and a menu block that contains all the available block types.

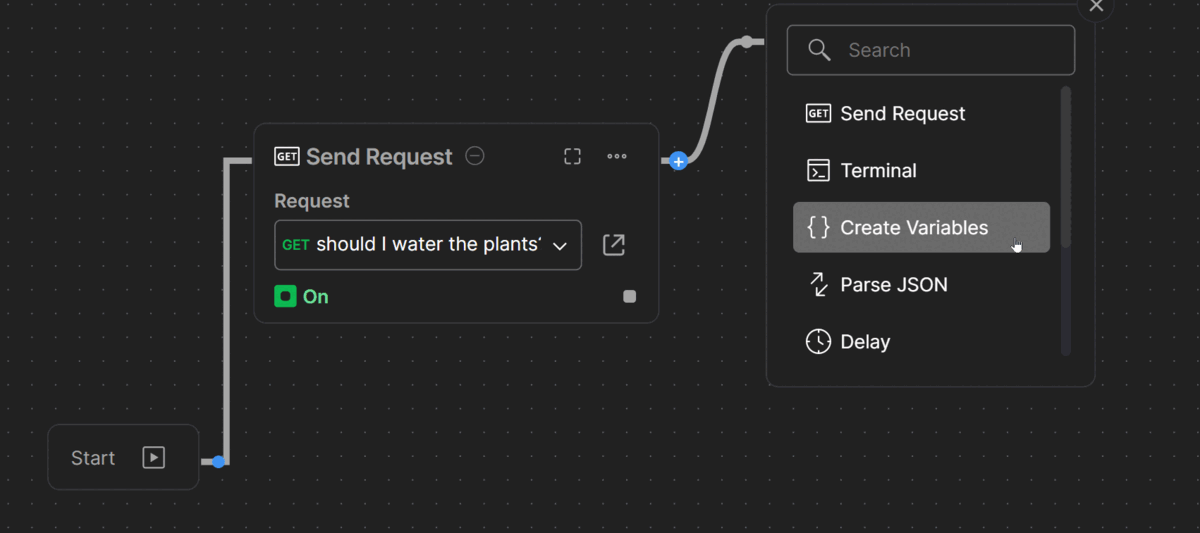
Block menu contains the following blocks so far. I can imagine that more blocks will be added later.
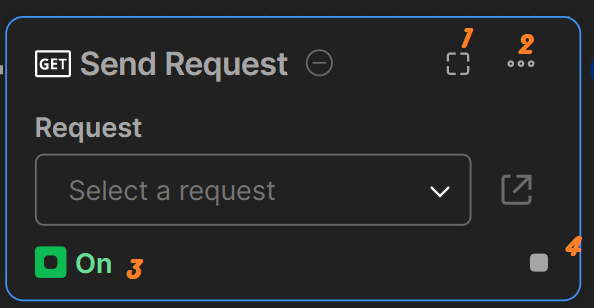
- Send Request: This block adds a pre-defined request, that is you should have the request somewhere in a collection, so you can add it to the block
- Terminal: It will just show you request logs.
- Create Variables: You can create variables and use those variables in order to share data between requests.
- Parse JSON: You can quickly parse JSON output without writing a single line of code.
- Delay: This one can be used to add delays between requests. The duration of delays should be defined in milliseconds.
- Validate: Validate the output of requests with the help of this block, which can have either true or false output.
- For Each: Instead of trying to find out how the “for each” statement works in JavaScript you can just use this block and easily loop through your data.
- Combine: Combine block is used to merge 2 data outputs into a single one.
- Annotation: This block can be used to add annotations to different places in the flow to describe how it functions. Look at it something like adding comments into code.
All the blocks have 4 common buttons as shown below in the picture 👇
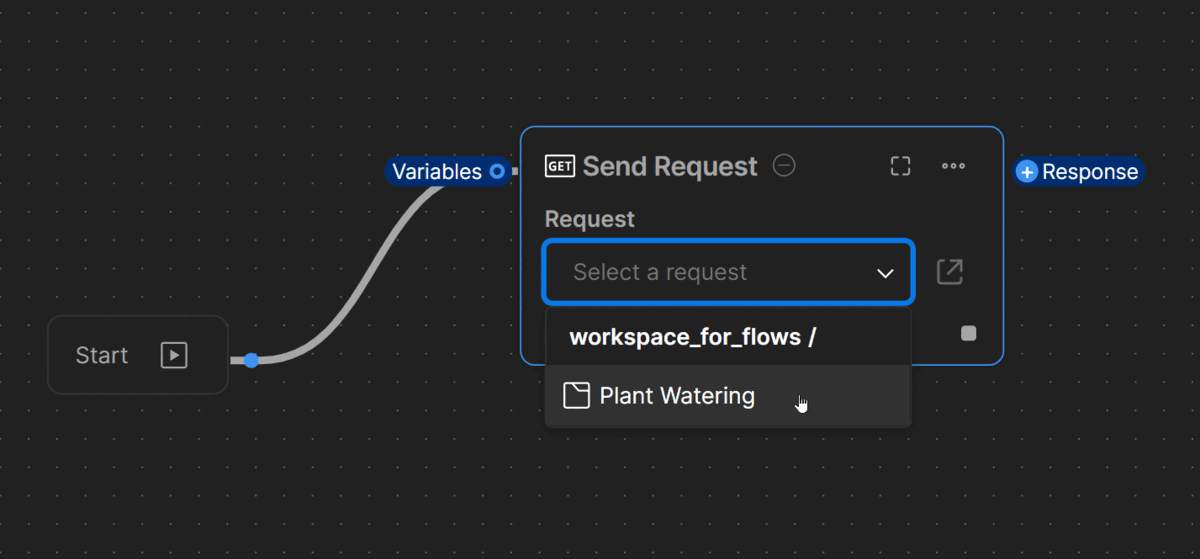
Now it is time to design a simple flow using some of the available blocks. For that, we will be using a request example from the “30 days of Postman” course. So we fork the Plant Watering collection 🌵, which has a single GET request and which is asking for and getting a hydration level variable as a response. The forked collection should be in the same workspace where we want to design our flow.

Our flow is going to have the following steps:
- We send the GET request and get the hydration level in response
- We parse the JSON response
- We create a variable to save the hydration level
- We validate the hydration level and if it is higher than 0.6 then in the terminal we should get a message telling us, that it is time to water it. If the hydration level is lower than 0.6 then we should get another message in the terminal, this time telling us, that we don’t need to worry about watering the plant.
To start with, we add the GET request block.
Blocks can be chained in 2 ways. If the next block needs to get data from the previous one in order to be triggered then we use the +Response button on the upper right corner of the block, otherwise, we use the small square button on the lower right corner of the block.
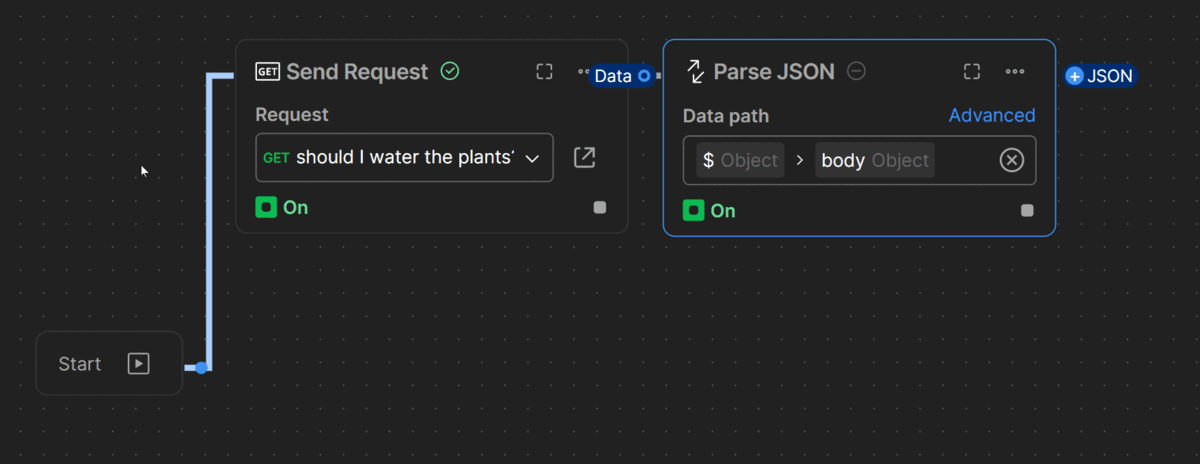
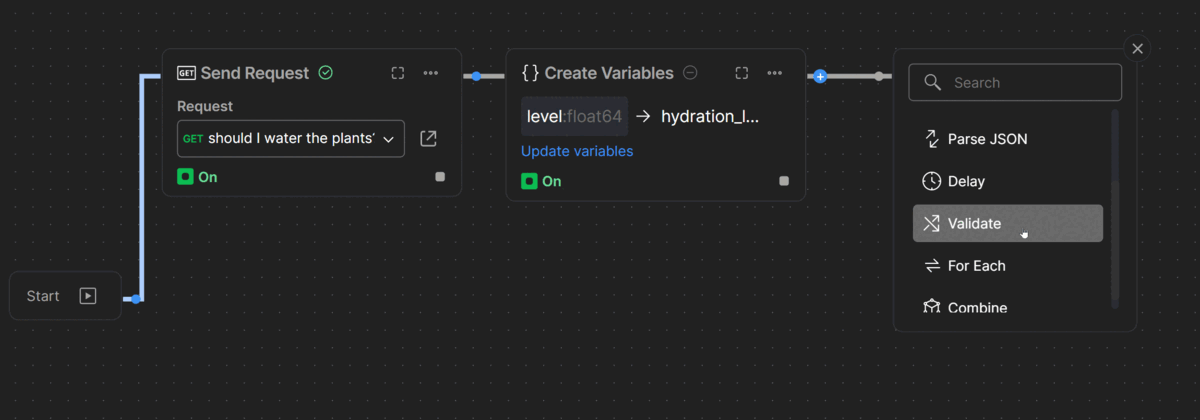
Before adding the variable block, click the start button and run the first request so the output data can be generated. Normally the next step would be adding the Parse JSON block after the request in order to parse the JSON response, but as Flows is still in Beta version and that block is not working yet, we’ll just move on without parsing the response.
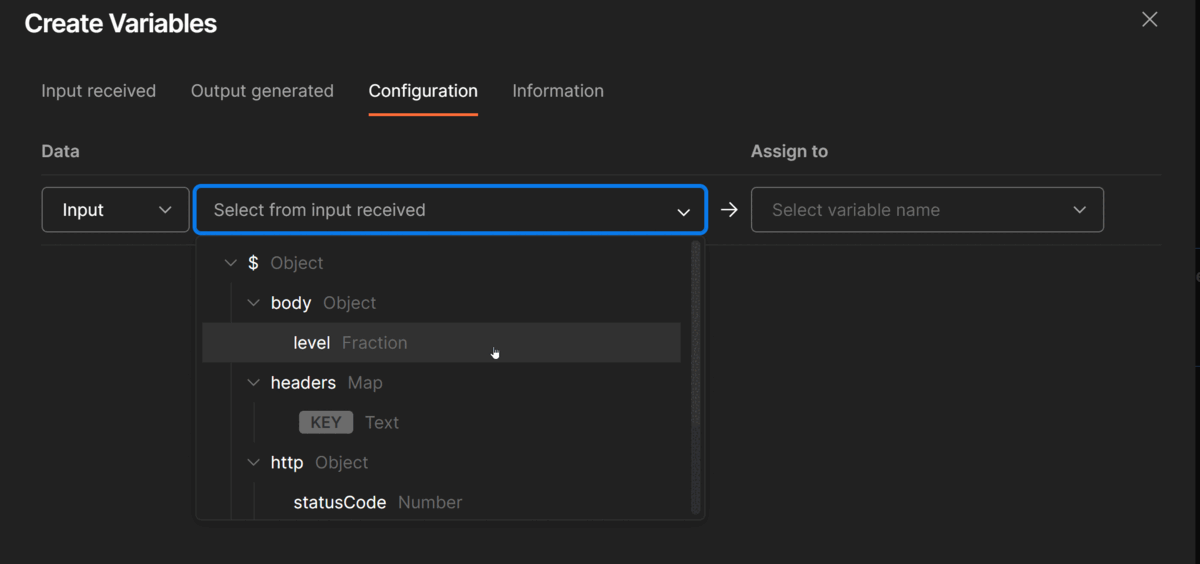
When clicking on Create Variable button inside Create Variables block, a new window opens, where you can specify the input value and the name of the variable. In our case, the input value of the variable is going to be the level parameter from the response body of our GET request and we’ll name it hydration_level.
We need to validate the hydration_level variable upon which we’ll decide whether or not to water the plant. So the next step is to add the Validate block.
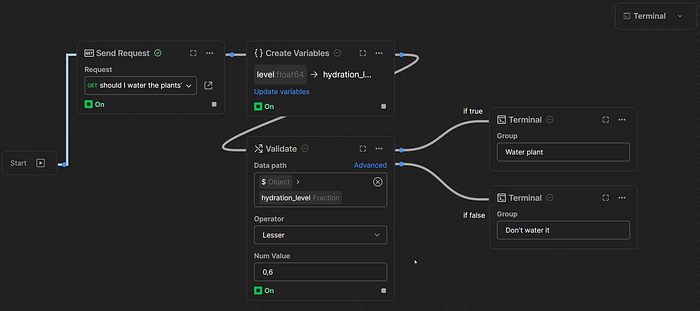
Inside the Validate block, we need to specify what should be validated, the validation operator, and the value. We want to check whether hydration_level is less than 0.6, so the Data path will be hydration_level, operator Lesser and Num Value will be 0.6.
In the final step, we add 2 terminals, one for the true output and the other one for the false one. If the hydration_level value is less than 0.6 then the first terminal gets activated, otherwise, the second one gets activated telling us not to water the plant. As a final touch, we add 2 annotation blocks, one on the true output line that will indicate that it is the true output and the other one on the false one. To run the flow, we just need to click on the Start button.
Now it is your turn, go on and give it a try.

