WWDC20
SwiftUI + Vision Contour Request — Coin Detection in iOS
Apple boosts its computer vision ambitions with a bunch of new Vision requests

This article was originally posted on my Substack, iOSDevie.
Apple’s WWDC 2020 (digital-only) event kickstarted with a bang. There were a lot of new surprises from the world of SwiftUI, ARKit, PencilKit, Create ML, and Core ML. But the one that stood out for me was computer vision.
Apple’s Vision framework got bolstered with a bunch of exciting new APIs that perform some complex and critical computer vision algorithms in a fairly straightforward way.
Starting with iOS 14, the Vision framework now supports Hand and Body Pose Estimation, Optical Flow, Trajectory Detection, and Contour Detection.
While we’ll provide an in-depth look at each of these some other time, right now, let’s dive deeper into one particularly interesting addition—the contour detection Vision request.
Our Goal
- Understanding Vision’s contour detection request.
- Running it in an iOS 14 SwiftUI application to detect contours along coins.
- Simplifying the contours by leveraging Core Image filters for pre-processing the images before passing them on to the Vision request. We’ll look to mask the images in order to reduce texture noise.
Vision Contour Detection
Contour detection detects outlines of the edges in an image. Essentially, it joins all the continuous points that have the same color or intensity.
This computer vision task is useful for shape analysis, edge detection, and is helpful in scenarios where you need to find similar types of objects in an image.
Coin detection and segmentation is a fairly common use case in OpenCV, and now by using Vision’s new VNDetectContoursRequest, we can perform the same in our iOS applications easily (without the need for third-party libraries).
To process images or frames, the Vision framework requires a VNRequest, which is passed into an image request handler or a sequence request handler. What we get in return is a VNObservation class.
You can use the respective VNObservation subclass based on the type of request you’re running. In our case, we’ll use VNContoursObservation, which provides all the detected contours from the image.
We can inspect the following properties from the VNContoursObservation:
normalizedPath— It returns the path of detected contours in normalized coordinates. We’d have to convert it into the UIKit coordinates, as we’ll see shortly.contourCount— The number of detected contours returned by the Vision request.topLevelContours— An array ofVNContoursthat aren’t enclosed inside any contour.contour(at:)— Using this function, we can access a child contour by passing its index orIndexPath.confidence— The level of confidence in the overallVNContoursObservation.
Note: Using
topLevelContoursand accessing child contours is handy when you need to modify/remove them from the final observation.
Now that we’ve got an idea of Vision contour detection request, let’s explore how it might work it in an iOS 14 application.
Getting Started
To start off, you’ll need Xcode 12 beta as the bare minimum. That’s about it, as you can directly run Vision image requests in your SwiftUI Previews.
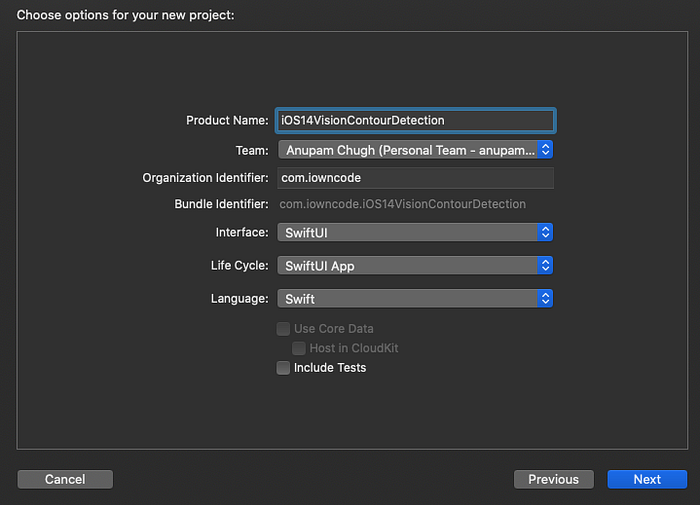
Create a new SwiftUI application in the Xcode wizard and notice the new SwiftUI App lifecycle:
You’ll be greeted with the following code once you complete the project setup:
@main
struct iOS14VisionContourDetection: App {
    var body: some Scene {
        WindowGroup {
            ContentView()
        }
    }
}
Note: Starting in iOS 14,
SceneDelegatehas been deprecated in favor of the SwiftUIAppprotocol, specifically for SwiftUI-based applications. The@mainannotation on the top of thestructindicates it’s the starting point of the application.
Detect Coins Using Vision Contour Request
In order to perform our Vision request, let’s quickly set up a SwiftUI view, as shown below:
In the above code, we’ve used the if let syntax that’s released with SwiftUI for iOS 14. Ignore the preprocessImage state; for now, let’s directly jump onto the detectVisionContours function that’ll update the outputImage state upon the completion of Vision request:
In the above code, we’ve set the contrastAdjustment (to enhance the image) and detectDarkOnLight (for better contour detection as our image has light background) properties on the VNDetectContoursRequest.
Upon running the VNImageRequestHandler with the input image (present in the Assets folder ), we get back the VNContoursObservation.
Eventually, we’ll draw the normalizedPoints as an overlay on our input image.
Draw Contours on an Image
The code for the drawContours function is given below:
The UIImage returned by the above function is set to the contouredImage SwiftUI state, and subsequently our view gets updated:
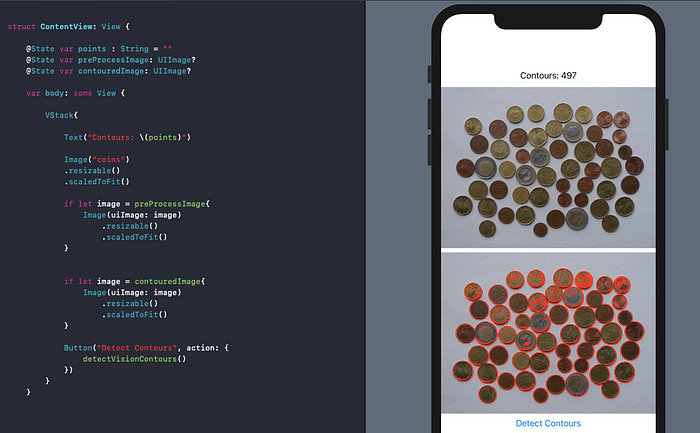
The results are pretty decent considering we ran this on a simulator, but they would certainly be better if we ran this on a device with iOS 14, with access to the Neural Engine.
But still, there are far too many contours (mostly due to coin textures) for our liking. We can simplify (or rather reduce) them by pre-processing the image.
Use Core Image for Pre-Processing Vision Image Requests
Core Image is Apple’s image processing and analysis framework. Though it works fine for simple face and barcode detection tasks, it isn’t scalable for complex computer vision use cases.
The framework actually boasts of over 200 image filters and is handy in photography apps as well as for data augmentation in your machine learning model training.
But more importantly, Core Image is a handy tool for pre-processing images that are then fed to the Vision framework for analysis.
Now, if you’ve watched the WWDC 2020 Computer Vision APIs video, you’ve seen that Apple has leveraged Core Image’s monochrome filter for pre-processing, while demonstrating their punchcard contour detection example.
In our case, for coin masking, the monochrome effect would not give as good results. Specifically for coins that have a similar color intensity that’s different from the background, using the black and white color filter for masking coins is a better bet.
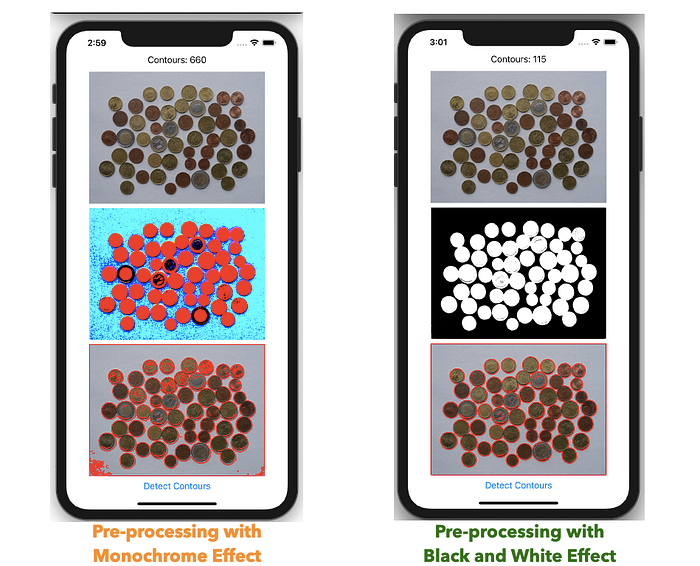
For each of the above pre-processing types, we’ve also set a Gaussian filter to smoothen the image. Take note of how the monochrome pre-processing filter actually gives us significantly more contours.
Hence, it’s important to pay heed to the kinds of images you’re dealing with when doing pre-processing.
The outputImage obtained after the pre-processing is fed to the Vision image request. The block of code for creating and applying Core Image filters is available in this GitHub Repository, along with the full source code.
Analyzing Contours
By using the VNGeometryUtils class, we can observe properties like diameter, bounding circle, area perimeter, and aspect ratio of the contour. Simply pass the contour, as shown below:
VNGeometryUtils.boundingCircle(for: VNContour)This can open up new computer vision possibilities in determining the different kinds of shapes available in an image.
Additionally, by invoking the polygonApproximation(withEpsilon:) method on a VNContour, we can further simplify our contours by filtering out little noisy parts around an edge.
Conclusion
Computer vision plays a huge role in Apple’s mixed reality future. The introduction of hand and body Pose APIs, which were a part of the ARKit framework, will open up new kinds of opportunities for building intelligent computer vision applications.
There’s a lot of exciting stuff that came out of WWDC 2020. I’m excited about the new kinds of possibilities for machine learning on mobile. Stay tuned for more updates, and thanks for reading.

