Micro Frontends Using Single-SPA and Module Federation
Let’s build an app with micro frontends together

In this article, I will walk you through how to implement a micro frontends app with single-spa and module federation in Webpack.
Example Repository
Here is the final codebase on GitHub:
Micro Frontends
Micro frontends have been around since 2016 in front-end developments. In a nutshell, the idea of micro frontends is to break down the monolith app into smaller pieces to make it easier to maintain.
Micro frontend allows you to:
- Deploy independently
- Use multiple UI frameworks (React, Vue.js, and Angular) in one place
- Decouple a piece of UI components from a large codebase
There are also drawbacks such as the complexity of the initial setup and performance issues caused by duplicated code, but single-spa and module federation can resolve them
single-spa
single-spa is a framework that enables you to quickly set up a micro front-ends app.
By abstracting lifecycles for the entire application, single-spa allows you to use multiple UI frameworks on the same page.
It also gives the ability to:
- Deploy independently
- Perform lazy loading
- Introduce new frameworks without any modification for an existing app
With single-spa, you have two options for choosing the ecosystem for sharing dependencies:
- Import maps
- Module federation in Webpack
The idea of import maps is to map the URL of the JavaScript import statement to libraries. For example, if you import moment to your code,
import moment from "moment";You will have to supply the browser with the following maps:
<script type="importmap">
{
  "imports": {
    "moment": "/node_modules/moment/src/moment.js"
  }
}
</script>
This can control what URLs get fetched by the import.
With this new feature and webpack externals, which can exclude some libraries, it will generate the bundled without duplicated modules in an app.
But we won’t be using this in our app. Instead, we’ll take advantage of new technology in Webpack 5.
Module Federation in Webpack
Module federation was introduced in Webpack 5. The main purpose of it is to share code and libraries between applications.
With module federation, any JavaScript code — such as business logic or libraries, and state management code — can be shared between applications. It can make multiple micro frontend apps work together as if you develop a monolith app.
You may be wondering what the difference between micro frontend and module federation is. They actually cover a lot of the same ground. But there is a difference.
The only purpose of micro front-ends is to share UI between applications, not JavaScript logic. So, the bundled code can include duplicated code.
The purpose of module federation is to share JavaScript code between applications, not UI. So, the shared code can be used in an app.
They are actually complementary. So, with module federation in a micro-frontend app, you can avoid duplicated code and provide shared UI components across the entire app.
Overview of the app
By now, we’ve covered the basic idea of micro frontends and module federation.
Next, we’ll walk through implementing a simple demo app to understand how they work together.

Let’s take a look at an overview of what makes up the app:
- A home app that handles all of the micro-frontend apps.
- A navigation app that shows header and footer UI made by React.
- A body app that shows the body element of the page made by Vue.js.
Set Up Root package.json
Before implementing the micro-frontends app, we create a package.json at the root. The three apps are included in one repo as monorepo, so we’ll use yarn workspaces to share some packages across the entire app.
Create a package.json at root, like so:
{
  "name": "micro-frontend",
  "version": "1.0.0",
  "private": true,
  "workspaces": [
    "packages/*"
  ],
  "scripts": {
    "start": "concurrently \"wsrun --parallel start\""
  },
  "devDependencies": {
    "concurrently": "^5.3.0",
    "wsrun": "^5.2.4",
    "@types/node": "^14.14.17",
    "@typescript-eslint/eslint-plugin": "^4.11.1",
    "@typescript-eslint/parser": "^4.11.1",
    "babel-eslint": "^10.1.0",
    "eslint": "7.16.0",
    "eslint-config-prettier": "^7.1.0",
    "eslint-config-react-app": "^6.0.0",
    "eslint-formatter-friendly": "^7.0.0",
    "eslint-plugin-babel": "^5.3.1",
    "eslint-plugin-flowtype": "5.2.0",
    "eslint-plugin-import": "2.22.1",
    "eslint-plugin-jsx-a11y": "6.4.1",
    "eslint-plugin-prettier": "^3.3.0",
    "eslint-plugin-react": "7.22.0",
    "eslint-plugin-react-hooks": "4.2.0",
    "prettier": "^2.2.1",
    "typescript": "4.1.3",
    "single-spa": "^5.8.3",
    "webpack": "^5.72.0",
    "webpack-cli": "^4.9.2",
    "webpack-dev-server": "^4.8.1",
    "html-webpack-plugin": "^5.5.0"
  }
}
Then, install the dependencies.
yarnA Home App
Next, we create a home app that coordinates each micro-frontend app. A home handles the task that renders the HTML page and the JavaScript that registers the applications.
Let’s take a look at the home structure:
├── packages
│   └── home
│       ├── package.json
│       ├── public
│       │   └── index.html
│       ├── src
│       │   └── index.ts
│       ├── tsconfig.json
│       └── webpack.config.js
Then, we create these files step-by-step.
First, create a package.json:
{
  "name": "home",
  "scripts": {
    "start": "webpack serve --port 3000",
    "build": "webpack --mode=production"
  },
  "version": "1.0.0",
  "private": true,
  "devDependencies": {
    "@babel/core": "^7.8.6",
    "@babel/preset-typescript": "^7.12.7",
    "babel-loader": "^8.2.2"
  }
}
And create a webpack.config.js:
const HtmlWebpackPlugin = require('html-webpack-plugin')
const ModuleFederationPlugin = require('webpack/lib/container/ModuleFederationPlugin')
const path = require('path')
const outputPath = path.resolve(__dirname, 'dist')

module.exports = {
  entry: './src/index',
  cache: false,

  mode: 'development',
  devtool: 'source-map',

  optimization: {
    minimize: false,
  },

  output: {
    publicPath: 'http://localhost:3000/',
  },

  resolve: {
    extensions: ['.jsx', '.js', '.json', '.ts', '.tsx'],
  },

  devServer: {
    static: {
      directory: outputPath,
    },
  },

  module: {
    rules: [
      {
        test: /\.tsx?$/,
        loader: require.resolve('babel-loader'),
        options: {
          presets: [require.resolve('@babel/preset-typescript')],
        },
      },
    ],
  },

  plugins: [
    new ModuleFederationPlugin({
      name: 'home',
      library: { type: 'var', name: 'home' },
      filename: 'remoteEntry.js',
      remotes: {},
      exposes: {},
      shared: [],
    }),
    new HtmlWebpackPlugin({
      template: './public/index.html',
    }),
  ],
}
This is a basic configuration for TypeScipt, but you can find the module federation imported in the plugins section.
To understand how it works, we’ll cover the three essential concepts.
remotes
The remotes fields take the name of the federated micro-frontend app to consume the code. In this case, the home app will use a navigation app and a body app so we need to specify the name of them in the remotes field, like so:
remotes: {
  navigation: 'navigation',
  body: 'body',
},
We will get into a lot more detail when implementing a navigation and body app.
exposes
The exposes field is used to export files to other applications. The key should be the exported name that is consumed in other applications. For example, if you export the component, Button from your code, then write it like this:
exposes: {
  Button: './src/Button',
},
shared
Ths shared is a list of all of the dependencies shared in support of exported files. For instance, if you export the Vue.js component, you will have to list vue in the shared section, like so:
shared: ['vue'],This will prevent an app from including duplicate libraries and will share a single instance across apps, even though the webpack compiler is completely separate.
Next, we will create public/index.html:
<!DOCTYPE html>
<html lang="en">
<head>
    <link rel="stylesheet" href="https://cdn.rawgit.com/filipelinhares/ress/master/dist/ress.min.css" />
    <link
      rel="stylesheet"
      href="https://fonts.googleapis.com/css?family=Oswald:300,400,500,600,700|Roboto:400,700&display=swap"
    />
  <style>
    html, body {
      scroll-behavior: smooth;
      width: 100%;
      height: 100%;
    }

    body {
      font-family: 'Roboto';
    }

    table {
      border-collapse: collapse;
      border-spacing: 0;
    }

    ul {
      list-style-type: none;
    }

    main > * > * {
      height: 100%;
    }
  </style>
</head>
<body>
<div style="height: 100%; display: flex; flex-direction: column;">
</div>
</body>
</html>
And create a src/index.ts:
import { start } from 'single-spa'

start()
This file will be used to register the micro-frontends app consumed in the home app. For now, we just execute the start function to boost the app.
A Navigation App
Now that we’ve set up the home app, let’s implement the navigation app.
Here’s the structure of the navigation app:
├── packages
│   ├── home
│   │   ├── package.json
│   │   ├── public
│   │   │   └── index.html
│   │   ├── src
│   │   │   └── index.ts
│   │   ├── tsconfig.json
│   │   └── webpack.config.js
│   └── navigation
│       ├── package.json
│       ├── src
│       │   ├── Footer.tsx
│       │   ├── Header.tsx
│       │   └── index.ts
│       ├── tsconfig.json
│       ├── webpack.config.js
We will export the Footer and Header component to the home app.
To do that, we first create those files. Create a navigation/package.json:
{
  "name": "navigation",
  "scripts": {
    "start": "webpack serve --port 3001",
    "build": "webpack --mode=production"
  },
  "version": "1.0.0",
  "private": true,
  "devDependencies": {
    "@types/react": "^17.0.0",
    "@types/react-dom": "^17.0.0",
    "@babel/core": "^7.8.6",
    "@babel/preset-react": "^7.12.10",
    "@babel/preset-typescript": "^7.12.7",
    "babel-loader": "^8.2.2",
    "single-spa-react": "^3.2.0"
  },
  "dependencies": {
    "react": "^17.0.1",
    "react-dom": "^17.0.1"
  }
}
A navigation app will be made by React, so install the dependencies and create a navigation/webpack.config.js:
const ModuleFederationPlugin = require('webpack/lib/container/ModuleFederationPlugin')
const path = require('path')
const outputPath = path.resolve(__dirname, 'dist')

module.exports = {
  entry: './src/index',
  cache: false,

  mode: 'development',
  devtool: 'source-map',

  optimization: {
    minimize: false,
  },

  output: {
    publicPath: 'http://localhost:3001/',
  },

  resolve: {
    extensions: ['.jsx', '.js', '.json', '.ts', '.tsx'],
  },

  devServer: {
    static: {
      directory: outputPath,
    },
  },

  module: {
    rules: [
      {
        test: /\.tsx?$/,
        loader: require.resolve('babel-loader'),
        options: {
          presets: [
            require.resolve('@babel/preset-react'),
            require.resolve('@babel/preset-typescript'),
          ],
        },
      },
    ],
  },

  plugins: [
    new ModuleFederationPlugin({
      name: 'navigation',
      library: { type: 'var', name: 'navigation' },
      filename: 'remoteEntry.js',
      remotes: {},
      exposes: {
        './Header': './src/Header',
        './Footer': './src/Footer',
      },
      shared: ['react', 'react-dom', 'single-spa-react'],
    }),
  ],
}
Check out the publicPath and ModuleFederationPlugin.
publicPath is the base name of the remote URL which will be used in the home app. In this case, the navigation app will be served at http://localshot:3001.
The exposes field takes two components, Header and Footer. This will export them to the home app.
As stated before, we will have to list the shared libraries in shared section. In this case, we need to write react, react-dom, and single-spa-react.
Next, create a src/Header.tsx and src/Footer.tsx:
import React from 'react'
import ReactDOM from 'react-dom'
import singleSpaReact from 'single-spa-react'

const Header: React.VFC = () => {
  return (
    <header
      style={{
        width: '100%',
        background: '#20232a',
        color: '#61dafb',
        padding: '2rem',
        fontWeight: 'bold',
      }}
    >
      Header from React
    </header>
  )
}

const lifecycles = singleSpaReact({
  React,
  ReactDOM,
  rootComponent: Header,
})

export const bootstrap = lifecycles.bootstrap
export const mount = lifecycles.mount
export const unmount = lifecycles.unmount
import React from 'react'
import ReactDOM from 'react-dom'
import singleSpaReact from 'single-spa-react'
const Footer: React.VFC = () => {
return (
<footer
style={{
width: '100%',
background: '#20232a',
color: '#61dafb',
padding: '2rem',
minHeight: '100px',
fontWeight: 'bold',
}}
>
Footer from React
</footer>
)
}
const lifecycles = singleSpaReact({
React,
ReactDOM,
rootComponent: Footer,
})
export const bootstrap = lifecycles.bootstrap
export const mount = lifecycles.mount
export const unmount = lifecycles.unmountRegister for the Navigation App
Now we’re ready to start exporting the navigation app.
Next, we register it in the home app. To register the micro-frontends app, the following steps are required:
- Include script tag
- List in remotes
- Add a registration
- Include a container
div
Let’s go through these steps.
Include script tag
First, to consume the code from the navigation app, we have to include it in the HTML file.
Go to home/public/index.html and include the script tag.
<!DOCTYPE html>
<html lang="en">
<head>
+     <script src="http://localhost:3001/remoteEntry.js"></script>
</head>
As stated before, the publicPath of a navigation app is http://localhost:3001 and the file name is remoteEntry.js.
List in remotes
Next, go to home/webpack.config.js and specify the remotes section:
remotes: {
+   'home-nav': 'navigation',
},
navigation is the name of the configuration in navigation/webpack.config.js:
plugins: [
  new ModuleFederationPlugin({
+   name: 'navigation',
    library: { type: 'var', name: 'navigation' },
    filename: 'remoteEntry.js',
    remotes: {},
    exposes: {
      './Header: './src/Header',
      './Footer': './src/Footer',
    },
    shared: ['react', 'react-dom', 'single-spa-react'],
  }),
],
The home-nav is the name used in the home app.
You can change the name of the import by changing the key to whatever you want.
Add a registration
Next, we register the navigation app in home/src/index.ts:
import { registerApplication, start } from 'single-spa'

registerApplication(
  'header',
  // @ts-ignore
  () => import('home-nav/Header'),
  (location) => location.pathname.startsWith('/'),
)

registerApplication(
  'footer',
  // @ts-ignore
  () => import('home-nav/Footer'),
  (location) => location.pathname.startsWith('/'),
)

start()
The registerApplication takes three things:
- An application name
- A function to load the application’s code
- A function that determines when the application is active or inactive
The import function specifies the name of the remotes key as stated above.
() => import('home-nav/Header'),Include a container div
Lastly, we write a div container that is used to include a Header and Footer component.
Go to home/public/index.html and add them:
<body>
<div style="height: 100%; display: flex; flex-direction: column;">
  <div id="single-spa-application:header"></div>
  <main>
    body
  </main>
  <div id="single-spa-application:footer"></div>
</div>
</body>
By default, with no option, single-spa will go find single-spa-application:{app name} and render the HTML below.
In this case, we’ve already registered the Header and Footer as header and footer so it will find the id of single-spa-application:header and single-spa-application:footer.
Let’s try this out.
Before that, make sure to install the dependencies:
yarnAnd start the server at the root:
yarn startSo, navigate to http://localhost:3000 and you will find that two React components rendered successfully.
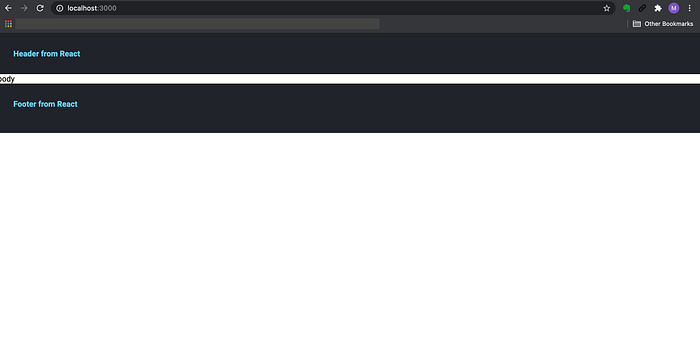
It seems to work well.
A Body App
Next, we will create a body app. A body app will be made by Vue.js but the process of implementation is almost the same as the one in the navigation app.
Let’s do it quickly.
The structure of the body app is:
├── packages
│   ├── body
│   │   ├── package.json
│   │   ├── src
│   │   │   ├── App.vue
│   │   │   ├── app.js
│   │   │   └── index.js
│   │   ├── tsconfig.json
│   │   └── webpack.config.js
Create a body/package.json:
{
  "name": "body",
  "scripts": {
    "start": "webpack serve --port 3002",
    "build": "webpack --mode=production"
  },
  "version": "1.0.0",
  "private": true,
  "devDependencies": {
    "vue-loader": "16.0.0-beta.7",
    "@babel/core": "^7.8.6",
    "@babel/preset-env": "^7.10.3",
    "@vue/compiler-sfc": "^3.0.0-rc.10",
    "babel-loader": "^8.2.2",
    "css-loader": "^3.5.3",
    "postcss-loader": "^4.1.0",
    "style-loader": "2.0.0",
    "node-sass": "^5.0.0",
    "vue-style-loader": "^4.1.2",
    "sass-loader": "^10.1.0"
  },
  "dependencies": {
    "autoprefixer": "^10.1.0",
    "postcss": "^8.2.1",
    "vue": "^3.0.0",
    "single-spa-vue": "^2.1.0"
  }
}
And create a body/webpack.config.js:
const ModuleFederationPlugin = require('webpack/lib/container/ModuleFederationPlugin')
const path = require('path')
const outputPath = path.resolve(__dirname, 'dist')
const { VueLoaderPlugin } = require('vue-loader')

module.exports = {
  entry: './src/index',
  cache: false,

  mode: 'development',
  devtool: 'source-map',

  optimization: {
    minimize: false,
  },

  output: {
    publicPath: 'http://localhost:3002/',
  },

  resolve: {
    extensions: ['.jsx', '.js', '.json', '.ts', '.tsx', '.vue'],
  },

  devServer: {
    static: {
      directory: outputPath,
    },
  },

  module: {
    rules: [
      {
        test: /\.s[ac]ss$/i,
        use: [
          'vue-style-loader',
          'style-loader',
          'css-loader',
          'postcss-loader',
          'sass-loader',
        ],
      },
      {
        test: /\.vue$/,
        loader: 'vue-loader',
      },
      {
        test: /\.js$/,
        loader: 'babel-loader',
      },
      {
        test: /\.tsx?$/,
        loader: 'ts-loader',
        options: {
          appendTsSuffixTo: [/\.vue$/],
        },
        exclude: /node_modules/,
      },
    ],
  },

  plugins: [
    new VueLoaderPlugin(),
    new ModuleFederationPlugin({
      name: 'body',
      library: { type: 'var', name: 'body' },
      filename: 'remoteEntry.js',
      remotes: {},
      exposes: {
        Body: './src/app',
      },
      shared: ['vue', 'single-spa', 'single-spa-vue'],
    }),
  ],
}
Create a body/src/App.vue and body/src/app.js:
<template>
  <div class="body">
    <div class="inner">
      Body from Vue.js
    </div>
  </div>
</template>

<style scoped lang="scss">
  .body {
    height: 100%;
    display: flex;
    justify-content: center;
    align-items: center;
  }

  .inner {
    width: 300px;
    height: 300px;
    display: flex;
    justify-content: center;
    align-items: center;
    background: #42b983;
    color: #ffffff;
  }
</style>
import singleSpaVue from 'single-spa-vue'
import { h, createApp } from 'vue'
import App from './App.vue'
const lifecycles = singleSpaVue({
createApp,
appOptions: {
render() {
return h(App, {
props: {
// single-spa props are available on the "this" object. Forward them to your component as needed.
// https://single-spa.js.org/docs/building-applications#lifecyle-props
name: this.name,
mountParcel: this.mountParcel,
singleSpa: this.singleSpa,
},
})
},
},
})
export const bootstrap = lifecycles.bootstrap
export const mount = lifecycles.mount
export const unmount = lifecycles.unmountRegister for the Body App
Next, we will register the body in the home app as we did before for the navigation.
Go to home/public/index.html and add a script tag:
<head>
    <script src="http://localhost:3001/remoteEntry.js"></script>
+   <script src="http://localhost:3002/remoteEntry.js"></script>
</head>
Then go to home/webpack.config.js and add home-body:
remotes: {
  'home-nav': 'navigation',
+ 'home-body': 'body',
},
Then, go to home/src/index.ts to register it:
import { registerApplication, start } from 'single-spa'

registerApplication(
  'header',
  // @ts-ignore
  () => import('home-nav/Header'),
  (location) => location.pathname.startsWith('/'),
)

registerApplication(
  'footer',
  // @ts-ignore
  () => import('home-nav/Footer'),
  (location) => location.pathname.startsWith('/'),
)

registerApplication(
  'body',
  // @ts-ignore
  () => import('home-body/Body'),
  (location) => location.pathname.startsWith('/'),
)

start()
Lastly, add a div container for that in home/public/index.html:
<body>
<div style="height: 100%; display: flex; flex-direction: column;">
  <div id="single-spa-application:header"></div>
  <main style="display: flex; flex: 1;">
    <div id="single-spa-application:body" style="width: 100%"></div>
  </main>
  <div id="single-spa-application:footer"></div>
</div>
</body>
Let’s test this out.
Run install dependencies:
yarnAnd start the server at the root:
yarn startNavigate to http://localhost:3000:
Great — you can see that the Vue component was rendered successfully.
Conclusion
In this article, we’ve covered how to implement a micro-frontends app using Single SPA and Module Federation in Webpack.
Micro-frontends benefit team development especially larger team in terms of flexibility, extensibility, and maintainability because it provides you with independent deploying, the use of mixed frameworks, and separation of concerns.
Although there are downsides, such as the complexity of configuration and learning costs, I think that the advantages stated above outweigh the drawbacks.
I hope this article has got you interested in micro frontends!