How to Use SSH Certificates for Scalable, Secure, and More Transparent Server Access
Better SSH

SSH is the standard tool used by pretty much anyone accessing the server. Yet very few people know about SSH certificates. We are still stuck with copying and pasting our public key to the server, which isn’t the most efficient, scalable, or transparent method.
What’s the problem with the good old way of copying and pasting keys?
- Scalability: It’s not very manageable when there are multiple servers and multiple users.
- Security: There is no check on the server’s identity. When you connect to
myserver.com, there is no authenticity that you are in fact connecting to the server you intended. Also, once you have added the user’s public key to the server, there is no way to have a 2FA, which is very essential now. - Flexibility: There is no way to give time-based access. Sometimes you might have a requirement to give access for an hour or so. You can’t really do that.
- Transparency: The
sshauth logs can be found at/var/log/auth.log. Try figuring out who logged to the server and when. It’s doable, but it’s not an easy task. If it’s not easy to figure out, it’s not transparent.
Now how does an SSH certificate solve this? Let’s set up certificate-based authentication and find out.
Using simple key SSH, there are two players:
- Client (i.e., your pc/laptop)
- Server
The client logs into the server when the server recognises the client’s public key and the client can prove that it is, in fact, the owner of the public key.
For SSH certificates, we have one more player:
- A certificate authority (CA)

What’s the role of the certificate authority? The server no longer needs to recognise every client’s public key but only needs to recognise the certificate authority (or the CA’s public key).
Now if we don’t add the client’s public key to the server, how can the server decide who to give access to?
CA issues certificates to the client, and the client presents that certificate to the server. If the server recognises the certificate issuing the CA and the certificate is valid (i.e., has a valid signature, is not expired, and some other important things), then the server allows access.
One more important thing to note here is that using certificates won’t eliminate keys. Keys are still used in the same way for encryption. Certificates are added for some additional functionality, like access management, access expiration, etc.
Setup Steps
Steps to set up SSH certificate infrastructure:
- Set up a certificate authority.
- Configure the server to recognise the CA.
- Issue client certificates.
1. Set Up a Certificate Authority
A certificate authority is simply a public and private key pair. The private key is used to sign certificates and the public key, which is to be distributed through secure channels, will be used to verify the certificate’s signature.
Why distribute through secure channels when the public key is supposed to be shared publicly?
The problem here is not the confidentiality of the public key (it isn’t confidential). The problem we have is the integrity of the public key. If not distributed securely, it can be tampered with or replaced with another key. If a server has the wrong public key configured (whose private key is in the hands of someone else), the server is trusting that someone else.
For implementation, you can create a CA on your local machine.
Generate a key pair using:
ssh-keygen -t rsa -f ca_key
This will create two files in the directory: the public key ca_key.pub and the private keyca_key. And you have your own certificate authority. Secure this directory with the right permissions.
2. Configure Server to Recognise the CA
For configuring the server with the newly created CA, you simply need to add the CA’s public key as TrustedUserCAKeys in SSH config /etc/ssh/sshd_config.
Create a file /etc/ssh/ca.pub and paste the CA’s public key in this file now.
Now add TrustedUserCAKeys /etc/ssh/ca.pub at the end of /etc/ssh/sshd_config .
Make sure you restart the sshd service using sudo service sshd restart.
And you have configured the server to trust your CA.
3. Issue Client Certificates
This will be done at the CA server. I am assuming you are using your local system as the CA for now.
Head over to the CA’s folder where you have generated CA keys. You will sign the certificate using the CA’s private key. You also need to pass the client’s public key, which will be signed, and some other parameters.
Your default SSH public can be found at ~/.ssh/id_rsa.pub, assuming that exists.
-s: private key used to sign the certificate-I: identity (This will be shown in all logs, so make it something meaningful, like the name of the dev.)-n: principals (It denotes what users have access to on the server, and accepts multiple comma-separated values.)-V: validity (+1ddenotes valid from now to one day from now.)-z: serial number (When you issue multiple certificates to a single client, this can help in tracking. It will also be logged along with identity.)
This command will generate a certificate at Users/aakash/.ssh/id_rsa-cert.pub.
Now you can simply SSH at ubuntu@myserver.com and you’ll be given access, but only from now to a day from now. The certificate will expire after that, and you will no longer have access. You will need to get a new certificate after that.
Let’s pause for a bit and see what problems we have solved.
- Scalability: You can create a CA server (ensure the security of this server, and if possible, only allow access through a VPN or local network) with exposing a web application that will authenticate organisation users, ask for a 2FA, and then issue certificates accordingly. Maybe put in a Google OAuth with 2FA enabled if you use G Suite. This system becomes very scalable.
- Security: By issuing certificates only for a small period, you will minimise the risk of unauthorised access to servers in case laptops are lost or stolen.
- Flexibility: With all the options you can configure the certificate with, you achieve flexibility.
- Transparency: Now when you check logs, you will see messages like this:
Accepted publickey for ubuntu from 106.202.115.141 port 48343 ssh2: RSA-CERT ID AakashsLaptop (serial 1) CA RSA SHA256:dfewVbDnh2OuOdY9AEwJJHoUfhPuqp/M2NIBRWX4Nf4, which is clearly much easier to debug.
But there are still two issues in our current setup:
- Host verification: Our current setup still doesn’t have any provision for verifying the host’s identity.
- Multiple servers with same username: It is very likely that you have multiple servers with the same username (
ubuntu,root). If you issue a certificate with principalsubuntu, you will be giving access to all the servers that trust your CA forubuntuuser.
Host Verification
When you connect for the first time to a server, you will be shown a message like this:

This says that the server you’re connecting can’t be verified, though that it is in fact the server you intend to connect to. You are supposed to manually match this key fingerprint (SHA256 hash of the public key) with your server’s public key. Have you ever done that? Most of the time, the answer is no.
Once you say yes, it will save the public key in ~/.ssh/known_hosts and won’t ever ask you again. If you want to see this message, simply head to this file and delete the line with the server you are connecting to.
You’ve seen what the problem is with the current way, so now try the certificate way. Just as you issued a certificate to the client, you’ll issue a certificate to the host. There is one minor difference. The principals that contained the usernames a client is authorised for will, for the host certificate, contain hostnames.
You have to copy the server’s host public key to a file to the CA for signing and then transfer the signed certificate back to the server. You can find the server’s host keys in /etc/ssh/. An ls command will give something like this:
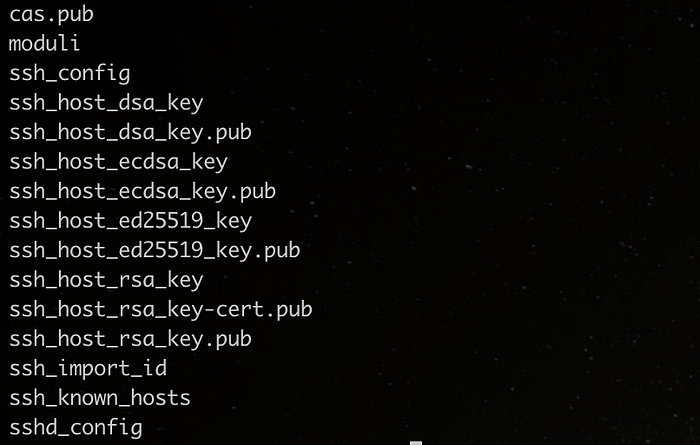
You will notice there are many host keys. That’s because the server has to support different types of algorithms. For the sake of this tutorial, just pick ssh_host_rsa_key.pub.
Copy it to a file on CA server and run the command:
-h : flag to indicate you are signing host key
-Z : to bind the certificate to a host (here I have used *.mydomain.com to denote all subdomains of mydomain.com)
This will create a ssh_host_rsa_key-cert.pub, which you will have to copy to server (in /etc/ssh/ directory). You’ll also need to add it as HostCertifcate in sshd_config, like this:

Changes in config only are reflected after you restart the sshd service.
Now that the server has a host certificate, we also need to configure the client to trust the CA’s public key. Add a line with the CA’s public key in ~/.ssh/known_hosts, as follows:
Now when you connect ssh ubuntu@dev.mydomain.com, the host will present the host certificate. You no longer will see the “host authenticity can’t be verified” message because host verification is handled automatically. If you still see this message, don’t blindly click on yes. Check why you are facing this issue.
Multiple Servers With the Same Username
When you issue a certificate with usernames, let’s say root , you will be giving access to all your servers that trust your certificate authority.
Instead of issuing the certificate username in principals, you need to create a strategy for principals and map those to usernames. You can do this by using AuthorizedPrincipalsFile. Just add this in the sshd_config of the server:
AuthorizedPrincipalsFile /etc/ssh/auth_principals/%u
When you ssh ubuntu@myserver.com, the certificate server will look to see if woobly-super is in the file etc/ssh/auth_principals/ubuntu (notice %u in config). If the file has woobly-super, then you will be logged in.

Let’s devise a principals strategy. A typical scenario is that some users are allowed to access some servers based on roles, and some are allowed to access all servers on a project.
Typically, some developers are allowed to access only dev servers, DBAs are allowed to access only database servers, QAs are allowed to access only testing servers, and a small group of people is allowed to access all the servers, including production servers.
One way to do things can be to create principals for each group and issue certificates with principles accordingly:
project-dev: project developersproject-dba: database administratorsproject-qa: project testersproject-super: people supposed to have access to all servers
Now for the different types of server, create principals file (/etc/ssh/auth_principals/ubuntu) and put principals like this : (\n is for the next line, as you have to put one principal per line)
- Dev servers:
project-dev\nproject-super - Database server:
project-dba\nproject-super - Testing servers:
project-qa\nproject-super - Production servers:
project-super
This can vary based on your requirements. Maybe developers also have access to a database server, or testing servers, or some other possibility — adjust accordingly.
Warning: Even when using AuthorizedPrincipalsFile, if a certificate is presented with a username (let’s sayubuntu ) in principals, it will still work. So make sure never to issue certificates with usernames.
You can also restrict what command will be executed through force-command in Critical Options. Let’s say someone is only allowed to deploy on a server. You can issue a certificate for that.
It might be overwhelming at first, but the benefits surpass any initial complexity involved. So that’s how SSH certificates deliver scalable, secure, flexible, and transparent infrastructure.

