How to Use Kotlin Symbol Processors on Android
We will dive into generating the boilerplate codes automatically by KSP and discuss challenges and solutions
Let me begin by reiterating a question:
What is an annotation?
Java annotations are used to provide metadata for your Java code. Java annotations do not directly affect the execution of your code, although some types of annotations can be used for that purpose.
— reference, more
It doesn’t matter what platform you use; as long as you use Kotlin, you can implement KSP in your project.
It is important to note that annotation processing is a compile-time operation and doesn’t involve runtime overhead.
Example
By working on an example, we will better understand the KSP.
Consider the following data class.
We want to generate a builder class based on the Builder pattern in this example.
Our generated class has a compile-time error! Because we’re not able to update data class properties. We must automatically generate an object with mutable properties to fix this issue.
We should change the builder class to the following code!
Implementation
We need three modules:
- Annotations module: To define annotations.
- Processor module: To generate codes.
- App module: Obviously, to use annotation.
Annotations module
We should create a Jave or Kotlin Library module, create the annotation class, define parameters and specify which types of objects can be annotated by @Target :
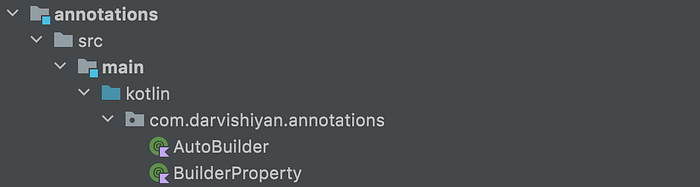
The AutoBuilder specifies data classes.
The BuilderProperty specifies which objects should have independent methods.
Finally, the flexible determines whether we want to generate mutable objects or not.
These annotations will change our data class to the following object:
Processor module
Our project needs the following classpath.
classpath ‘org.jetbrains.kotlin:kotlin-gradle-plugin:1.7.0’And the following plugin in the main gradle file:
id 'com.google.devtools.ksp' version '1.7.0-1.0.6' apply falseNow we should add the following dependency to the Processor module.
implementation project(path: ':annotations')
implementation "com.google.devtools.ksp:symbol-processing-api:1.7.0-1.0.6"
To process annotations, we need an object that provides a processor. Hence, We create a class and implement SymbolProcessorProvider.
Registering the provider is the next step. Therefore, create the following directory:
processor/src/main/resources/META-INF/servicesAnd create a file with the following name:
com.google.devtools.ksp.processing.SymbolProcessorProvider
Write your provider’s fully qualified name in the file. For example:
your.domain.processor.AutoBuilderProcessorProviderOur provider must have a SymbolProcessor. Hence, create a class and implement the SymbolProcessor interface.
Then implement the create function in the SymbolProcessorProvider.
It’s easy as a,b,c
Now, we should solve the last TODO. Let’s look at SymbolProcessor.
We should implement the process function in this class. As a first step, we must find the objects with our annotation.
val symbols: Sequence<KSClassDeclaration> = resolver
    .getSymbolsWithAnnotation(AutoBuilder::class.java.name)
    .filterIsInstance<KSClassDeclaration>()
It’s important to note that the
processfunction returns a list of processed annotations to avoid reprocessing.
Therefore, before starting processing the objects, It is necessary to check whether there are any objects with our annotation or not. Since our object is a Sequence, we will use the hasNext.
if (symbols.iterator().hasNext().not()) return emptyList()Note: Objects can have multiple annotations, and annotations can have various parameters, so we need to use their name to get a specific annotation and a specific parameter.
To make the code more readable, I use the following extension functions!
Now, we can start the process of our objects. It’s straightforward — use forEach
symbols.forEach { symbol ->
   // …
}
Foremost, we must check whether the object is a data class:
if (symbol.modifiers.containsIgnoreCase("data").not()) {
    logger.error("This object is not a data class", symbol)
    return emptyList()
}
We can retrieve a parameter’s value from a specific annotation using the following code:
val flexible = symbol.annotations
   .getAnnotation(AutoBuilder::class.java.simpleName)
   .arguments.getParameterValue<Boolean>("flexible")
This code has a problem; we used a string, which increases the possibility of mistakes. Change the annotation class to the following code:
And change the previous code to the following code:
val flexible = symbol.annotations
   .getAnnotation(AutoBuilder::class.java.simpleName)
   .arguments.getParameterValue<Boolean>(AutoBuilder.flexible)
To process the objects, we need to implement the KSVisitor interface, and this interface gets two generic types:
D: It is an object sent as input or created in process steps.
R: It is an object that our class will return.
The KSVisitor has some implementations. Depending on the situation, we can use them instead of implementing the KSVisitor.
We look at the builder visitor in this article, and the source code contains the mutable builder.
We use KSVisitorVoid in this example since our input and output are null.
Since our annotation targets are classes, we have to override the visitClassDeclaration.
In this step, we have to create our file:
val file: OutputStream = codeGenerator.createNewFile(
   dependencies = Dependencies(false),
   packageName = [Package Name],
   fileName = [File Name]
)
In this code, everything is clear except dependencies.
To prevent reprocessing and regenerating the unnecessary file, KSP uses the Incremental processing technique. For sake of brevity, I’ll skip the workings of this technique. However, if you wish, you can read about it in the documentation.
The following operation function helps us to have more readable code.
Remember to CLOSE the OutputStream at the END.
Writing in the file is easy; you need to write line by line.
We should read the properties three times in this example.
The first is to create the contractor:
class PersonBuilder(name: kotlin.String)The second is to create the private object:
private val mutablePerson: MutablePerson = MutablePerson(
   name = name,
   age = null,
   email = null,
   contact = null,
)
The third is to create the builder functions:
fun age(age: kotlin.Int): PersonBuilder {
   mutablePerson.age = age
   return this
}
Note 1:
Finding all off types and writing on the top of the file is complex. To solve this problem, we should use the qualified name of our types instead of the simple name.
It means writing:
kotlin.collections.List<kotlin.Boolean>Instead of:
List<Boolean>Note 2:
Getting the generic type is not easy. To handle it, we should use the following recursive functions.
Note 3:
Calling the resolve operation is expensive in terms of computation. So, you must use it carefully.
As a result, our processor module generates the following code:

App module
To add the Processor module to the App module, we should add the following plugin to the main module:
id 'com.google.devtools.ksp'Also, add the following dependencies to the main module:
implementation project(path: ':annotations')
ksp project(path: ':processor')
Build and Sync the project and create the following class:

Build the project again and find your files at the following address:
~/build/generated/ksp/debug/kotlin/...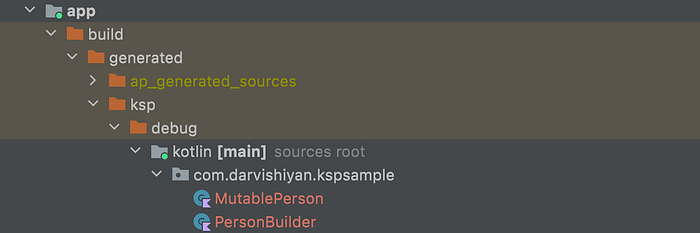
Challenges and Solutions
Challenge 1 — I wanted to showcase auto-generated objects in Android mode.
To show the auto-generated objects in Android mode, we should add the following code to the .gradle file.
Application module:
applicationVariants.all { variant ->
    kotlin.sourceSets {
        def name = variant.name
        getByName(name) {
            kotlin.srcDir("$buildDir/generated/ksp/$name/kotlin")
        }
    }
}
Library module:
libraryVariants.all { variant ->
    kotlin.sourceSets {
        def name = variant.name
        getByName(name) {
            kotlin.srcDir("$buildDir/generated/ksp/$name/kotlin")
        }
    }
}
Challenge 2 — I want to have config options:
We can write our config in the ksp block to have the config options.
android {
    ...
    ksp {
        arg("myConfig1", "true")
        arg("myConfig2", "myText")
        arg("myConfig3", "1")
    }
}
I use the following code to read config.
Finally, we can’t access the default value; if necessary, you can define some annotation and send the default value by them. Check this issue.
Source code
Another sample: This project automatically generates the DiffCallback objects for the ListAdapter in Android.