How To Present a View Controller With Blurred Background in iOS
Customize the intensity level of UIBlurEffect
What’s the issue?
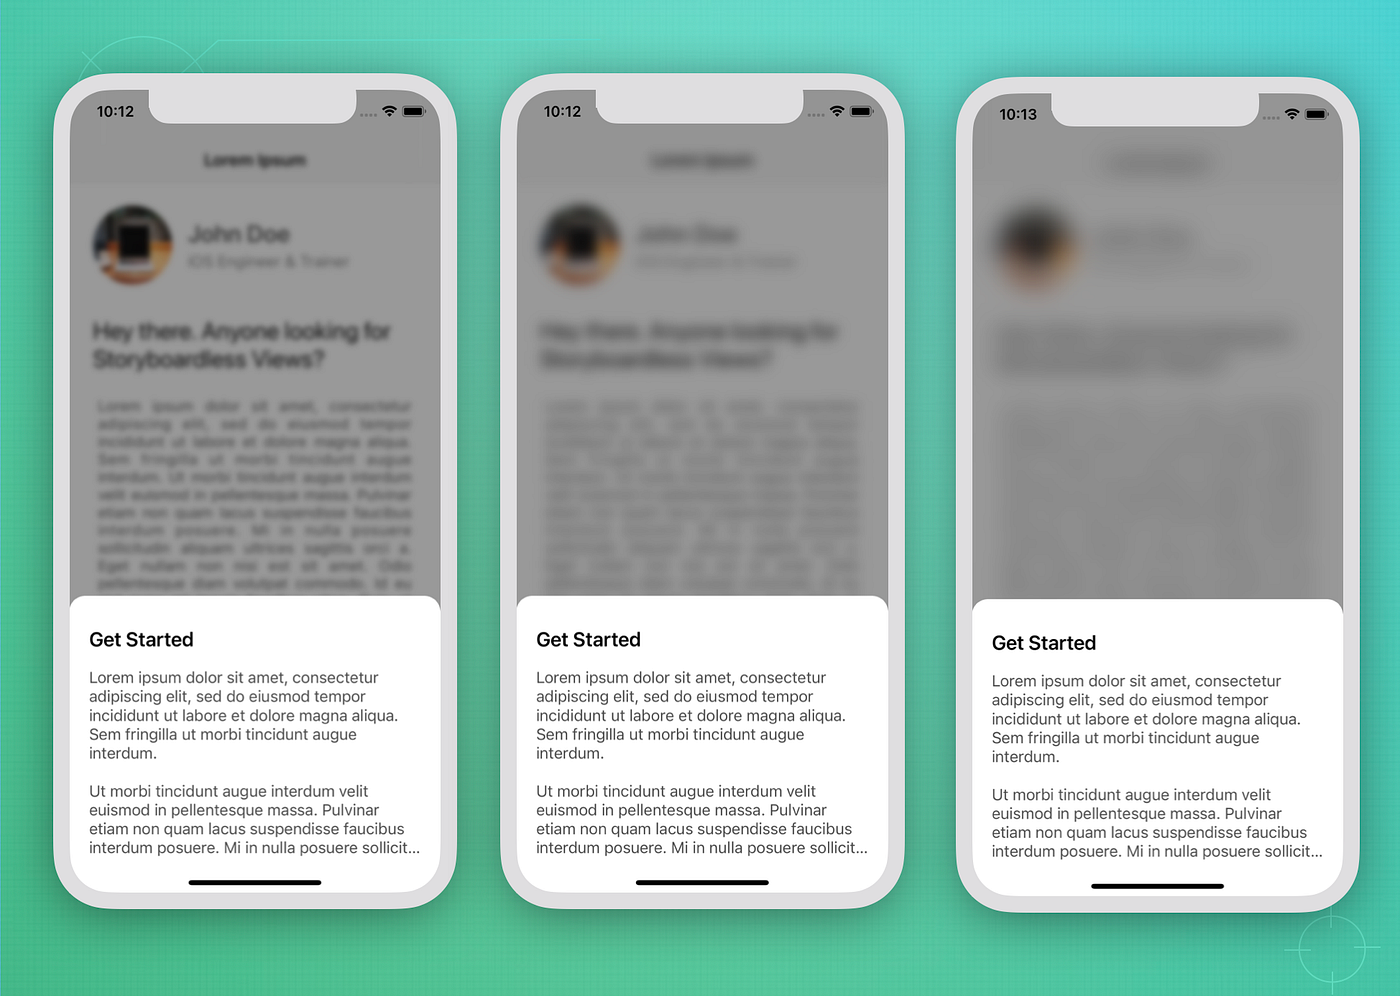
The problem begins when I was searching for a native iOS API to create a blurred background view while presenting a modal ViewController as shown in the image above.
I found that iOS has provided UIBlurEffect with three different styles, including .light, .dark and .extraLight. However, I could not set the intensity level and the default blurred level is quite high.
There are few available solutions, but most of them are related to UIImage blurring effects instead of applying to a single UIView.
Another article takes a similar approach. It takes a background screenshot and applies a Gaussian Blur in the screenshot image. It is quite good but has a few seconds delay in processing and applying the blurring filter on the screenshot image before it can be applied as a background view.
Solution
Fortunately, I discovered a simple solution that implements UIBlurEffect with UIViewPropertyAnimator by changing its .fractionComplete value based on the intensity level.
It has no delay and we don’t have to wait on the completion process. Moreover, it is also compatible with iOS12 and above.
Let’s Start
In this article, we will create a simple UIKit app with two ViewControllers.
ViewController, as the main page, which will present the second view controllerInfoViewController, a modal view controller with a blurred background.

1. Create a UIKit project

2. Add Labels, Image, and Button to our ViewController class
Open the Main.storyboard and add a StackView as the main container.
Then, add an image, labels, and a button. You may add your own content, as it is not that important.
Our main purpose is just to show how the blur effect will affect the text and image later. Also, the button is used to present the new modal controller.
Please keep in mind that the ViewController.swift class in the left pane is already linked (by default) to this “View Controller Scene.”

3. Create InfoViewController

Create a new “Cocoa Touch Class”, and choose “UIViewController”. Our new ViewController will be called “InfoViewController.”
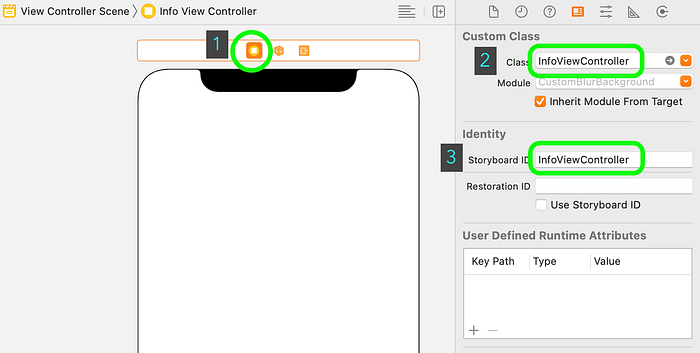
Then, open the Main.storyboard. Add a new scene (UIViewController) and connect it to our newly created InfoViewController class by entering the class name into the text box as illustrated in the below image.
Also, enter the Storyboard ID to be called later when it will be presenting.
4. Add main container view to InfoViewController
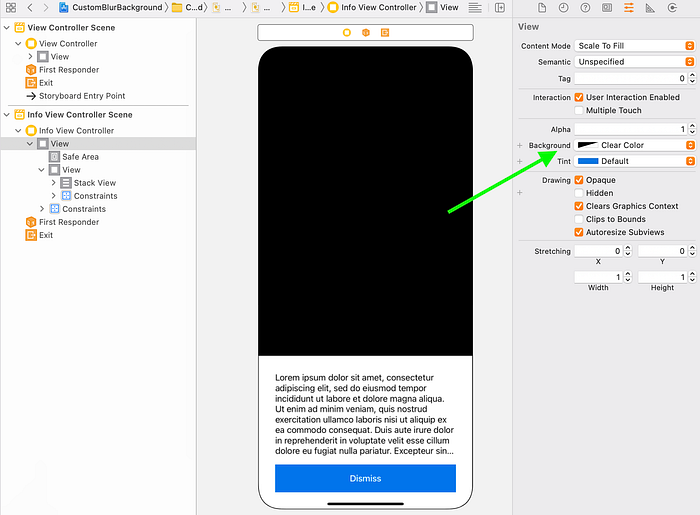
In this section, we will add a UIView as the main container to hold the main content including a label and button. This is because the current background view will be changed to a clear colour in the next step.
As a result, when the InfoViewController is displayed, only this main container will be visible.

Now, set the view background color to .clear.
5. Add IBAction to ViewController button to present the InfoViewController
In this step, connect the “Show Detail” button to the ViewController as an IBAction and put the function name “showDetailAction” and it will automatically create the function placeholder inside the ViewController.
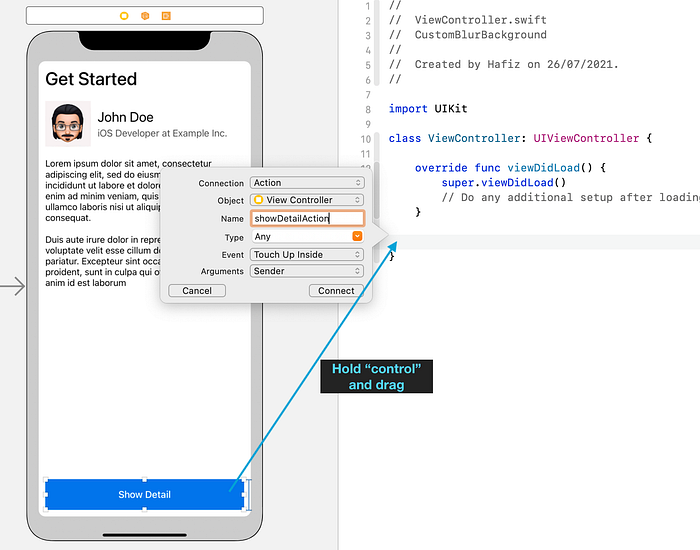
Then, add the below code to showDetailAction function to present the InfoViewController (You may use segue if needed). Remember to use the same identifier that we have defined previously.
At this stage, if you try to run the project now and click the “Show Detail” button, you will get the InfoViewController is presented on top of the main ViewController with transparent background.
Great! It is a time to add the background blurred View.
6. Add Custom UIVisualEffectView subclass
Create a new file called CustomUIVisualEffectView.swift and add the below code.
7. Add Custom BlurView to InfoViewController background
Create a UIView named as blurView. Then, create a container view where we’ll set the blur effect and a dimmed view.
Subsquently, we need to connect the “Dismiss” button as IBAction in InfoViewController (similar to step 5) and handle the dismiss action.
Now, our InfoViewController will look like the code below. You may change the intensity at line 10 and the dimmed alpha value at line 14.
Cool! Now, when you try to run the project and click the “Show Detail” button again, you will get the blur view at the back.
Furthermore, you may also add a UITapGestureRecognizer to the blurView to allow dismissal action on tapping.
Project Completed
Congratulations! Now, we have completed all steps and the project is working fine as we were expecting.
The complete source code can be downloaded from my GitHub repository.
Try to implement it into your projects and improve the code by creating a ViewController subclass that will be reusable for other modal ViewController to have blurred background views.
Thanks for reading. Happy coding!

