How To Implement a Linked List Using JavaScript
Dive into a useful data structure
Today, I’m going to show you how to implement a singly linked list and all its common functions from scratch. (Doubly linked list implementation coming very soon!)
What Exactly Is a Singly Linked List?
It’s an ordered data structure used to store values just like an array.
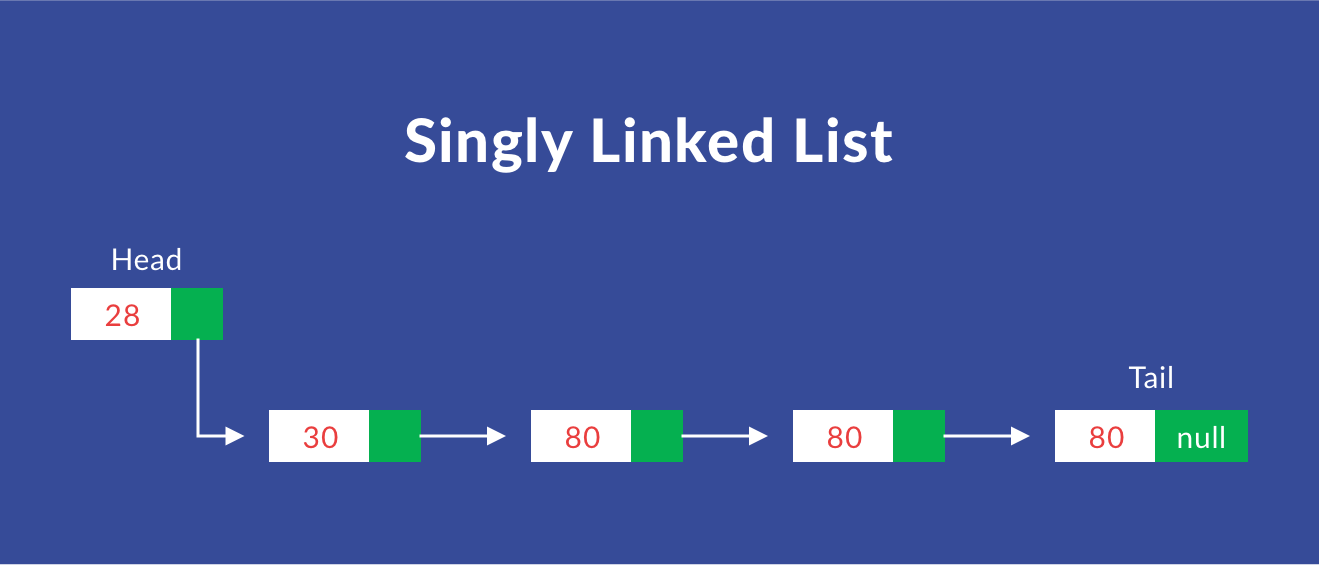
However, it has some key differences. Unlike an array, a linked list has no indices. Instead, a linked list contains nodes that are pointing to the next element using pointers.
A node contains a value (a number, string, or anything for that matter) and a pointer that references the next node. If there’s no next node, it points to null.
Let’s quickly implement a node that we’ll use for our linked list implementation.
A linked list has a Head property, a Tail property, and an optional length property to keep track of the elements. The Head is the first node of the linked list and the Tail is the last.
To be able to access any node in the list, we start off with the node at the Head and traverse the list using the node’s next property and so on until we reach the node we’re looking for.
Refer to this resource to better visualize the traversal.
Linked List Implementation
Now that all the technical jargon is out of the way, let’s finally implement the linked list.
Basic implementation
We’ll start by defining a class that takes in the following values in the constructor:
headpoints to the first node and is currently set tonull.tailpoints to the last node and is currently set tonull.lengthcontains the list’s length and is set to0initially.
Let’s now implement the common functions associated with the linked list. It helps to keep the same resource as listed above open, to better understand and visualize each function explained in the following section.
Important: All the functions implemented below are defined inside the LinkedList class that we’ve just created. I’ll be sharing the gists of each function separately for readability.
Here’s a link on GitHub for the complete implementation.
Push function
Just like an array, the push function takes in a value and assigns it to the end of the list.
- The
pushfunction takes a value and creates an instance node with it. - It then checks if the
headproperty is notnull. If it is, that means that there’s no element (node) on our list. So, if there’s no element on our list, the function assigns the newly created node to theheadand thetailproperty. - There, if the
headproperty is notnull(i.e. there are elements (nodes) on our list), it sets thetail's next property to point to the newly created node, as well as set the newtailto point to the newly created node. - Finally, it increments the
lengthproperty by 1.
Pop function
The pop function, like an array, removes an element (node) from the end of the list. However, it requires us to traverse through the whole list as there are no indices.
We traverse through the whole list until we reach the second last node. We then set its next property to null and set it to be our new tail. Let’s see it in code.
- The function returns
undefinedif the list is empty. You can optionally returnnullas well. - It then loops through the list until it reaches the
tail. It also keeps track of the previous item as that we set to be our newtail. - When it reaches the
tail, it assigns the second-last time that we are keeping track of to be our newtail. - It then decrements the length of the list by 1.
- Finally, it returns the popped item.
- Edge case— Check if all items are popped off. If they are, set the
headandtailto benull.
Unshift function
It’s a simple function that adds an element to the start of a list.
- It creates a node with the value that’s passed to the function.
- If sets the
headandtailto point to this node if the list is empty. - Otherwise, it sets the current
headto point to this node’snextproperty and sets this node to be the newhead. - Finally, it increments the
lengthby 1.
Shift function
This function is also pretty simple. It removes the first element of the list and returns it.
- It returns
undefinedif the list is empty. You can optionally returnnull. - Store the current
headand set the newheadto point to the current head’s next property. - Decrement the
lengthby 1. - Finally, return the removed element.
Get function
The get function takes a number (an index) and loops through the list until it finds the node at that index and returns it.
- If the passed index is out of bounds, return
undefined. You can optionally returnnull. - Iterate through the list until it reaches the specified index and returns the node at that index.
Set function
The set function takes an index and a value. It then assigns that value at the specified index.
- It used the
getmethod to find the node at the specified index. - Assigns the value of the node if it is found and returns true.
- Otherwise, returns false.
Insert function
The insert function takes an index and a value just like the set function. Unlike the set function, though, it inserts the value at the specified index.
- If the index is out of bounds, return undefined.
- It pushes the node with the provided value to the end of the list if the index is the same as the length. We’ll use our
pushfunction here for our convenience. - It pushes the node with the provided value to the beginning of the list if the index is 0. We’ll use our
unshiftfunction here for our convenience. - Otherwise, it gets the element before the specified index and assigns its
nextproperty to our new node with the specified value. - It then assigns the
nextproperty of the new node to point to thenextproperty of the element before the specified index. - Finally, it increments the length by 1 and returns true.
Remove function
The remove function takes in an index and removes the value at the specified index.
- If the index is out of bounds, it returns undefined.
- It removes the node from the end of the list if the index points to the last element’s index. We’ll use our
popfunction here for our convenience. - It removes the node from the beginning of the list if the index is 0. We’ll use our
shiftfunction here for our convenience. - Otherwise, it gets the element before the specified index and assigns its
nextproperty to point to thenextproperty of the node at the specified index! - Finally, it decrements the length by 1 and returns the removed node.
Where to Go From Here
Phew! That’s about it.
There’s a lot that we could have implemented or improved. But if you understand these common functions, you’ll be able to do most of it on your own.
- Go through the explanations and try to implement it on your own.
- Refer to VisuAlgo to better understand and visualize how each function works.
- Also, read through this article for a big-O analysis and comparison with arrays.
Conclusion
Here’s the GitHub repo for the complete linked implementation. Feel free to comment below if you have any doubts and I’ll try my best to clarify it.

