How to Host Your DocC Documentation on the Web
Ensure your documentation is always synced across website and codebase

In the first part of this article, we learned how we can generate documentation for our Swift frameworks using DocC.
In this article, we are gonna learn how we can share our documentation with the world. We’ll see how to export our DocC archive for sharing. Then we are going to host the doc as a website, and set up a CI so that every time we update our code base latest copy of documentation gets deployed in our website.
What we are gonna learn:
- Exporting your DocC Archive
- Generating docarchive from command line
- Hosting the docarchive on netlify
- Automating the docarchive build and deployment using bitrise
Exporting your DocC Archive
The simplest way to share your document with other people is by exporting the DocC archive and sharing it using mail or message.
To export your DocC archive go to Products > Build Documentation.

then click on the context menu button on the left of your libs root article name inside the document window of Xcode.

Then select the location to export your archive

Now you can attach this in mail or share in message to your friends and colleagues and they can see you doc by double clicking on the file, it will open inside their Xcode document window.

Sharing the archive would suffice if you want to share the doc to a relatively small group of people, but you can do better you can host your docc documentation as an website which can be accessed by everyone.
To do that we are going to host how documentation on web, same as apple’s own documentation website.
We will use Github and Netlify to setup our documentation website
If you already have your swift package on Github that is good, if not please create an repo and push your swift package directory to Github, as a repository.
Generating docarchive from command line
Before moving forward we need to generate the docarchive in docs folder inside our swift package directory so that the docarchive could be included in our git repository which will be used in later point to host the documentation site from.
To generate docarchive from command line, run the following commands from root directory of your swift package
- Run following CMD to builds the docarchive in custom derived data location
xcodebuild docbuild -scheme ElegantAPI -derivedDataPath ~/ElegantAPIBuild -destination 'platform=iOS Simulator,name=iPhone 12'2. We will copy the generated docarchive to the path Docs/ElegantAPI.docarchive inside our swift package, by running:
cp -R `find ~/ElegantAPIBuild -type d -name 'ElegantAPI.doccarchive'` Docs/ElegantAPI.doccarchive3. We will need to add /* /index.html 200 , as the docarchive is built on top of Vue.js, we need this redirect to make the routing working, by running following command we will create a file inside our docarchive with the name _redirects which then will be used by Vue.js router to successfully navigate to our documentation page.
echo "/* /index.html 200" > Docs/ElegantAPI.doccarchive/_redirectsYou can now push this folder to GitHub by adding it to git and pushing the same to Github.
Hosting the docarchive on netlify
Now that our Github repo contains our docarchive, we are going to use netlify to host that docarchive as a website, docarchive already generates all the HTML and JS required to present our documentation on the web we just need to serve them on a server and for that we will use Netlify, so if you do not have an account on Netlify you can create one at: https://app.netlify.com/signup.
You can signup using GitHub.

You will be asked a few questions, below is an example of how you can fill it up.

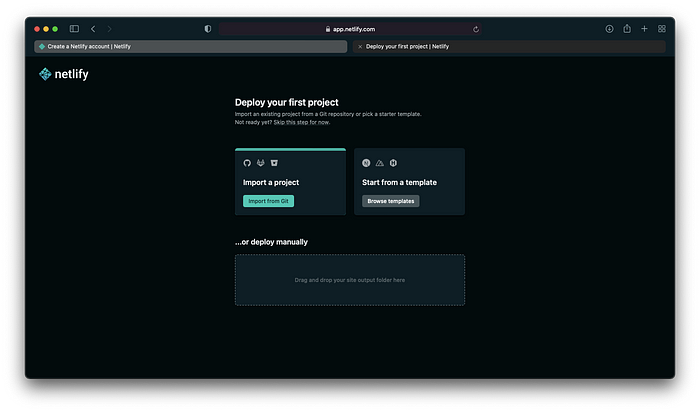
You will be presented with a project setup page, select import project:
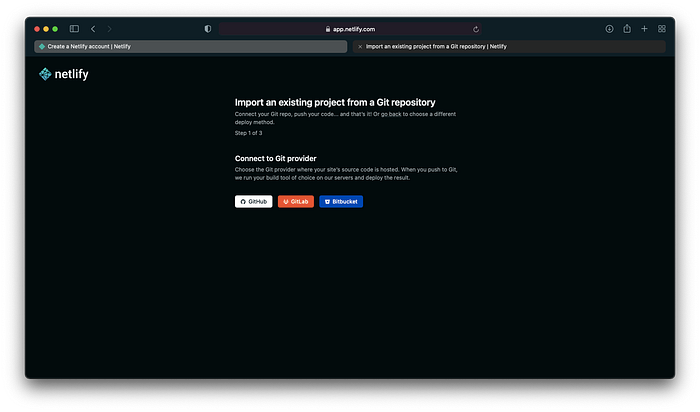
Select your GitHub as your source provider
Select the GitHub repository of your swift package:

You will be presented with the following form, add the publish directory path same as your docarchive location inside the GitHub repository.
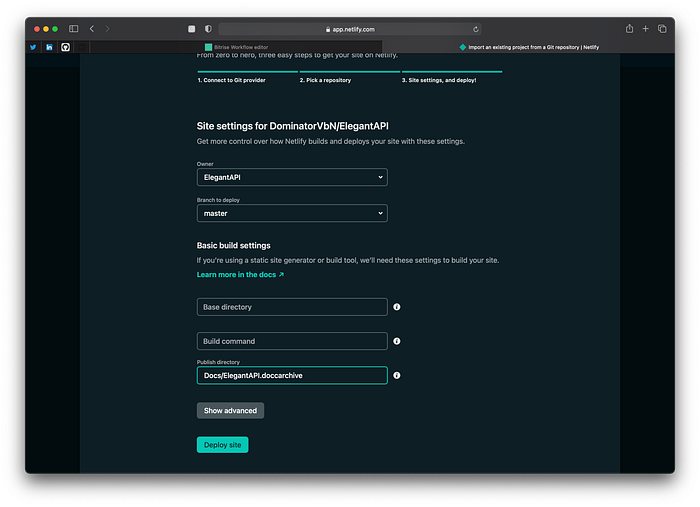
Once done you will see something similar to the below screenshot:

You can navigate to your hosted doc site by pressing on the top left link, in my case https://nervous-pike-2f8a3f.netlify.app, but you will not see the documentation rather an empty screen like below:
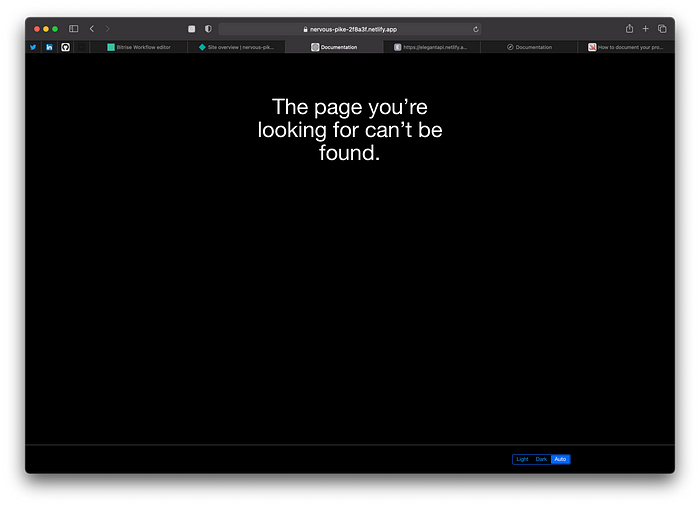
To see your documentation you will need to alter the URL bit like below:
https://nervous-pike-2f8a3f.netlify.app/documentation/ElegantAPIHere you can change the base URL and the end-path according to your base path and package name.
The format is <base url>/documentation/<swift package name>
You can now see your hosted document site on the altered URL:

Changing the base URL of your hosted doc
As you may have noticed netlify provides us with a random generated URL, but you can edit the URL to make it more human-readable.
For that go to domain setting:

And then tap on the right options tab and tap on “Edit site name”:

Then inside the field add your preferred subdomain name:

and voila! You can now access the site at:
https://elegantapi.netlify.app/documentation/ElegantAPIAutomating the docarchive build and deployment using bitrise
Now we have our website up and running but it will need to be updated every time we change our source documentation, wouldn't it be great if every time you make some changes in your package documentation, and push it to git, the website gets regenerated to reflect the changes.
That’s what we are gonna automate in this section using Bitrise.
Please create a Bitrise account if you don’t have one from here.
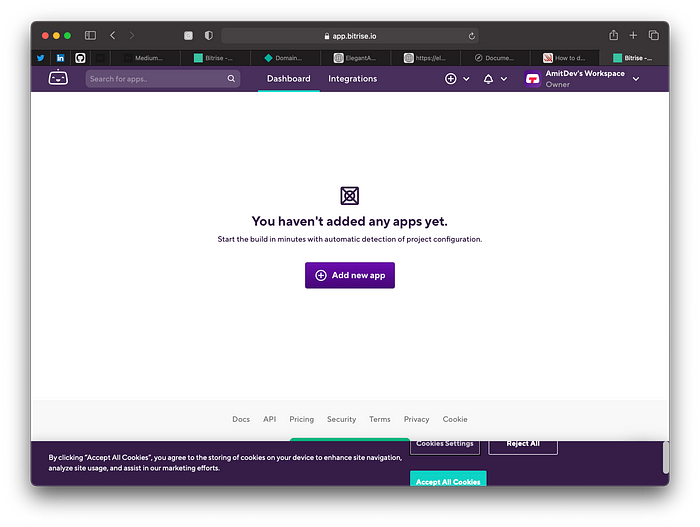
Creating app in bitrise
Once you have created your account, you will need to add an app to the dashboard tap on the “Add new app” button to add the app to the dashboard.
In the next step you will be asked for the privacy type of the app, you can select either private or public for this demo we are selecting private:

In the next step bitrise will ask you to connect your repository from one of the provided repository providers, in this case, we selected GitHub and our swift package repository:

In this next step, you will be asked if you want to setup an additional private repository.
We do not require any private repo access so select “No, auto-add SSH key”

Next, you will need to specify the branch you need to take the code from, in this case, we are picking the default branch “master”:

Bitrise will try to recognize your project type. But as we are not setting up for an iOS app it won't be able to detect the configuration for us:

As such we will do the custom configuration for our CI pipeline:

Select “Other/Manual” from the config list and select macOS stack from drop-down then tap on “I’m Ready”:

Skip the app icon, and webhook section, and finish the configuration by tapping “finish” at the top right:

Once you are done with the configuration you will be able to see your newly created app in your dashboard:

Defining CI workflow
Tap on your app and go to the workflow section, we will now define our CI pipeline here, you will see screen as below:

As you can see bitrise have set up quite a few workflows for us, but we won't require all of them, as we will not deploy to bitrise. Instead, we will remove the step. To do that tap on the “Deploy to bitrise”, scroll down on the right section, and delete the step:

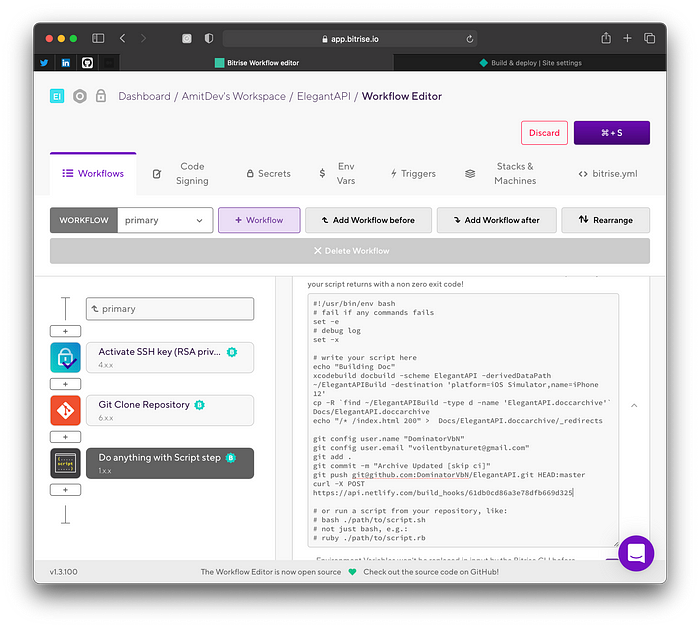
Now go to the “Do anything with Script step” and paste in following script:
echo "Building Doc"# Builds the docarchive with custom derive data path, change the scheme name to match your package here
xcodebuild docbuild -scheme ElegantAPI -derivedDataPath ~/ElegantAPIBuild -destination 'platform=iOS Simulator,name=iPhone 12'#2 Copy the docarchive to correct place, change the path according to you package name
cp -R `find ~/ElegantAPIBuild -type d -name 'ElegantAPI.doccarchive'` Docs/ElegantAPI.doccarchive#3 Writes necessary redirects
echo "/* /index.html 200" >  Docs/ElegantAPI.doccarchive/_redirects#4 Git config needed to push back to git repo, replace with your git id and email
git config user.name "DominatorVbN"git config user.email "voilentbynaturet@gmail.com"#5 Add the newly generated docarchive to git indexc and commit
git add .git commit -m "Archive Updated [skip ci]"#6 Push back to the git repo, if your branch is other than master change accordingly
git push git@github.com:DominatorVbN/ElegantAPI.git HEAD:master
This script is responsible for generating the docarchive, and pushing the updated archive to the git repo.
Setting up webhook for netlify build
This script will only update the git repository with new docarchive but it won't be deployed to netlify to do that, we will set up a webhook to let netlify know to redeploy our site.
To do that navigate to netlify dashboard and go to build settings:

Then navigate to “Build and deploy” from the right side menu, move over to “Build hooks” and tap on “Add build hook”:

Name the build hook as bitrise and select master as your default branch to build:

Now copy this URL and add following to it:
curl -X POSTthe resultant command will look like this:
curl -X POST https://api.netlify.com/build_hooks/61db0cd86a3e78dfb669d325Add this to the script step in bitrise:
Type CMD+S to save the workflow.
Setting up SSH in Bitrise
We will need to do a tad more setup to be able to push back to our Github repository, we will need to set up an ssh key which will provide access to our Github repo so that Bitrise CI can push to our repository, go to settings tab of your app in Bitrise:

Then scroll down to SSH settings:

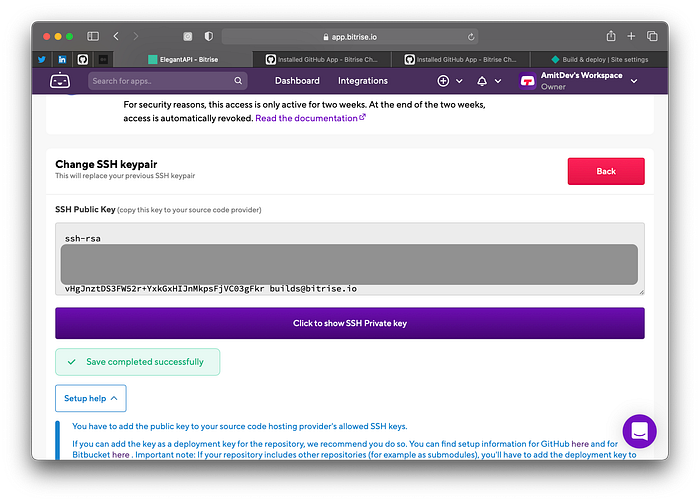
Click in “Change SSH keypair” then select “Generate SSH keypair”:

Copy the generated SSH public key to the clipboard:
Go to Github and navigate to the setting from the top right profile button:

Navigate to the “SSH and GPH Keys” section, then click on “New SSH Key”:

Paste in the copied public key and give it a name then click “Add SSH Key”:

Setting up webhook for GitHub
Once this is done we are ready to set up our webhook which will trigger the build when we push our code to GitHub to set up the webhook go to APP > Code > Incoming Webhooks and click on “Setup automatically ”:

That’s all the configuration to test out the pipeline you can make some changes in your doc and push it to Github.
You can see your build running on your bitrise dashboard:

That’s all for this article. Thanks for reading.
Want to Connect?Reach out to me on Twitter, Linkedin.

