How to Deploy a WebSocket App to Amazon Lightsail
Deploying a WebSocket application to the cloud

Amazon Lightsail provides lightweight virtual servers that are easy to use at a very cost-effective price and automatically configure networking and security environments.
The use cases may include:
- A simple web applications
- A test environment
- A personal project like a portfolio or blog
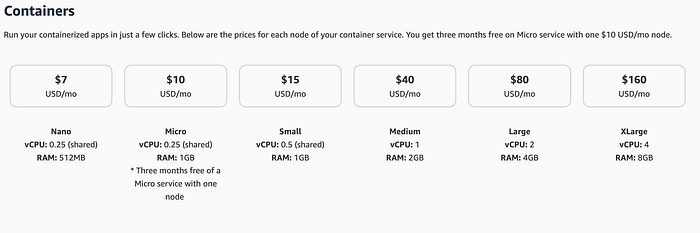
Amazon Lightsail is suitable for WebSocket applications as well. Other cloud servers also support WebSocket such as Heroku and Google App Engine for a flexible environment (not Standard). But Heroku for a free plan is not enough in terms of performance. From a cost point of view, Google App Engine can be expensive for small projects. Amazon Lightsail offers plans starting at $7 for containers, and the server specs are adequate. I built an application using Golang and GraphQL and deployed it in a micro container. This uses WebSocket for real-time communication, and the performance is good enough.
This post will guide you through the deployment of the Lightsail with AWS CLI.
Pre-requisite
Download the WebSocket app to deployment to AWS Lightsail.
$ git clone https://github.com/manakuro/golang-websockets-exampleIf you want to know how WebSocket works, take a look at the previous post.
Example Repository
Here is the final codebase on GitHub
Overview
- Configure AWS CLI
- Create Lightsail service
- Create Docker image
- Push Container
- Deploying
Configure AWS CLI
First, install the AWS CLI.
$ brew install awscliYou can also install it by following the AWS instructions.
Create policy
To access Lightsail from awscli, create a policy.
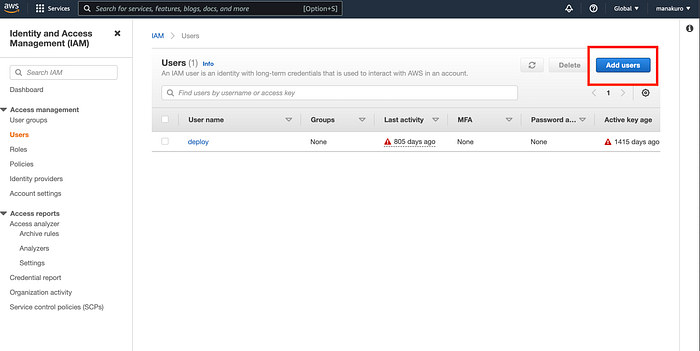
Go to the IAM console and the Policies in the left navigation. Click the Create Policy button.

In the create policy, click the JSON tab and past it:
{
    "Version": "2012-10-17",
    "Statement": [
        {
            "Effect": "Allow",
            "Action": [
                "lightsail:*"
            ],
            "Resource": "*"
        }
    ]
}
This policy grants access to all Lightsail actions and resources.
Add user
Next, go to the Users in the left navigation, and click the Add Users.
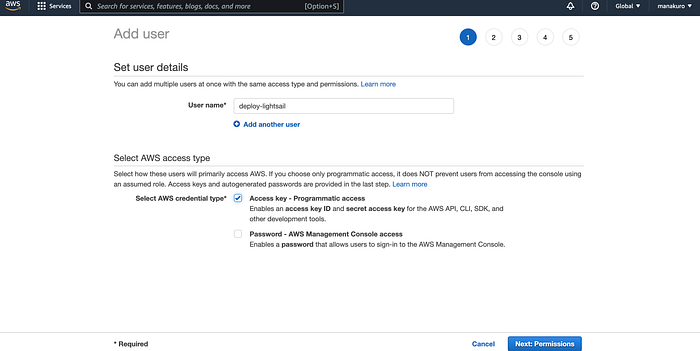
And fill in the user name and check the Access key like so:
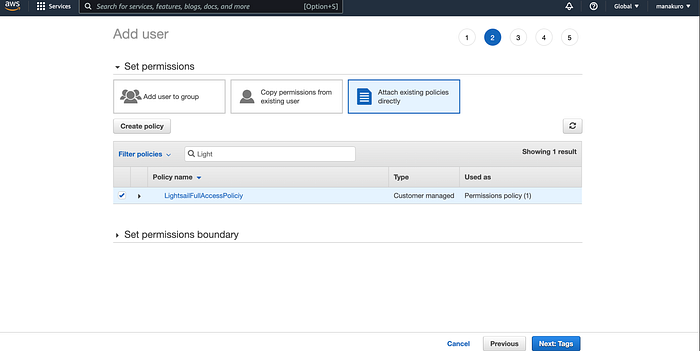
Next, attach the Lightsail policy like this:
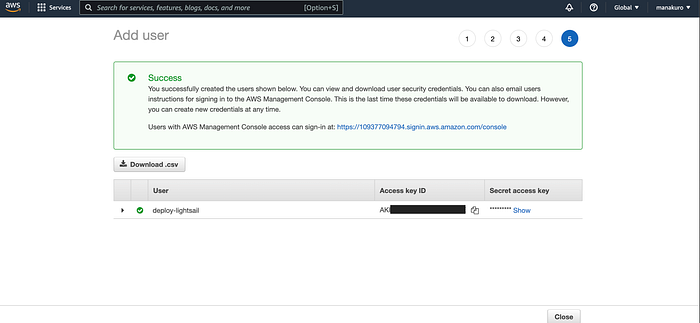
Lastly, create the user and make a note of the Access Key ID and Secret access key. We will use this later.
Configure awscli
Set up the user above to be able to access your AWS account from the command line.
$ aws configure --profile deploy-lightsail
AWS Access Key ID [None]: xxxxxAWS Secret Access Key [None]: xxxxxDefault region name [None]: ap-northeast-1Default output format [None]:
After the configuration, the credential file should look like this:
cat ~/.aws/credentials [default]aws_access_key_id = xxxaws_secret_access_key = xxx[deploy-lightsail]aws_access_key_id = xxxaws_secret_access_key = xxx
Install the Lightsail plugin
Next, install the Lightsail plugin to be able to push container images of Docker.
$ brew install aws/tap/lightsailctlCreate Lightsail service
Now we’re ready for accessing the AWS Lightsail from the command line.
In this post, we will create a micro container service that costs $10 a month but includes free for three months.
Create a micro container from the command. The service name is websocket-lightsail here.
$ aws lightsail create-container-service --service-name project- websocket-lightsail --power micro --scale 1Docker image
We can now push a container image to Lightsail. So next, create a Dockerfile to deploy our application.
Create Dockerfile in the root directory.
Then, build the image named app:
$ docker build . -t appAnd the Docker images should look like this:
$ docker images -a

REPOSITORY                TAG       IMAGE ID       CREATED         SIZE
app   latest    87961c0073de   5 seconds ago   14.5MB
Push container
We’ve created the docker image app, push the image to the container.
$ aws lightsail push-container-image --service-name websocket-lightsail --label app --image appSince a container service can have multiple containers, we label it by adding --label app and specify our image to push by adding --image app in the end.
After the creation, the response shows something like this. The image name will be used for pulling containers in the Lightsail.
Refer to this image as ":websocket-lightsail.app.1" in deployments.Deploying
To deploy our application, tell the Lightsail which container should be running by a configuration.
To send a configuration option, we create a json file.
So first, install the jq. The jq is a flexible command-line JSON processor.
$ brew install jqThen, create a template file conatiner.tmpl.json like so:
{
  "containers": {
    "app": {
      "image": "",
      "ports": {
        "8080": "HTTP"
      }
    }
  },
  "publicEndpoint": {
    "containerName": "app",
    "containerPort": 8080,
    "healthCheck": {
      "healthyThreshold": 2,
      "unhealthyThreshold": 2,
      "timeoutSeconds": 5,
      "intervalSeconds": 10,
      "path": "/",
      "successCodes": "200"
    }
  }
}
The app.image should be the name of a pushed container image. To get the name dynamically, we can use the get-container-image command like so.
$ aws lightsail get-container-images --service-name websocket-lightsail | jq -r '.containerImages[0].image'
:websocket-lightsail.app.1
Then create a container.json running by this:
$ jq --arg image `aws lightsail get-container-images --service-name websocket-lightsail| jq -r '.containerImages[0].image'` '.containers.app.image = $image' container.tmpl.json > ./container.jsonThe generated file should look like this:
{
  "containers": {
    "app": {
      "image": ":websocket-lightsail.app.1",
      "ports": {
        "8080": "HTTP"
      }
    }
  },
  "publicEndpoint": {
    "containerName": "app",
    "containerPort": 8080,
    "healthCheck": {
      "healthyThreshold": 2,
      "unhealthyThreshold": 2,
      "timeoutSeconds": 5,
      "intervalSeconds": 10,
      "path": "/",
      "successCodes": "200"
    }
  }
}
In the end, deploy our application by running the create-container-service-deployment like so:
$ aws lightsail create-container-service-deployment --service-name websocket-lightsail --cli-input-json file://$(pwd)/container.jsonOnce running the command, the response prints to the console like this. You can now access the URL.
{
    "containerService": {
        "containerServiceName": "websocket-lightsail",
        "url": "https://xxxx.xxxx.ap-northeast-1.cs.amazonlightsail.com/"
    }
}
To deploy the newest image automatically, create a Makefile and put some script like so:
We can now deploy a new version of our app by running:
$ make build push deployIn order to connect to the server through WebSocket, use wss protocol like so:
Conclusion
We’ve covered how to deploy and connect to Amazon Lightsail in this post. The takeaway is as follows:
- Build Docker image
- Push container image
- Deploy it
That’s all there to it. Very simple and easy to use.

