How To Create Your First Firebase Cloud Function
Learn how to write, test, and deploy with ease

Cloud Functions is a powerful feature provided by Firebase that is capable of managing intensive backend processes and handling event responses. It is very useful to reduce important logic performed in frontend apps.
In some scenarios, when a user logs into an app, we might need to send a welcome email or authentication code. In another example, when a user uploads photos from an app, we sometimes want to capture and modify it before it is stored. These logics need to be handled by the backend through the cloud function. Moreover, our apps will be much more secure from reverse-engineer threats by hiding the backend process and API calls.
Advantages of Using Cloud Functions
- Easily integrate with various Firebase services, including Authentication, Realtime Database, Storage, Cloud Messaging, etc.
- Secure server application logic from client-side penetration.
- Zero maintenance — Firebase will automatically manage the server scale depending on requests and usage. All we need is to write a cloud function in JavaScript or TypeScript and deploy it.
- Ability to use an emulator in local development before deploying to the Firebase server.
What Can We Do?
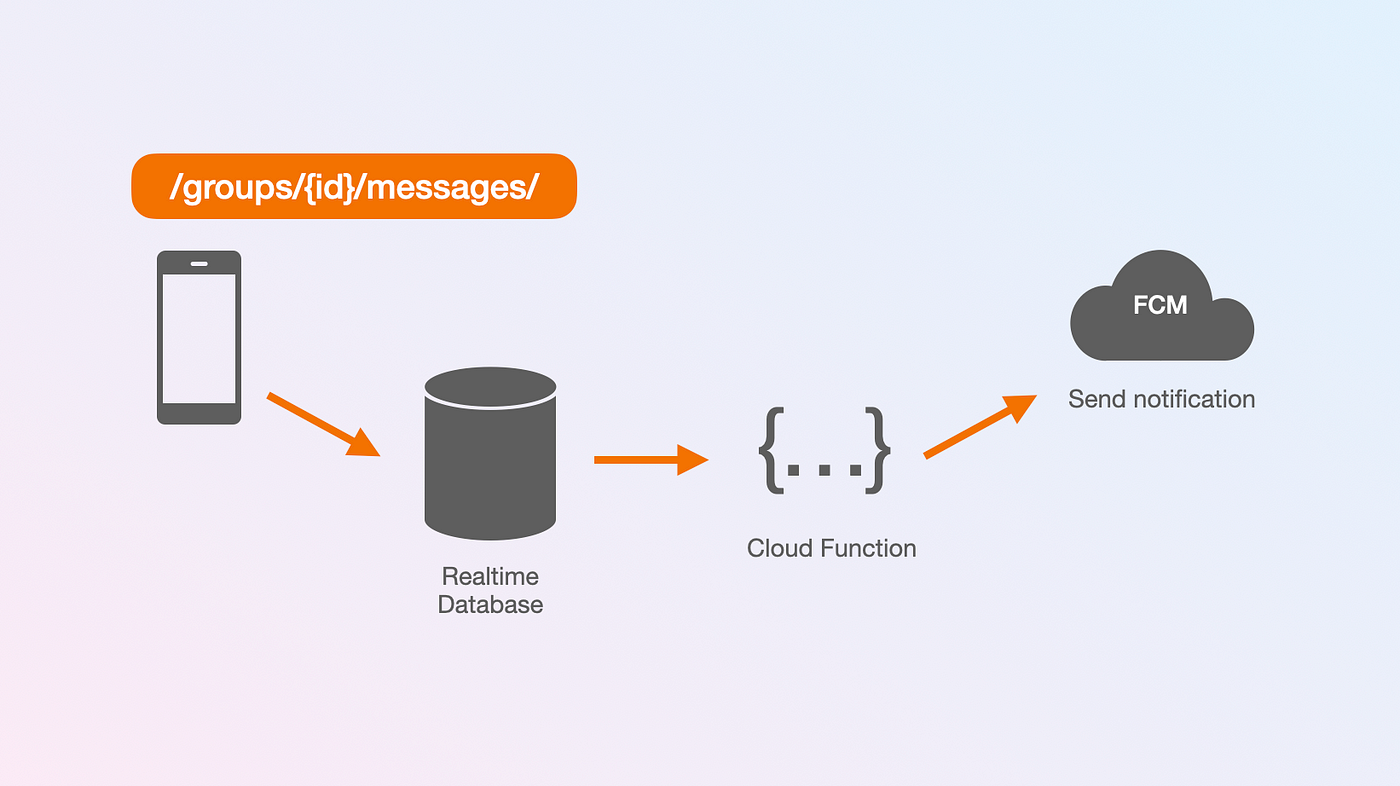
- Have a listener to manage each event that hits our database. For example, when a user is sending a message to a group chat from an app, we store it in the
/messagesnode. However, during the saving process, we can capture the event in our custom function and send notifications to each user in that group. We also can filter the message and sanitize it before sending it to other users. - Perform expensive tasks or complex queries to the database. This is very useful when we have thousands or even millions of records in the database.
- Integrate with a third-party API or SDK such as GitHub API, Slack, Mail Service, etc.
- Schedule tasks using cloud functions for periodical execution, such as daily backup and data cleanup.
Awesome!
Now that we understand the main idea behind cloud functions, let’s start writing our first one.
What Will We Build?
I assume that you are already familiar with Firebase Realtime Database or at least have learned it before and understand the concept, including how to store and read from the database.
In this tutorial, we are going to create two functions as described below:
addStudent()— This function will allow us to send new student data to the server and save it in Realtime Database. This process can basically be done on the client side, but we will create it to insert data so it can be called from any of your apps through HTTP requests without focusing on which language or framework is used.getTopStudent(limit:)— A function to get the top scorer from the student list (you may customise this depending on your needs). Keep in mind that in Firebase Database, such a task should be done in a cloud function because common client SDKs do not have good query methods to perform extensive search and sort — especially when dealing with huge data and multiple search parameters.
Project Setup
1. Create Firebase project and Realtime Database
Before we can start writing our functions, we need to create a new project in the Firebase Console. We will name it “StudentRecord.”

Please follow the complete steps as described in the docs.
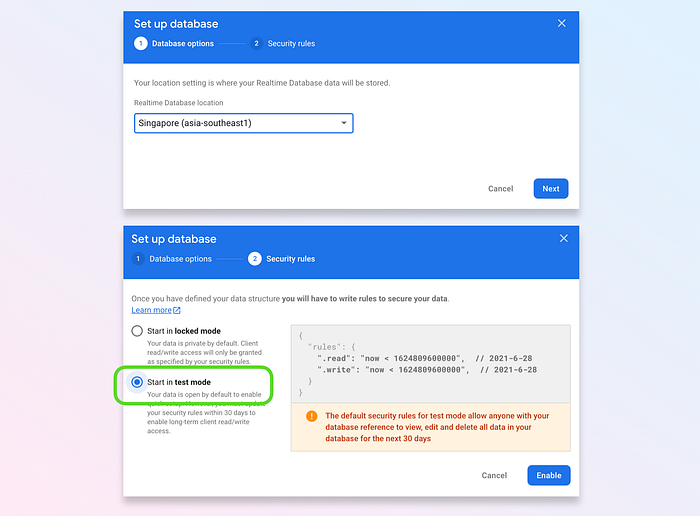
Once the project is created, go to “Realtime Database” from the left menu and hit the “Create Database” button, as shown below. You may choose to use Firestore if necessary.

Then you will be redirected to the screen below. Fill up the fields accordingly based on your location. Take note that we will use the “test mode” rules for the initial setup.
2. Install Firebase CLI tools
Make sure you have installed Node and NPM. Otherwise, download and install Node.js from its website (depending on your OS). Once installed, verify the installation of Node.js and NPM by checking the version:
$ node -v
v10.15.3$ npm -v
6.14.5
Then, install Firebase tools using this command:
npm install -g firebase-tools3. Initialize project
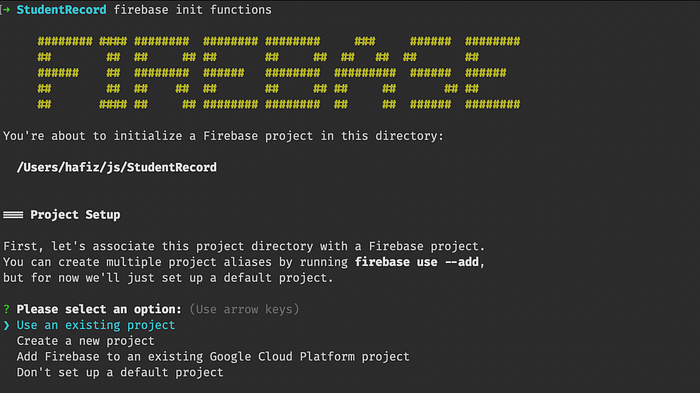
In this section, we are going to create a project and authenticate it with a Firebase server through the command line.
First, create a directory (where we will create the project). Then, open the terminal, go to that directory, and follow the steps below.
- Run the
firebase logincommand in the terminal for authentication and you will be redirected to the browser to log in. - Run
firebase init functionsand few dialogs will be shown in the terminal for the project setup.
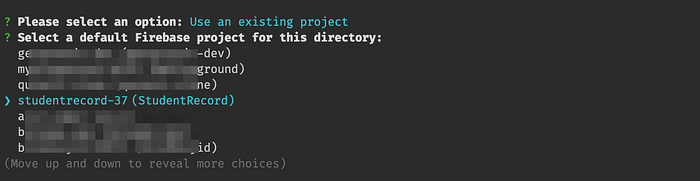

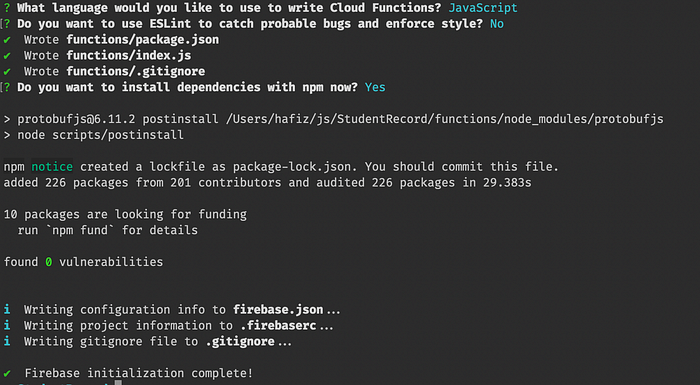
Great. We have completed the setup. It is not that hard since most of us have already gotten used to the Node.js environment and the wizard is quite straightforward. Now, try to check the project folder that we created just now. It should have a similar structure as shown below with a few .json files and a default index.js.
4. Emulator
One of the best features in Cloud Functions is the emulator. We can build the function and quickly test it in local development. Cool!
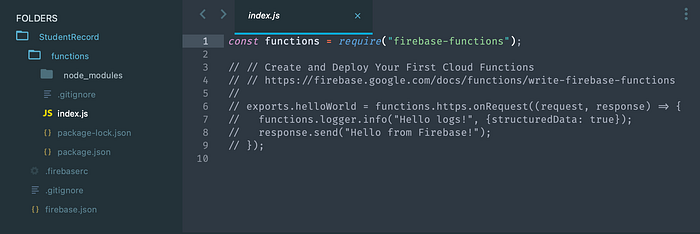
In order to test the emulator, let’s enable the “Hello World” sample code. Open the index.js file in your favourite editor, uncomment the exports.helloWorld closure, and save.
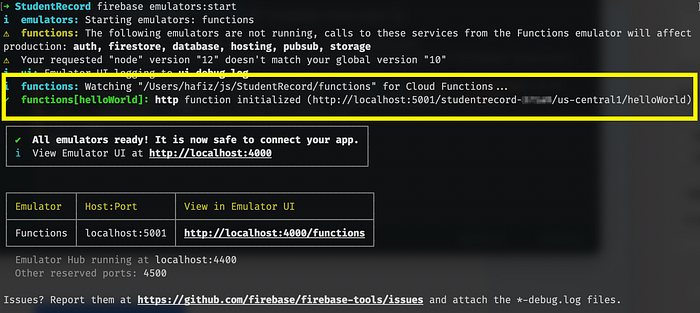
Then, run firebase emulators:start in the terminal. If it is a success, you will get a similar output to what is shown below. In the yellow box, the emulator will create an endpoint for the new helloWorld function at a given URL (the project id studentrecord-xxx might be different for others). In my case, the URL is http://localhost:5001/studentrecord-xxx/us-central1/helloWorld.
Copy the URL and paste it into browser, Postman App, or Insomnia to view the result. You also can see the logs in the terminal (emulator output).
i  functions: Beginning execution of "helloWorld"
>  {"structuredData":true,"severity":"INFO","message":"Hello logs!"}
i  functions: Finished "helloWorld" in ~1s
Wow, this is truly awesome! Every time we send a request or any errors occur, it will automatically refresh and show in the emulator’s output.
You may kill the emulator process by pressing Ctrl + C.
Is it callable from the app?
As mentioned in the documentation, other than by using an HTTP request, the function created can also be called directly from the apps depending on the platform and language. However, in this article, we are only focusing on HTTP requests.
Coding Time!
Let’s continue to write our first cloud function.
Function 1: addStudent()
Open the functions/index.js file and add this code. In this code, we have added a new function called addStudent() that will send a student object to the Firebase database with a unique id (detailed explanations are in comments). Check out the reference for saving data in Realtime Database.
You may notice in the emulator log that it will automatically add a new endpoint. Again, the URL endpoint will be different on your side, so replace it with yours while sending a request.
✔ functions[addStudent]: http function initialized (http://localhost:5001/studentrecord-xxx/us-central1/addStudent)Now, open Postman App or Insomnia and fill up the “URL” and “Body” sections with name, email, and score in raw JSON format. We cannot make a request from a common browser, as this function requires a POST method and data inside the body.
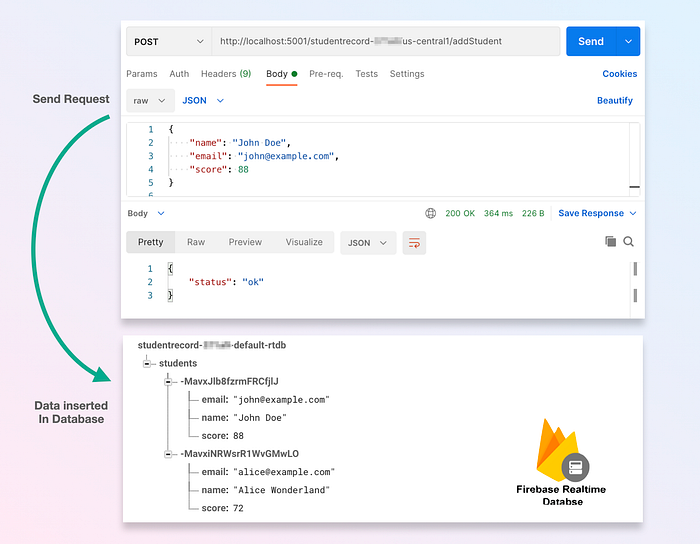
As shown in the image above, if the request is successful, the students node will be filled up with the new object. Try to add some more data and see the changes. Also, it will be useful to test our next function later. Take note that for this demo purpose, I did not add the validation or extra data checking. You may add validations or functionalities as needed.
Great, we are done with the first function. Let’s proceed to the next one.
Function 2: getTopStudent(limit:)
We will keep using the index.js and append this code (new function) at the bottom. This function will be using a GET method and have a limit on the results to return.
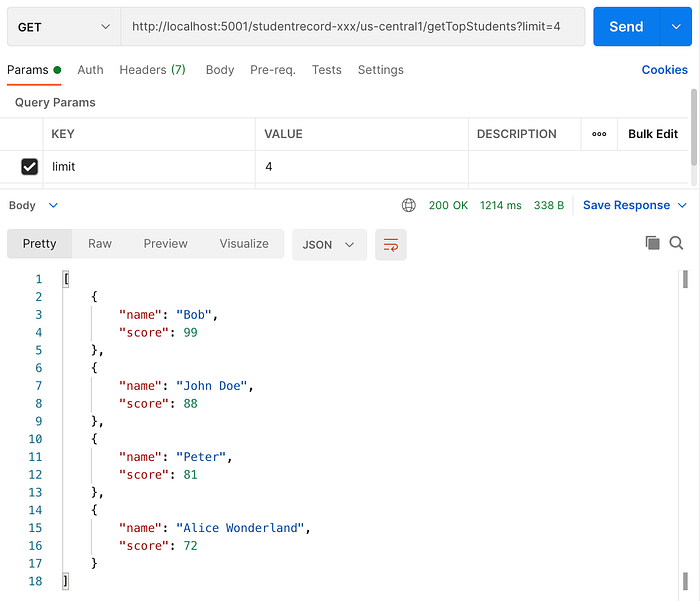
Your emulator log should print the new function URL. Use it and paste it into the browser or Postman with the limit query parameter being greater than 0.
✔ functions[getTopStudents]: http function initialized (http://localhost:5001/studentrecord-xxx/us-central1/getTopStudents).See the request and result below and try to change the limit param to see different sizes of arrays.
Deployment
After we have tested our functions in the emulator, we are ready to deploy to a production server. There are two main commands for the deployment.
1. Deploy all functions in the files
$ firebase deploy --only functionsOnce the functions have been successfully deployed, the server will respond with the new endpoints (quite similar to the emulator’s output).
Function URL (addStudent): https://us-central1-MY_PROJECT.cloudfunctions.net/addStudentFunction URL (getTopStudents): https://us-central1-MY_PROJECT.cloudfunctions.net/getTopStudents
2. Deploy only specified function
This is useful to avoid overwriting the function.
$ firebase deploy --only functions:getTopStudentPlease take note that to enable deployment into the server, we need to subscribe to the Blaze plan, as mentioned in the Firebase documentation:
“Keep in mind that to deploy to the recommended Node.js 14 runtime environment, your project must be on the Blaze pricing plan. See Cloud Functions pricing.”
Great work! We have learned the basic cloud function setup and implementation. The complete source code for index.js can be downloaded in my gist.
What’s Next?
You may explore more functionalities that can be added to your function, such as listeners (triggers), authentication, and middleware. Furthermore, the cloud functions can also be built with advanced modules using the Express.js framework. There is also a collection of sample codes with various modules provided in the Firebase GitHub repository.
Hopefully, this article will help you improve your development skills. Thanks for reading. Feedback is most welcome. Happy coding!

