Member-only story
How To Create a WebSocket in Python
An introduction to WebSockets
“A WebSocket is a computer communication protocol, providing full-duplex communication channels over a single TCP connection.” — Wikipedia
In this piece, you’ll learn how to set up your WebSocket in Python using the WebSockets API.
The Websocket API makes a two-way interactive communication session between the client and the server possible. With the API, you can send and receive messages in an event-driven manner without having to poll the server for data all the time. This leads to less overhead and allows real-time data transfer from and to the server.
Getting Started
WebSocket requires Python ≥ 3.6.1.
You can simply install the WebSockets API in Python with the following command:
pip install websocketsAfter reading this piece, you’ll understand what a WebSocket is exactly. I’m going to give you an intermediate example where the server synchronises all the messages it gets with its connected clients.
I won’t touch subjects like security — everything I’ll show will be written in Python. It’ll be simple enough to comprehend for everyone that’s at least a bit familiar with the language or with programming in general. This way, it’ll be easier for you to write a consumer, producer, or even a server in another language or for a front-end application.
I hope you’ll find the provided examples useful, and I encourage every developer out there to try out WebSocket at least once in your career — it’s awesome. There is more than REST, you know!
A Simple Message Consumer
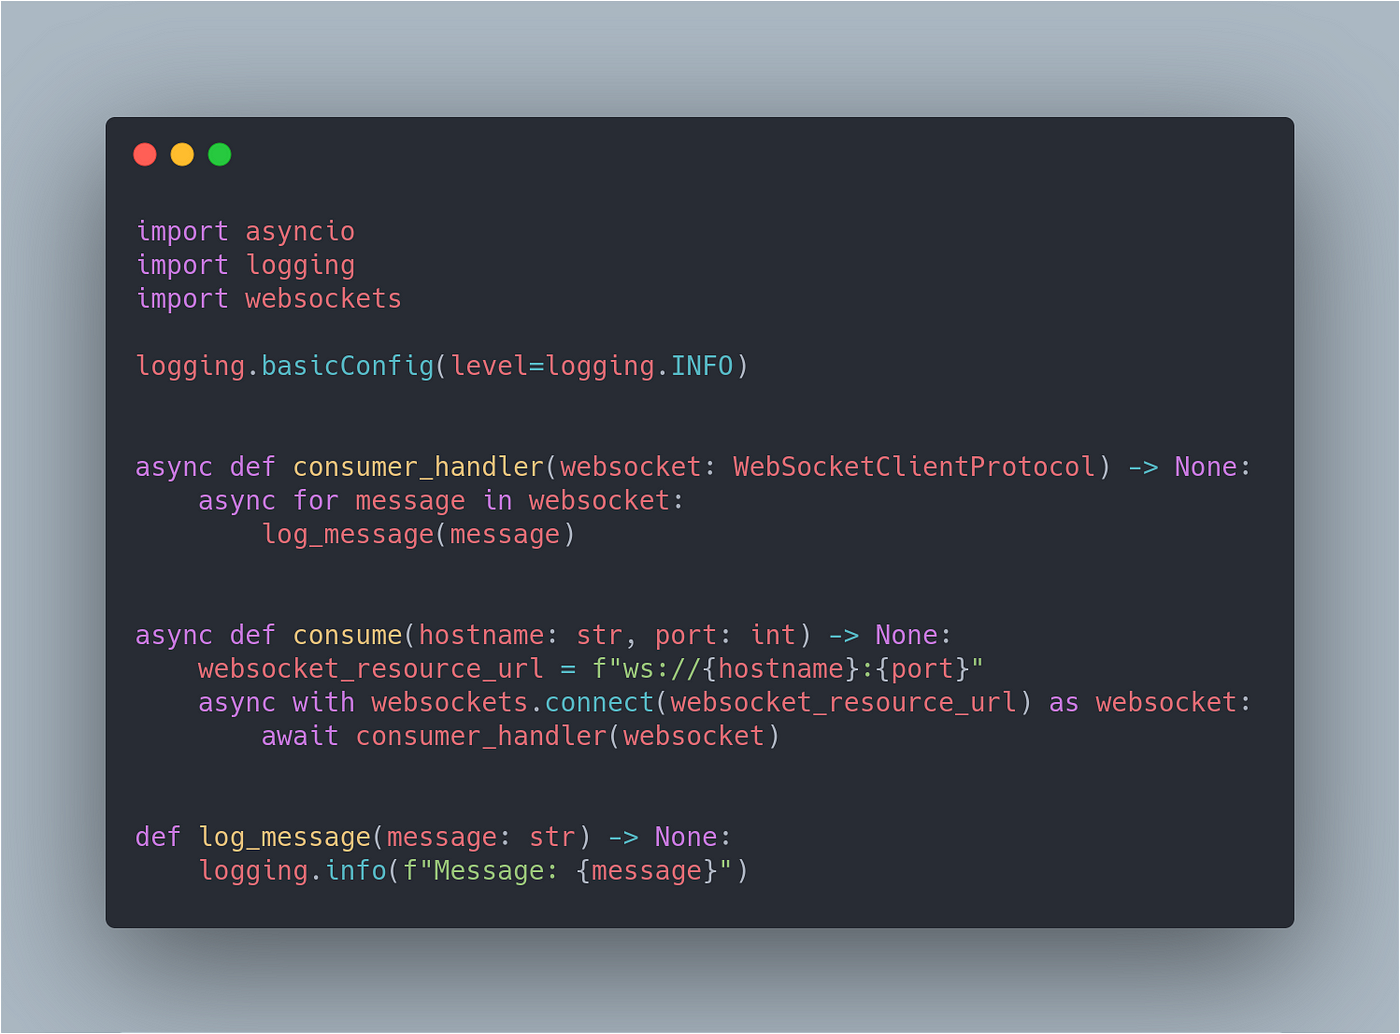
So first, let’s start with the consume coroutine I provide above. I’m going to explain every line of the code above so you’ll understand what happens well. To shortly summarize what’s happening above: We connect to the WebSocket specified by a specific WebSocket URL. Every message that’s generated by the WebSocket server is logged.