How I Finally Managed to Debug My Google Cloud Hosted Alexa Skill Locally
Fours steps to easily debug your Alexa skill

During the development of my Alexa Skills, I came across multiple pitfalls when developing those as servlets and not as AWS lambda functions. It took me quite some time to figure out how to solve them, including reading many different Websites, blog posts, and watching YouTube videos.
Since I’d love to have some kind of archive where I can look up such things, I thought that there must be others who would find this information useful, so I decided to share my knowledge and hopefully, somebody will find it helpful.
Why
In 2017, when I was working on my first Alexa Skill, I “debugged” my code using simple log messages, probably like many beginners, and it was fine for me at that time, but it was more time consuming than doing usual debugging and not that comfortable as well. So as soon as the processes/the software become more complicated, it wouldn’t be bad to be able to really debug the code. It was only later that I started to think about how this could be done better and found this way, which I will now explain in detail.
I already have an Alexa Skill
If you already have an Alexa Skill running on Google App Engine and just want to know how you can debug it, click here.
Table of Contents:
- Step one — Create a new Skill at Amazon
- Step two — Setup the Java Project in IntelliJ
- Step three — Create the Alexa Skill classes
- Step four — Finalize everything and start debugging your Skill
- Summary
Let’s jump right in
What you need:
- IntelliJ IDE
- JDK 8 or 11+
- Apache Maven 3.8.4 +
- ngrok (https://ngrok.com)
This account must already be set up:
- Amazon Developer Account — for creating a new Alexa Skill
Step one — Create a new Skill at Amazon
Open https://developer.amazon.com/alexa/console and create a new Alexa Skill:

Provide a name, select “Custom” as type of your skill and choose “Provision your own”, since we’re going to “host” this skill on our local machine:

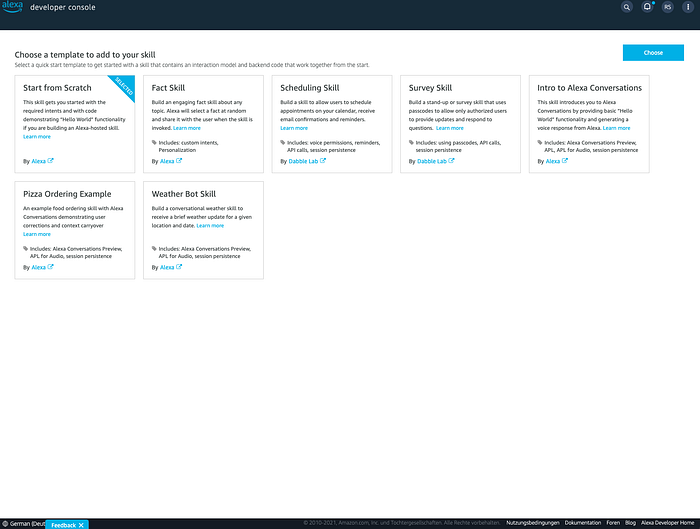
Click create and select “Start from Scratch”:
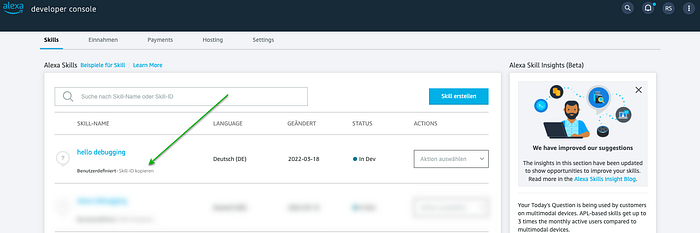
When the Skill creation is finished, click on “Copy Skill ID” and save the ID for later:
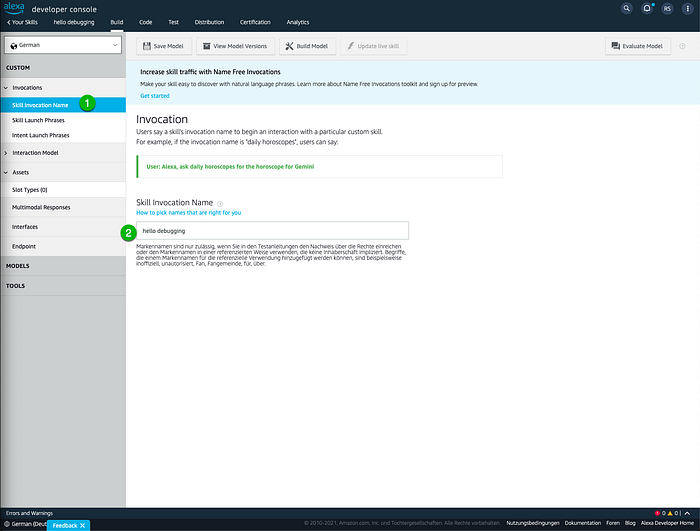
Now open the skill and set the invocation name to “hello debugging”. This invocation name is used for launching the skill via the simulator or the echo dot for example:
Click on “Save Model” and continue with the next steps.
Step 2 — Setup the Java Project in IntelliJ
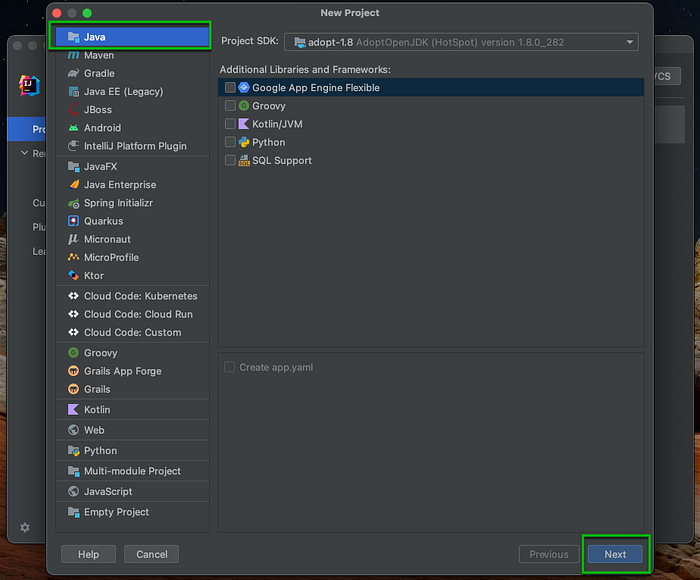
To be able to debug something, we need to write some code :-) Therefore we just create a new project in IntelliJ:

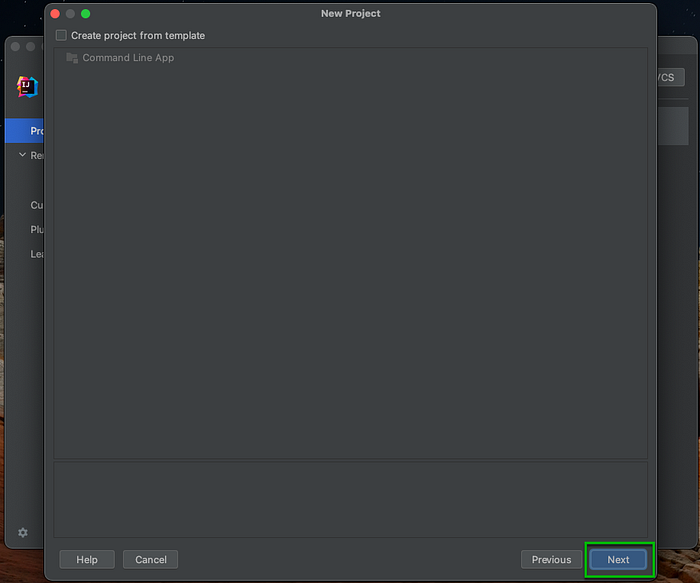
Select “Java” and simply continue with “Next”:
Confirm this step with “Next” as well:
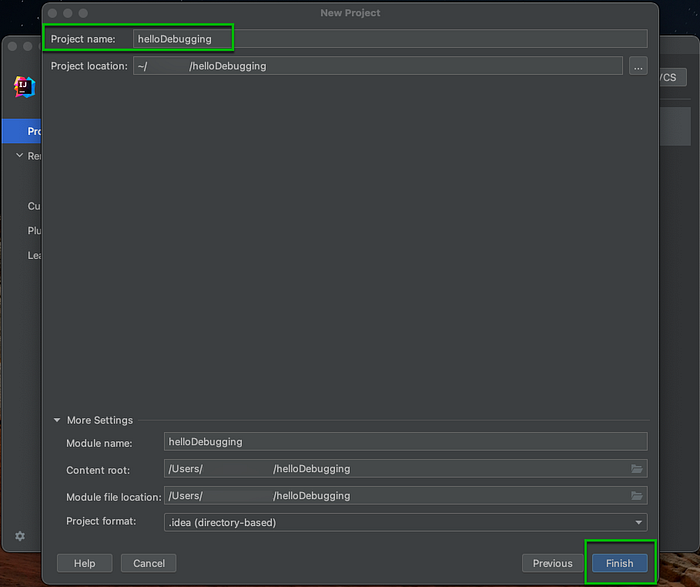
Now choose a “project name” and a project location:
When the projects is created and the main window is opened, click on “IntelliJ IDEA -> Preferences -> Plugins”, and install the “Cloud Code” plugin from Google:

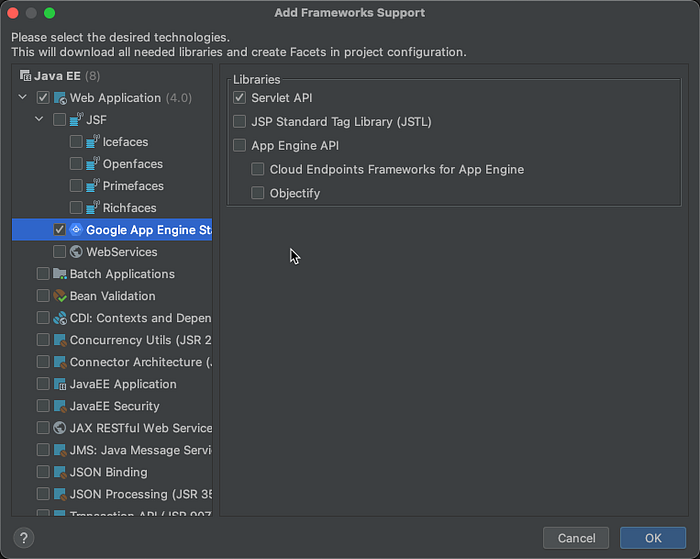
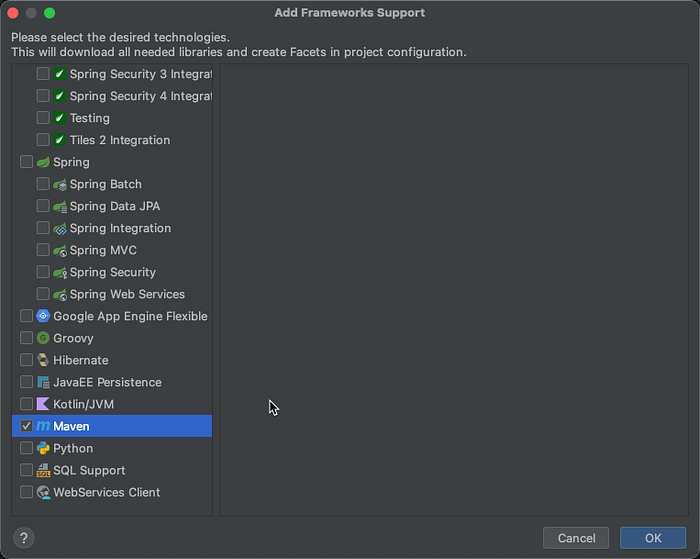
Once that is installed, we go ahead and add both “Maven” and “Google App Engine Standard” to the project:

Make sure that you select “Google App Engine Standard” and “Maven”. Confirm it by clicking “OK”:
At this point you can see that a “web” folder as well as a “pom.xml” file have been added to the project:
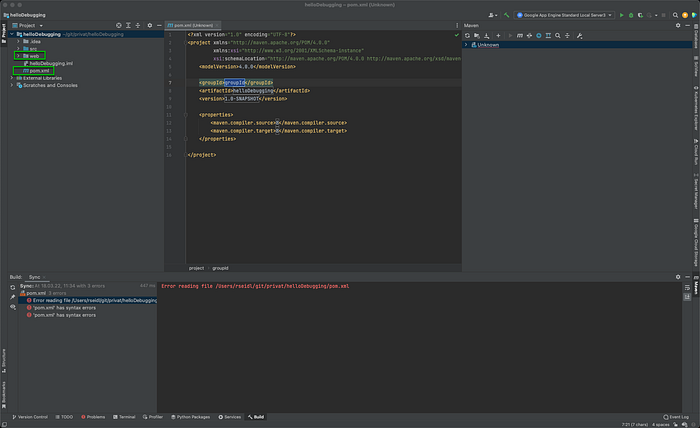
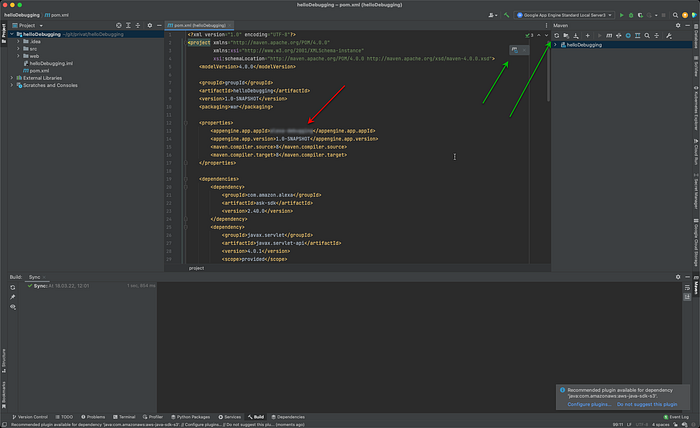
Let’s continue and add a few dependencies like the ask-sdk, the javax.servlet-api and the log4j-core via maven. To add these dependencies as well as the project configuration, just replace the pom.xml contents with this file.
If you’ve already created a project at Google Cloud Platform, you can replace “YOUR PROJECT ID” with your project id, otherwise you can simply continue with this “dummy” id in the file provided here:
Reload the maven project so that the changes are applied:
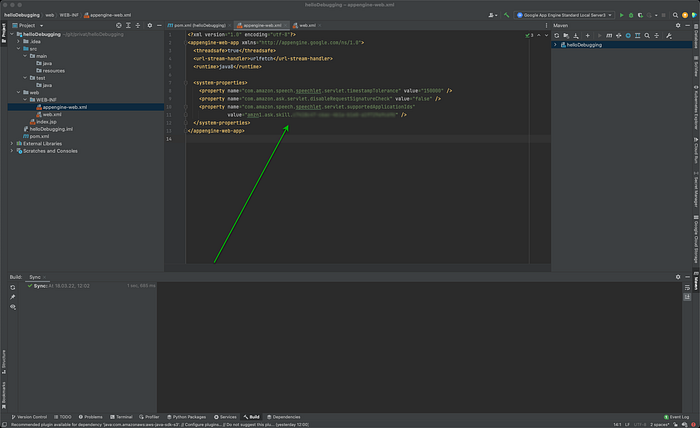
When the update is done, we can continue with the appengine-web.xml file, which contains certain configuration properties for the app engine. Copy the contents of the file:
and replace the placeholder “{YOUR SKILL ID}” with the previously saved skill id:
I’ve created a log4j2.xml file with some basic settings for logging messages to SYSTEM_OUT. Just copy the contents and place it at src/main/resources/log4j2.xml:
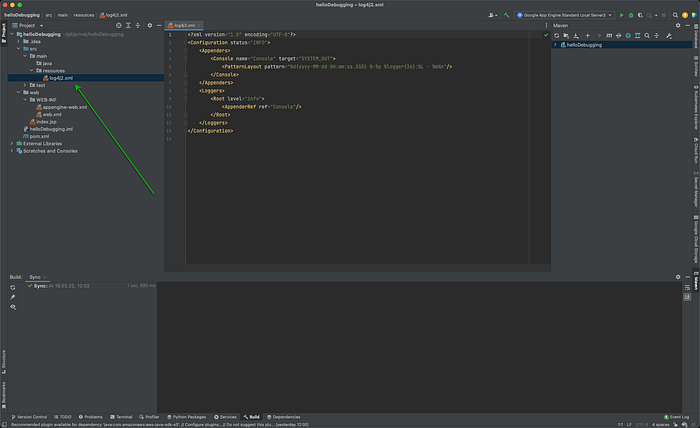
For more information on how to configure the logger, please refer to the log4j manual.
After all these steps, we check whether we have set everything up correctly. Open the project settings and check if “Facets” contains those two entries:
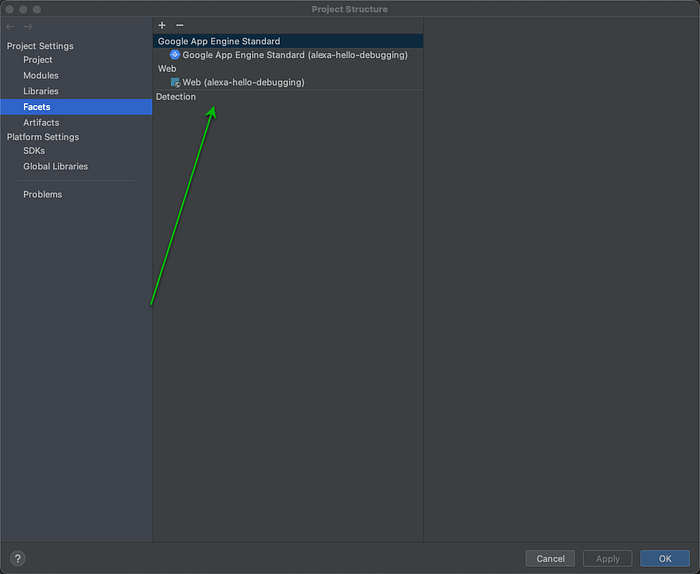
If not, add the “Web” and “GAE Standard” facet using the plus icon.
Next, let’s go to the “Artifacts” section and check if the “war” and “war exploded” artifacts are created when the project is build. If there is one missing, add it using the plus icon as well:

Make sure that both are available and that the “war exploded” artifact is included in the project build:

Step 3 — Create the Alexa Skill classes
First we need to create the handler class which will just do some basic handling of the launch request. Let’s place it in src/main/java/handler/LaunchHandler.java:

Next we need to create the entry point of the application, the servlet class. This is the class that extends the SkillServlet class from Amazon and provides the handlers as well some other important configurations like the skill id. We’ll add our previously created LaunchHandler as well as our skill id:
Last but not least, we need to add our AlexaServlet class to the web.xml file, so that we’re able to call our skill:
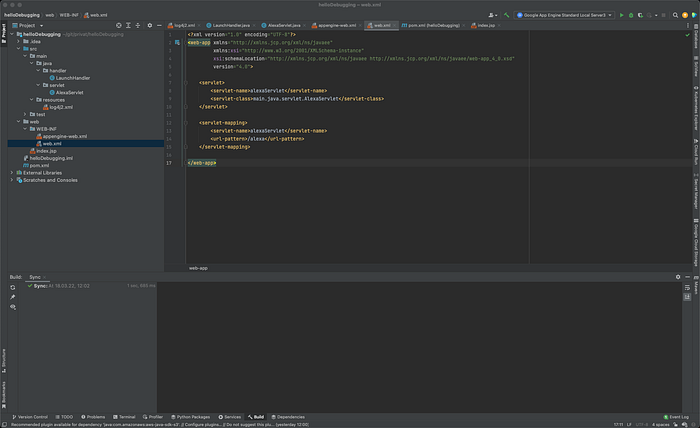
Basically we’re just referencing the AlexaServlet class and tell the application that this servlet can be reached at this URL: http://localhost:8080/alexa:
Now try to build and run the application by clicking on the debug button next to the run configuration. If everything went well, we should see that the server started without any problems:

Step 4— Finalize everything and start debugging your Skill
Now open a terminal and navigate to the location where you downloaded ngrok earlier and execute this command: ./ngrok http 8080
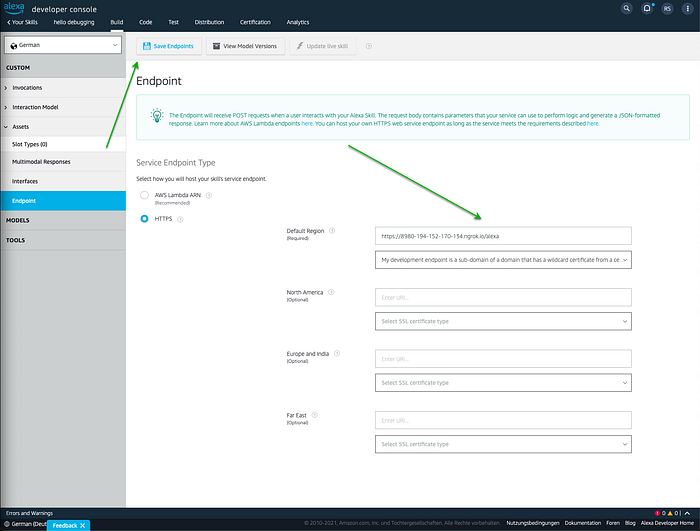
Ngrok tunnels to your local machine on port 8080 and provides a public URL with a valid certificate so that we can connect our skill on Amazon to our local machine. Go ahead copy the HTTPS URL and paste it at amazon:

Make sure you add “/alexa” at the end of the URL so that our AlexaServlet is called and select “My development endpoint is a sub-domain of a domain that has a wildcard certificate” from the dropdown menu:
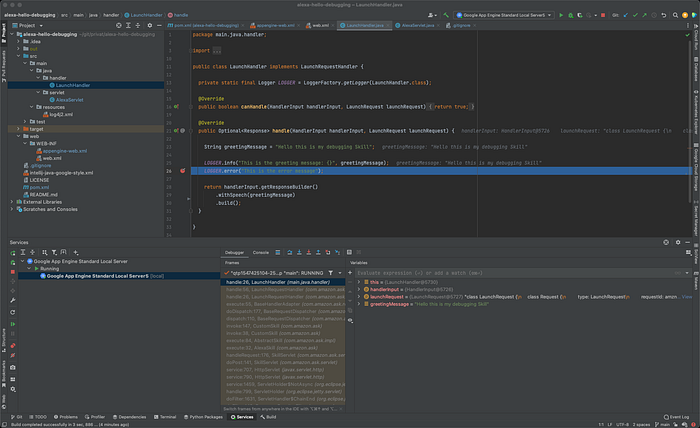
Now the moment we have been waiting for finally arrives: We can set a breakpoint, e.g. at one of our log messages:

If you now switch back to the browser and click on the “Test” tab in the alexa developer console, you can start the skill with either “öffne hello debugging” or “open hello debugging”, depending on the language of the skill. Furthermore, IntelliJ should now indicate that the breakpoint is active with this blue bar:

Summary
Let me summarise our journey. We created a new Alexa Skill in the Alexa developer console and set an invocation name.
Then we created a Java project in IntelliJ and added both, the Maven and the Google App Engine Standard framework support. After a few minor adjustments to the configuration files, we used ngrok to tunnel a public URL with a valid SSL certificate to our local machine.
Finally, we added the URL provided by ngrok, to the skill in the Alexa developer console and opened it, which triggered the breakpoint in IntelliJ. That’s it! I hope I was able to help some of you and wish you lots of fun developing your Alexa Skills!
Since it is, in my opinion, good practice, the whole project is of course also available on Github.

