Go API Design With Protocol Buffers and gRPC
A step-by-step guide based on a social media app

When building APIs using gRPC, the API design is commonly built using protocol buffers to define API endpoints, request messages, and response messages. This is typically accomplished using proto files that can later be used to generate the go code to make actual RPC calls and also to generate a reverse proxy to translate gRPC into JSON APIs, etc.
I’d recommend reading the articles in the following order:
- Go API Design With Protocol Buffers and gRPC
- Building Reverse Proxy (gRPC-Gateway)
- Go API — Database Connection
In this article, we’ll focus on the following:
- building API design using protocol buffers
- creating endpoints
- defining request messages
- defining response messages
- using enumerables
- handling timestamps
- returning empty responses
I won’t go into details on what gRPC is or why you should use protocol buffers as opposed to JSON, but if you are interested in getting to know more, here’s another article that explains a bit more about it.
For this article, the API design will be based on a social media app.
Before jumping in, it is important to mention that I’ll be using Go modules. So, to follow along in this series, it’ll be necessary to have Go modules working correctly on your machine since we’ll be testing the API in a Go application later.
First, let’s navigate to the $GOPATH using this command:
cd $GOPATHThen create or navigate to the following path:
cd src/github.com/YourGithubHandle/smaCreating this path now will be helpful later because we’ll eventually push this code to GitHub.
Once we are in the sma folder, which stands for social media app, let’s initialize a Go module.
go mod init github.com/YourGithubHandle/smaThis command will create the go.mod file for us.
Then we’ll create the posts.proto file under protos.
So, let’s create that folder and put the posts.proto file inside it.

We’ll first define the create endpoint. This endpoint will receive a request message with some parameters, and it will return a response message notifying us that the post object was created.
Let’s see the definition below:
The first line of this proto file defines which proto syntax we are using. In this case, that’s the proto3 syntax. If this line is not specified, the protobuf compiler will assume the proto2 syntax is being used. If you want to explore more about their differences, here is the proto3 and proto2 documentation.
In line 3, we have the package definition. This can help you avoid name clashes if you need to define the same message definition under a different package name.
Then we also have the option go_package. In Golang’s case, this will be used as the package name, but for this example, it is the same as the original package name. If you need it to be different, you can use this option.
Then we have an import. This import allows us to properly serialize created_at and updated_at timestamp. This import is literally another proto file timestamp.proto that protobuf will use to handle timestamps. Just like we are importing this external proto file, we will be using other external proto files for different purposes.
Also, we can use definitions from other proto files we own if we needed, including ones that don’t come from Google. We’ll be covering that later.
In line 9, we have the service definition for Posts. By defining a service in a proto file, we can generate Go code when the protocol buffer compiler uses this file. It will generate server and client interfaces with all the code to make RPC calls.
We define the endpoint that we’ll want to support within this service. In this case, we have the create post endpoint, which takes the CreatePostReq and returns the created Post object.
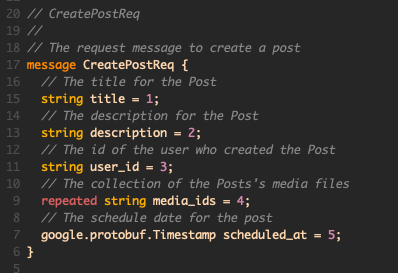
Let’s focus on the CreatePostReq message first.
This message defines the parameters this endpoint will accept in the request.
The structure is first defining the field’s type, then the field’s name, and then the field’s number.
The field’s type specifies the data type of this param, either a string, integer, boolean, float, double, bytes, etc.
The field’s name is just the name of the param itself.
The field’s number is the unique number that is used to identify each field in the binary format. And should not change once your message type is already being used. One important thing to note here is that you should try to reserve the numbers from 1 to 15 for the most important and frequent fields in your message.
This is because the field numbers from 1 to 15 take one byte to encode and from 16 to 2047 take two bytes. So, it is perfectly fine if you have 10 fields in a message that goes from 1 to 10, and then two other fields that have a field number greater than 15 because you want to reserve those five numbers for future fields.
The last thing to mention about this CreatePostReq message is the last field has an extra word at the beginning of the definition. This is because this last param is an array, and the way to represent this in protocol buffers is using the repeated word at the beginning of the field definition. The default value of a repeated field would be an empty list or array, depending on the programming language this message is translated to.
Let’s now inspect the definition of the Post message. The first four fields are self-explanatory, so let’s go to the status field. Here we are using an enum (defined in line 50) as the field’s type. Using an enum will ensure this field only accepts one of the options in the enum. If no value is passed, the enum value with the field number of 0 will be the default.
A couple of considerations for enums are that it has to have a zero value since the zero value is considered the default value. Another thing is that for compatibility with proto2 syntax, the zero value has to be the first element in the enum.
Finally, we have the created and updated fields in the Post message, and here the field’s type is google.protobuf.Timestamp, which is, in turn, has another protobuf message with two fields: seconds and nanos.
We’ll be adding more endpoints to this file, but for now, let’s go ahead and generate the Go code for this proto file.
First, let’s install protobuf with this command:
brew install protobufWe’ll also need to install protoc-gen-go and protoc-gen-go-grpc, as shown below:
go install google.golang.org/protobuf/cmd/protoc-gen-go@latest
go install google.golang.org/grpc/cmd/protoc-gen-go-grpc@latest
Then make sure you update your path
export PATH="$PATH:$(go env GOPATH)/bin"After that, make sure “enable module” is on
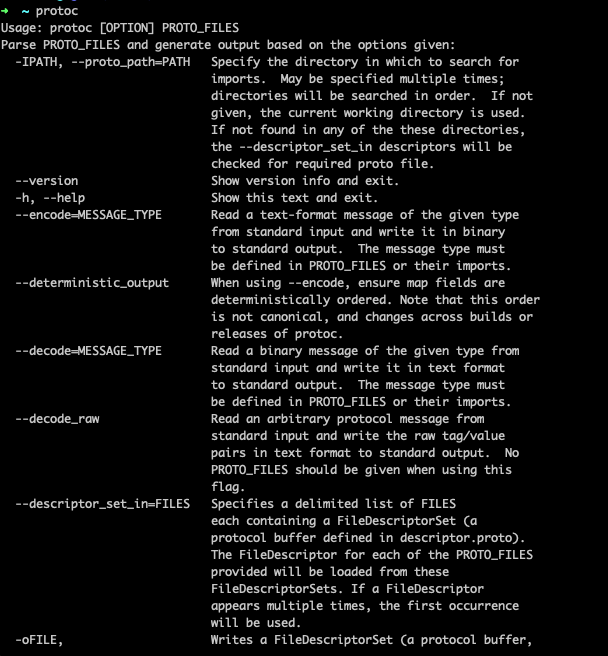
export GO111MODULE=onIf you type protoc, you should see the following:
Now, let’s navigate to the protos folder and run the following command to generate the Go code. Before doing this, make sure you create the src/go/sma folder structure.
protoc --go_out=src/go/sma \
       --go_opt=paths=source_relative \
       --go-grpc_out=src/go/sma \
       --go-grpc_opt=paths=source_relative \
       posts.proto
This will generate the Go code with the Posts service and endpoint definitions.
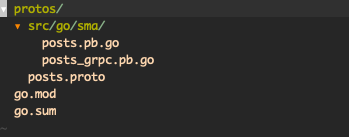
Great! We’ve generated the code for the Posts service containing the create endpoint.
To continue building the Posts service, we need to add the UPDATE, SHOW, LIST, and DELETE endpoints.
Here’s the definition for the update endpoint:
As usual, we define the RPC endpoint with a request message and a response message. That is not new at this point. Let’s examine the UpdatePostReq message definition.
The first field of this message is update_mask , and its type is google.protobuf.FieldMask.
Field masks are used for two things, either to explicitly define the set of fields that should be returned by a get operation or the fields that will be updated in the case of an update operation. It filters out the fields sent in a patch request and only leaves or allows the ones specified in the mask.
For a get operation, it will take the response and only return the fields that are present in the mask. The remaining fields will default to the default value of the data type they hold. For endpoints that return a collection of objects, the field mask will apply to each object in the collection. In this case, the mask object is the last field in this message.
Later, we’ll see how this field is used when we write the annotations for this proto file. One thing to note here is that the REST verb for this endpoint will be PATCH since we are using a field mask. PUT is only used for full updates.
On line 8, we have the import of this proto file to use FieldMask.
UpdatePost holds the permitted attributes to be updated. This means that the endpoint will permit the title, description, media_ids, and schedule_at attributes to be updated.
PostId is the id of the post to be updated.
All right, let’s move on to the show endpoint, which is shown below:
This is a pretty simple one. In the PostIdReq message, we have only one field, which is the post_id of the post we want to show. As a response, we return the Post message we declared before.
Here’s the code for the ListPosts endpoint definition:
For this endpoint, we’ll return the collection of posts associated with a given user so that the user id will be needed in the request message.
If we take a look at the ListPostsReq message, the first field is the actual user_idThe next one is a search query string in case we want to search through the collection. It also has page and per_page fields to specify which page to return and how many elements each page should have.
The last element is the filter, and here again, we have an enum representing the type of this field, which means we can only filter by the elements specified in the Filters enum, which maps the posts’ statuses.
In ListPostsResp, we have only two fields. The first one represents the collection of posts that will be returned, and the second one focuses on the pagination data object.
Finally, let’s see the definition of the delete endpoint:
This endpoint is pretty simple; it takes the PostIdReq we previously defined and returns an empty response message.
Let’s also update the CreatePostResp message to add the scheduled_at field since I added it in the UpdatePost endpoint.
We are done with the API for the Posts service.
Here’s the entire proto file:
Now, let’s generate the Go code for this service.
To avoid having to remember the last protoc command we ran to generate the Go code, let’s create a Makefile under the protos folder with the following code:

Now, let’s open the terminal under the protos folder and run the make command:
make proto proto_file=posts.protoThis will generate the Go code! Great, we have defined the API endpoints for the Posts resource using protocol buffers and gRPC!
The folder structure looks like this:
Let’s now see how to generate swagger and openapi documentation for the Posts API.
First, let’s define the service configuration file for the posts.proto file. This file contains the HTTP configurations and mappings from gRPC to REST API.
Create a new file inside the protos folder and call it posts_annotations.yml . The code follows:
Here we have the HTTP rules for each endpoint from the posts.proto file.
The selector specifies the RPC endpoint, and then we specify the HTTP verb followed by the rest path we want to map this endpoint to. Here we specify the parameters that must be in the path. In this case, the user_id and the post_id depend on each endpoint.
In the UpdatePost endpoint, we used a field mask, and we called the updatable object Post. That is why the body has a string that says “post.” This is referring to the Post message we have in the UpdatePostReq message.
Run this command to install swagger and protoc-gen-openapiv2:
go install github.com/grpc-ecosystem/grpc-gateway/protoc-gen-swagger@latest
go install github.com/grpc-ecosystem/grpc-gateway/v2/protoc-gen-openapiv2@latest
Let’s create two new folders. Under src, create the swagger folder and the openapi folder.
Now, we need to extend the command in the Makefile to generate the API documentation with swagger and openapi. We will also include the command to generate the gateway Go code so that our API is ready to implement a reverse proxy.
The new command looks like this:
Let’s generate the code.
make proto annotation_file=posts_annotations.yml proto_file=posts.protoThis will create the swagger JSON files and also a new file posts.pb.gw.go, which contains the code to implement a reverse proxy.
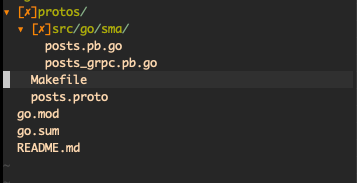
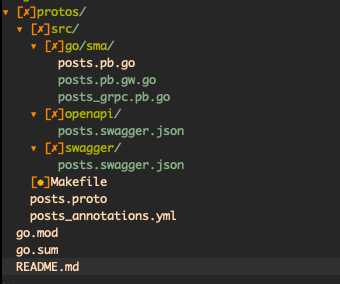
This is the new folder structure after running the make command:
Great. We have covered a lot, and our API design is ready to be used in a gRPC project. If you want to see how to implement the reverse proxy and consume this API, leave a comment!
Thank you for reading. Stay tuned.

