Getting Started With Brownie (Part 2)
Working with Brownie projects

Missed part one? Click here.
We’ve just installed Brownie and confirmed that it works. Now what? Let’s start with a quick orientation, and then we’ll dive into some of the more important areas. First things first: We need a project!
Create a Brownie Project
Most of the time when using Brownie, you’ll be working with a project. A project consists of one or more smart contracts, unit tests, and scripts to handle deployment and common interactions.
We can start a new project by typing brownie init inside an empty folder, but for this tutorial, we’re instead going work from a pre-made project. Brownie offers several templates (known as mixes), and a tool for initializing them, brownie bake.
Let's get started by initializing token-mix, a simple ERC20 project:
brownie bake token
cd token
Once the initialization finishes, open the newly created token subdirectory and have a look around. If you’ve used other smart contract frameworks, this layout is likely familiar.
contracts/holds all of the source files for your project’s smart contracts. Brownie supports contracts written in Solidity (with a.solsuffix) and Vyper (with a.vysuffix).interfaces/holds smart contract interfaces required by your project. An interface is a file that can be used to interact with a contract but doesn’t contain enough information to deploy it.scripts/holds the Python scripts used for deployment and interaction with your project.tests/holds the unit tests for your project. Brownie uses the pytest framework for testing.
Run the Compiler
The project was initialized, but it hasn’t been compiled yet. We can manually trigger the compiler with the following command:
brownie compileYou should see some output like this:

Brownie automatically tracks the files in your project’scontracts/ folder and will run the compiler when a file is added or changed. There isn’t often a need to manually compile — but it’s still good to know how.
Run the Tests
Brownie uses pytest for unit testing. Pytest is a mature and full-featured testing framework — if you haven’t used it before, you’ll quickly come to love it. We’ll get into the how of unit testing in another article. For now, let’s just run the test suite:
brownie testYou should see output like this:

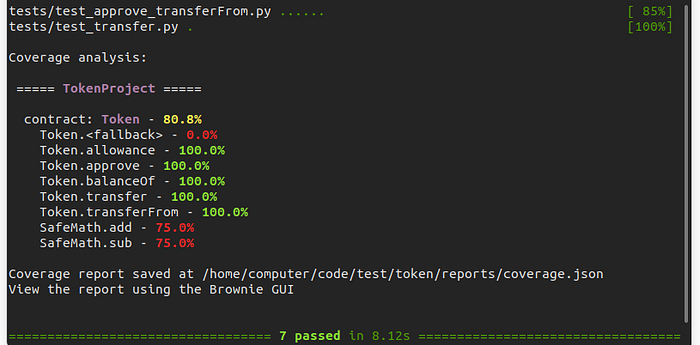
Brownie can also evaluate test coverage:
brownie test --coverageYou should see output like this:
Run the Deployment Script
Inside the scripts/ folder, you’ll find a single file, token.py. This is a very basic script that can handle deployment of the Token contract. Let’s try running it:
brownie run tokenYou should see output like this:

You may have noticed that Brownie loaded Ganache and the contract was deployed there. This is good since we’re just figuring out how everything works, but when it comes time for an actual deployment we’d use the --network flag to instead deploy to a live network. More on that later.
Launch the Console
The Brownie console is a valuable tool for quick testing and debugging while you develop. It’s also an excellent starting point to familiarize yourself with Brownie’s functionality.
To load the console:
brownie consoleYou should see something like this:
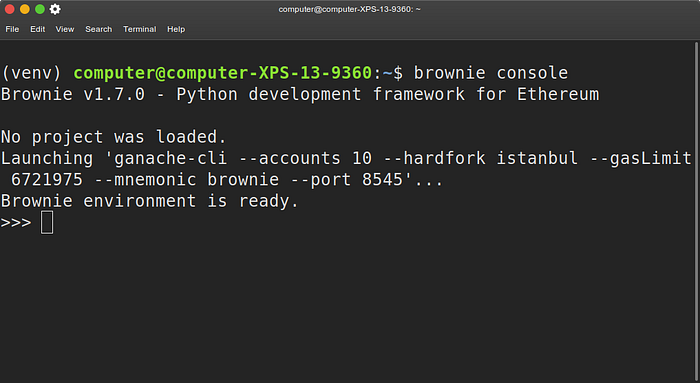
As you type, Brownie provides auto-completion and input hints to help you navigate. You’re connected on a development chain provided by Ganache, so feel free to play around. You won’t break anything :)
Next Up
Don’t close the console just yet! In Part Three of this series, we’ll be using it to explore some of Brownie’s functionality.