From Text to Unreal Engine Object Using OpenAI’s Point-E

As a developer, you’ve likely heard of OpenAI’s GPT-4, the revolutionary language model that’s transforming the way we interact with technology. OpenAI has made yet another significant advancement in artificial intelligence with the release of Point-E, an AI system that can create 3D models from text prompts. With the ability to generate 3D models in just a few minutes on a single GPU, Point-E has the potential to revolutionize the way we create and manipulate virtual objects. I wanted to test it myself and see how good the system is. In this article, I will show you how to make 3D models using Point-E yourself and use them in Unreal Engine.
If you quickly want to test out Point-E, you can try their demo text to 3D model generator. I will use Point-E’s GitHub repository to generate the 3D model in Google Colab. They have made it really easy by providing the notebook files, so all you have to do is load them directly in your google colab notebook by using the GitHub link.
Choose Upload notebook from the files tab and paste the Github URL. Wait for it to load and select the text2pointcloud.ipynb file. Also make sure to change the runtime type to GPU from the runtime tab, in case it is not already set and click connect.

Before running the cells, we need some library files from the original repository and we also need to install some pip dependencies, so we will do that first. We can do that using the following code. Run this in a separate cell.
!git clone https://github.com/openai/point-e.git
%cd ./point-e
!pip install -e .
This should successfully install the dependencies we need. Now, we can just run the next 3 cells from importing all the libraries, loading the base models up to initializing the point cloud sampler.
Now comes the interesting part, the text prompts. You can get creative here. I am going to choose to create a simple tree. I encourage you to read their paper to know more about the capabilities of this system.
# Set a prompt to condition on.
prompt = 'a tall green tree'

# Produce a sample from the model.
samples = None
for x in tqdm(sampler.sample_batch_progressive(batch_size=1, model_kwargs=dict(texts=[prompt]))):
    samples = x
Enter a prompt you like and run this cell. This will take a few minutes and it should be done after 130 cycles. After that, you can see the model you have generated by running the last remaining cell. If you want to see the best model change the grid size to 1. But the better way to view this model is with a 3D viewer.
import plotly.graph_objects as go
viewer = go.Figure(data=[go.Scatter3d(
                        x=pc.coords[:,0], y=pc.coords[:,1],z=pc.coords[:,2],
                        mode='markers',
                        marker=dict(size=2,color=['rgb({},{},{})'.format(r,g,b) for r,g,b in zip(pc.channels["R"],pc.channels["G"],pc.channels["B"])]))],
                   layout=dict(scene=dict(xaxis=dict(visible=False),yaxis=dict(visible=False),zaxis=dict(visible=False)))
          )
viewer.show(rendere="colab")
And just like that, we were able to generate a 3D model. Even if this is not the perfect model, this is actually amazing how fast it is generated. And every time you run it, you will get a different 3D model. Go on and try different prompts. We are not quite done yet.
Generate 3D Mesh from Point Cloud
We need to be able to actually use this model in Unreal Engine. For that, we will convert this to a 3D mesh using another AI model provided. This AI will convert the point cloud to a mesh and we can save it as .ply. We can use this notebook to do that. First, let’s import the libraries and load the SDF model.
from PIL import Image
import torch
import matplotlib.pyplot as plt
from tqdm.auto import tqdm
from point_e.models.download import load_checkpoint
from point_e.models.configs import MODEL_CONFIGS, model_from_config
from point_e.util.pc_to_mesh import marching_cubes_mesh
from point_e.util.plotting import plot_point_cloud
from point_e.util.point_cloud import PointCloud

device = torch.device('cuda' if torch.cuda.is_available() else 'cpu')

print('creating SDF model...')
name = 'sdf'
model = model_from_config(MODEL_CONFIGS[name], device)
model.eval()

print('loading SDF model...')
model.load_state_dict(load_checkpoint(name, device))
Plotting the result, we can check if we still have the point cloud.
# Plot the point cloud as a sanity check.
fig = plot_point_cloud(pc, grid_size=1)
If you have it, you should be able to see the same point cloud as we saw earlier. Now, we will generate the mesh and save it. I am increasing the grid size of the model to 128 for a better resolution.
import skimage.measure # To avoid AttributeError
# Produce a mesh (with vertex colors)
mesh = marching_cubes_mesh(
    pc=pc,
    model=model,
    batch_size=4096,
    grid_size=128, # increase to 128 for resolution used in evals
    progress=True,
)
# Write the mesh to a PLY file to import into some other program.
with open('mesh.ply', 'wb') as f:
    mesh.write_ply(f)
After running this, you should see a mesh.ply file. Right-click on the file and download it.
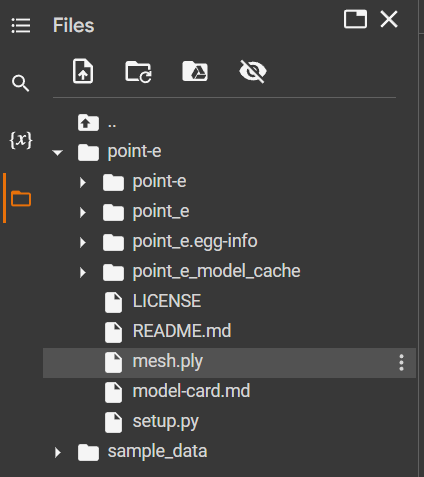
You can view the downloaded mesh file using this online tool — 3D viewer. I am going to use Blender to view the 3D mesh.
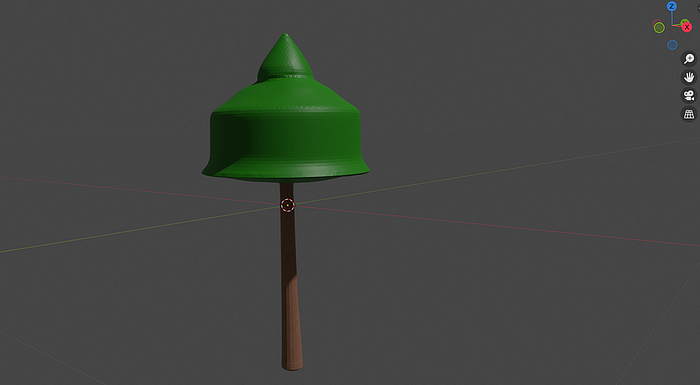
Blender
To get started, open Blender and create a new project. Next, remove the default cube by selecting it and pressing the ‘X’ key followed by ‘Delete’. Now, it’s time to import your PLY model. Head to the ‘File’ menu, select ‘Import,’ and choose the ‘PLY’ format. Navigate to the location where you saved your 3D model and click on the file to import it into the Blender workspace. It is time to create a UV map for your mesh.
- Switch to ‘Vertex Paint’ mode: In the top-left corner of the viewport, click on the dropdown menu and select ‘Vertex Paint’ mode. You should now see your mesh with its original colors.
- Enter ‘UV Editing’ workspace: At the top of the Blender window, click on the ‘Layout’ tab and select ‘UV Editing.’ This will change the workspace layout and show you the UV editor on the left side of the screen.
- Select the entire mesh: In the 3D viewport on the right side, press ‘A’ to select your entire mesh.
- Open the ‘UV Mapping’ menu: With the mesh selected, click ‘UV’ in the top menu, and then choose ‘Smart UV Project.’
- Adjust the settings: In the ‘Smart UV Project’ pop-up window, change the ‘Angle Limit’ to 50 degrees and the ‘Island Margin’ to 0.005.
- Confirm your changes: Click ‘OK’ to apply the settings and generate the UV map.
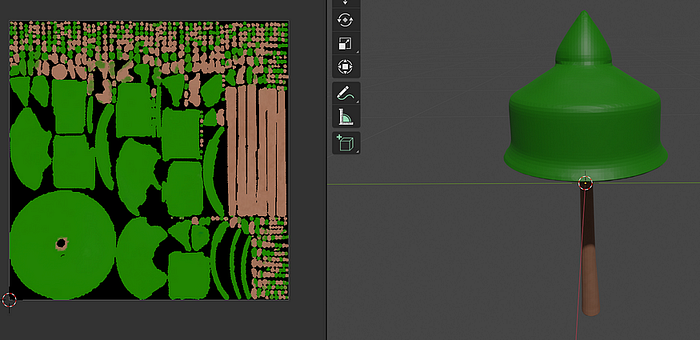
You should now see the UV map of your mesh displayed on the left side of the screen in the UV editor.
Now that you have a UV map for your model, let’s create a material and assign the vertex colors to it:
- Switch to ‘Shader Editor’ workspace: At the top of the Blender window, click on the ‘UV Editing’ tab and select ‘Shading.’ This will change the workspace layout and show you the Shader Editor at the bottom of the screen.
- Create a new material: In the 3D viewport on the right side, make sure your mesh is still selected. Then, go to the ‘Material Properties’ tab in the right sidebar and click the ‘New’ button to create a new material.
- Add a ‘Vertex Color’ node: In the Shader Editor, press ‘Shift+A’ to open the ‘Add’ menu, then navigate to ‘Input’ and select ‘Vertex Color.’ This will add a ‘Vertex Color’ node to the editor.
- Connect the ‘Color’ output: Click and drag the ‘Color’ output of the ‘Vertex Color’ node to the ‘Base Color’ input of the ‘Principled BSDF’ node. This will apply the vertex colors to the base color of the material.
- Add an ‘Image Texture’ node: Press ‘Shift+A’ again to open the ‘Add’ menu, then navigate to ‘Texture’ and select ‘Image Texture.’ This will add an ‘Image Texture’ node to the editor.
- Configure the ‘Image Texture’ node: In the ‘Image Texture’ node settings, uncheck the ‘Alpha’ option and click ‘OK.’ This will disable the use of the alpha channel in the image texture.
With the material and image texture set up, it’s time to bake the material onto the UV map.
- Open the ‘Render Properties’ tab: In the right sidebar, click on the ‘Render Properties’ tab (represented by a camera icon). Change Render Engine to Cycles.
- Configure baking settings: Scroll down to the ‘Bake’ section and expand it. Set the ‘Bake Type’ to ‘Diffuse.’ Make sure only the ‘Color’ option is checked under the ‘Influence’ settings. This will ensure that only the diffuse color information is baked.
- Bake the material: With the settings configured, click the ‘Bake’ button to start the baking process. Blender will now transfer the vertex colors from the material onto the UV map.

After the baking process is complete, you should see the UV map with the mesh colors in the ‘Image Editor.’ This baked texture can now be used in your FBX object, allowing you to easily import your model into Unreal Engine with its original appearance intact.
Export to FBX object
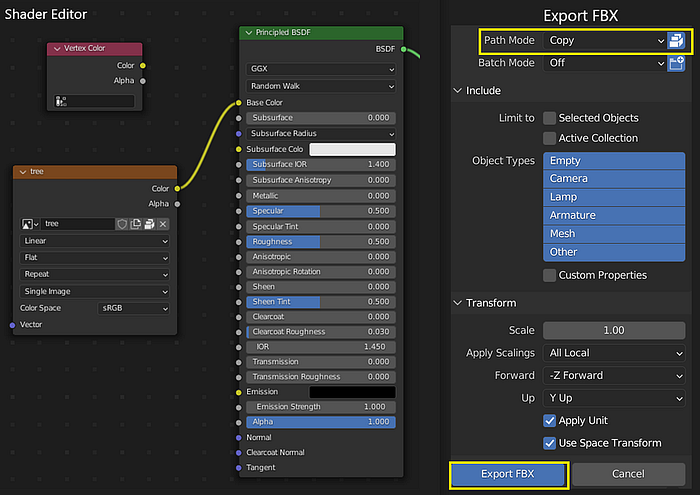
Before exporting, go back to the Shader Editor and disconnect the ‘Vertex Color’ node from the ‘Base Color’ input of the ‘Principled BSDF’ node. Then, connect the ‘Color’ output of the ‘Image Texture’ node to the ‘Base Color’ input of the ‘Principled BSDF’ node. This will ensure that the baked texture is used when importing the model into Unreal Engine.
Here’s how to export your model:
- Save the baked texture: In the ‘Image Editor,’ click ‘Image’ in the top menu and choose ‘Save As.’ Save the baked texture to a location on your computer where you can easily find it later.
- Prepare to export as FBX: With your model still selected in the 3D viewport, go to the ‘File’ menu, select ‘Export,’ and choose ‘FBX.’
- Configure export settings: In the export settings window that appears, make sure the following options are set as shown in the image.
- Export the FBX object: Click ‘Export FBX’ to save the model as an FBX object.
Congratulations! You’ve successfully converted your Point-E model into an FBX object using Blender. With the FBX object and baked texture, you can now import your model into Unreal Engine and use it in your projects.
Unreal Engine
It’s time to bring your 3D model to life in Unreal Engine. To do this, simply import the FBX file into your Unreal Engine project by dragging and dropping it into the ‘Content Browser.’ Once the model has been imported, you can also import the baked texture and assign it to the corresponding material slot. Now, you’re all set to add your model to the environment. Simply drag and drop the model from the ‘Content Browser’ into your scene, placing it wherever you like.
Now that your 3D model is all set, you’re ready to see it in action within Unreal Engine. But first, let’s have some fun! I’ve put together an environment featuring numerous objects that I’ve created using Point-E, following the same steps outlined in this article.
Prepare to be amazed as we dive into this interactive world, where creativity knows no bounds! This is the perfect opportunity to witness firsthand the incredible versatility and potential of your 3D models when used in Unreal Engine.
Conclusion
As we conclude this comprehensive guide on transforming your text into fully functional 3D models using OpenAI’s Point-E and integrating them into Unreal Engine, it’s evident that the possibilities for creativity are virtually limitless. By harnessing the power of cutting-edge AI technology and combining it with the versatile tools provided by Blender and Unreal Engine, you can bring your wildest ideas to life and create stunning, immersive environments for your projects.
I hope that you’ve found these guides informative, inspiring, and above all, enjoyable to follow. Remember that the real magic lies in experimentation and pushing the boundaries of your imagination. So go ahead, explore the incredible world of 3D modeling, and most importantly, have fun creating! The future of 3D design is here, and you are now equipped with the knowledge to make the most of it. Happy modeling, and may your creative journey be filled with endless discovery and excitement!
Try it yourself, and let me know what you think of Point-E.
Connect with me on Twitter to discuss interesting topics in the field of AI.

