Implementing Facade Design Pattern in C#
Hands-on implementation of the popular design pattern
Why do we need a Facade design pattern?
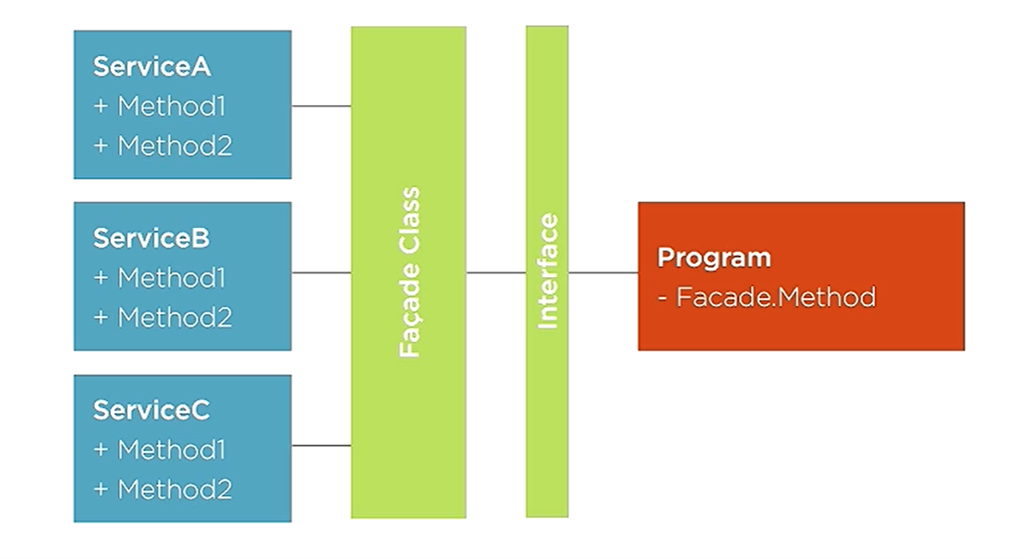
Take a sly look at the image below. The right-hand side class needs 4 methods that belong to the leftmost class. But in order to determine which four methods we need to access, we’ll likely need to dig around in the internals of leftmost ClassA. or there is a better solution!
I can just place a facade between my classes and now the facade has an internal reference to the ClassA and orchestrates calls on behalf of our Program class. We’re using a facade class which contains the classA and only expose the methods needed by our program. We can use more meaningful method names plus our program only talks to the facade without knowing about the classA at all.

The scalable and complex project obviously has hundreds of classes. This pattern assists our calling class by focusing on what is needed rather than going through everything, (Abstraction-oops).
Assume we want to implement a smartphone class that has 3 specifications: Processor, Memory(RAM, ROM) & Display. Our implementation might look like this:
Listing 1: class Processor —
Listing 2: class Memory —
Listing 3: class Display:
Listing 4: calling class, class SmartPhone:
Let’s first understand, this is a simple problem, but as smartphones need to follow the latest trend and innovation you’ll need to add more classes for every feature.
You’ll have to go through all of the mud of classes to reimplement smartPhone. Here we only have 3 classes (Display, Memory, Processor) but in a real-life project, as I said there would be hundreds of classes which make it difficult to look for classes that are needed to implement a new smartPhone.
We can add a middle layer that acts as a facade for our smartphone, which will take care of all the functionalities that are needed to make a smartphone. To make our pattern more advanced we can add one interface through which our smartPhone class will interact.
Why interface? Good question.
This abstraction allows a calling program (smartPhone in our case) to work solely with the facade and simplify the code. Introducing an interface here really tidies things up for the caller and allows easily adding new facade classes to the underlying service classes(more features, more classes) change in the future (more advanced smartphone classes in the future).
If tomorrow, I want to release a new smartPhone for Android 10 with new high-end specifications, that can be achieved by interacting with an interface.
Having said that, let’s start working with the Facade Design Pattern.
What if we put processor, memory, and display behind the facade so the smartphone doesn’t have to worry about the above complexity.
Step 1
Listing 5: Let’s add interface ISmartPhoneFacade:
Step 2
Listing 6: Now let’s add class SmartPhoneFacade:
Listing 7: Now a simpler look at our smartPhone class:
If tomorrow, the new smartPhone device comes, all I have to do is create a new facade, specific to that smartPhone features and inherit from interface ISmartPhoneFacade. This is the power of abstraction in oops.
Note: this might feel like a headache to add an extra class, but it helps in the bigger picture and this is where you can design classes that are loosely coupled.
I sincerely hope you enjoyed this blog and that you’re inspired to apply what you’ve learned to your own applications.
Catch me on Linkedin !!

