Error Handling in Angular
How to properly handle errors in Angular applications

In this piece, we’ll demonstrate how to properly handle errors in Angular applications.
Error handling in software development is as important as having a working application. In order to have a complete and robust application, errors and exceptions have to be properly handled.
I’ll walk you through efficiently handling errors in your Angular application. I’m using Angular 7.0.4 in this tutorial — I advise you use the same.
Prerequisites
The following should be available on your system:
Node
- Go to nodejs.org
- Download and install the available LTS version.
- To check your version, run
node -vin a terminal/console window.
Angular CLI

Visual Studio Code
I use VSCode but you can use any other IDE (Atom, Vim, etc.).
With these in place, we can start by creating a new folder for our application.
- Open the folder in VSCode by right-clicking in the folder and open with VSCode.
- Open VsCode terminal and create a new angular project.

- The
ng newcommand prompts you for information about features to include in the initial app project. Accept the defaults by pressing the Enter or Return key. - Cd into the project folder cd myErrorHandlingApp
Serve the application locally:

This will open the application in your local browser on localhost:4200. You should see this:

An error in an Angular application can either be a client-side error or server-side error:
- Client-side error: errors related to front-end code and the network — they throw 4xx status codes.
- Server-side error: errors related to back-end codes, database, and file system. They usually throw 5xx status codes.
We’ll demo error handling by consuming chucknorris API to display random jokes, using Angular’s in-built HttpClientModule.
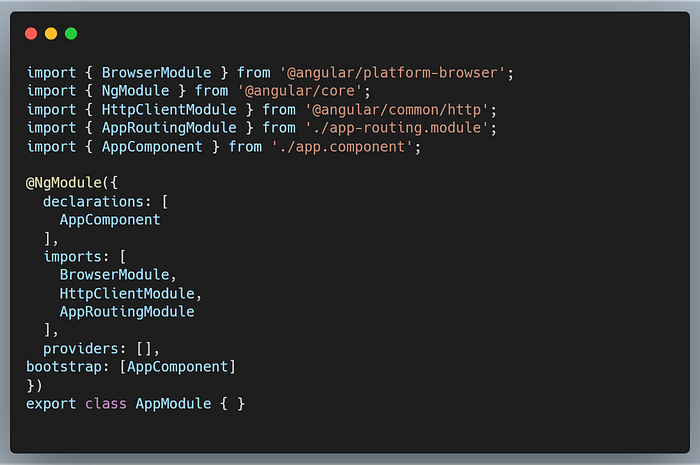
1. We start by importing HttpClientModule to our root module (app.module.ts).
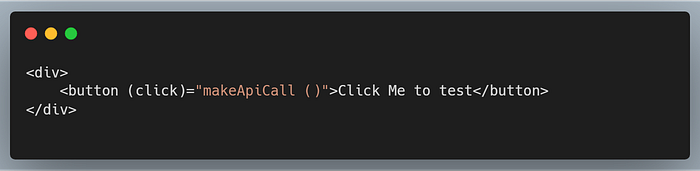
2. In app.component.html, we create a button which will initiate an HTTP request on click:
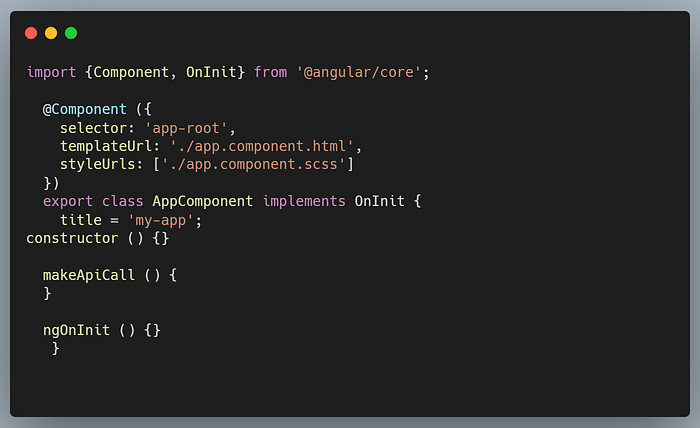
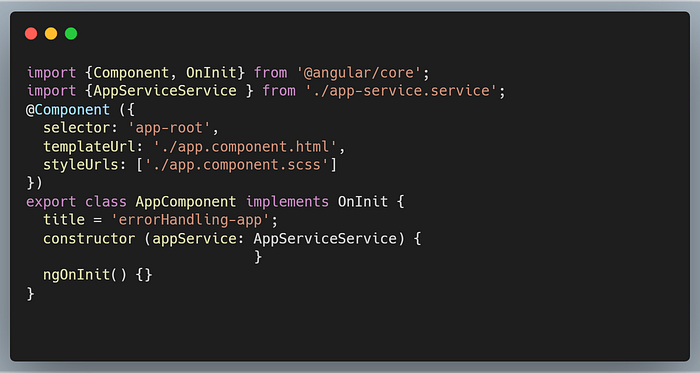
3. In app.component.ts, we include our constructor function and extend the component’s class to implement the OnInit lifecycle hook.
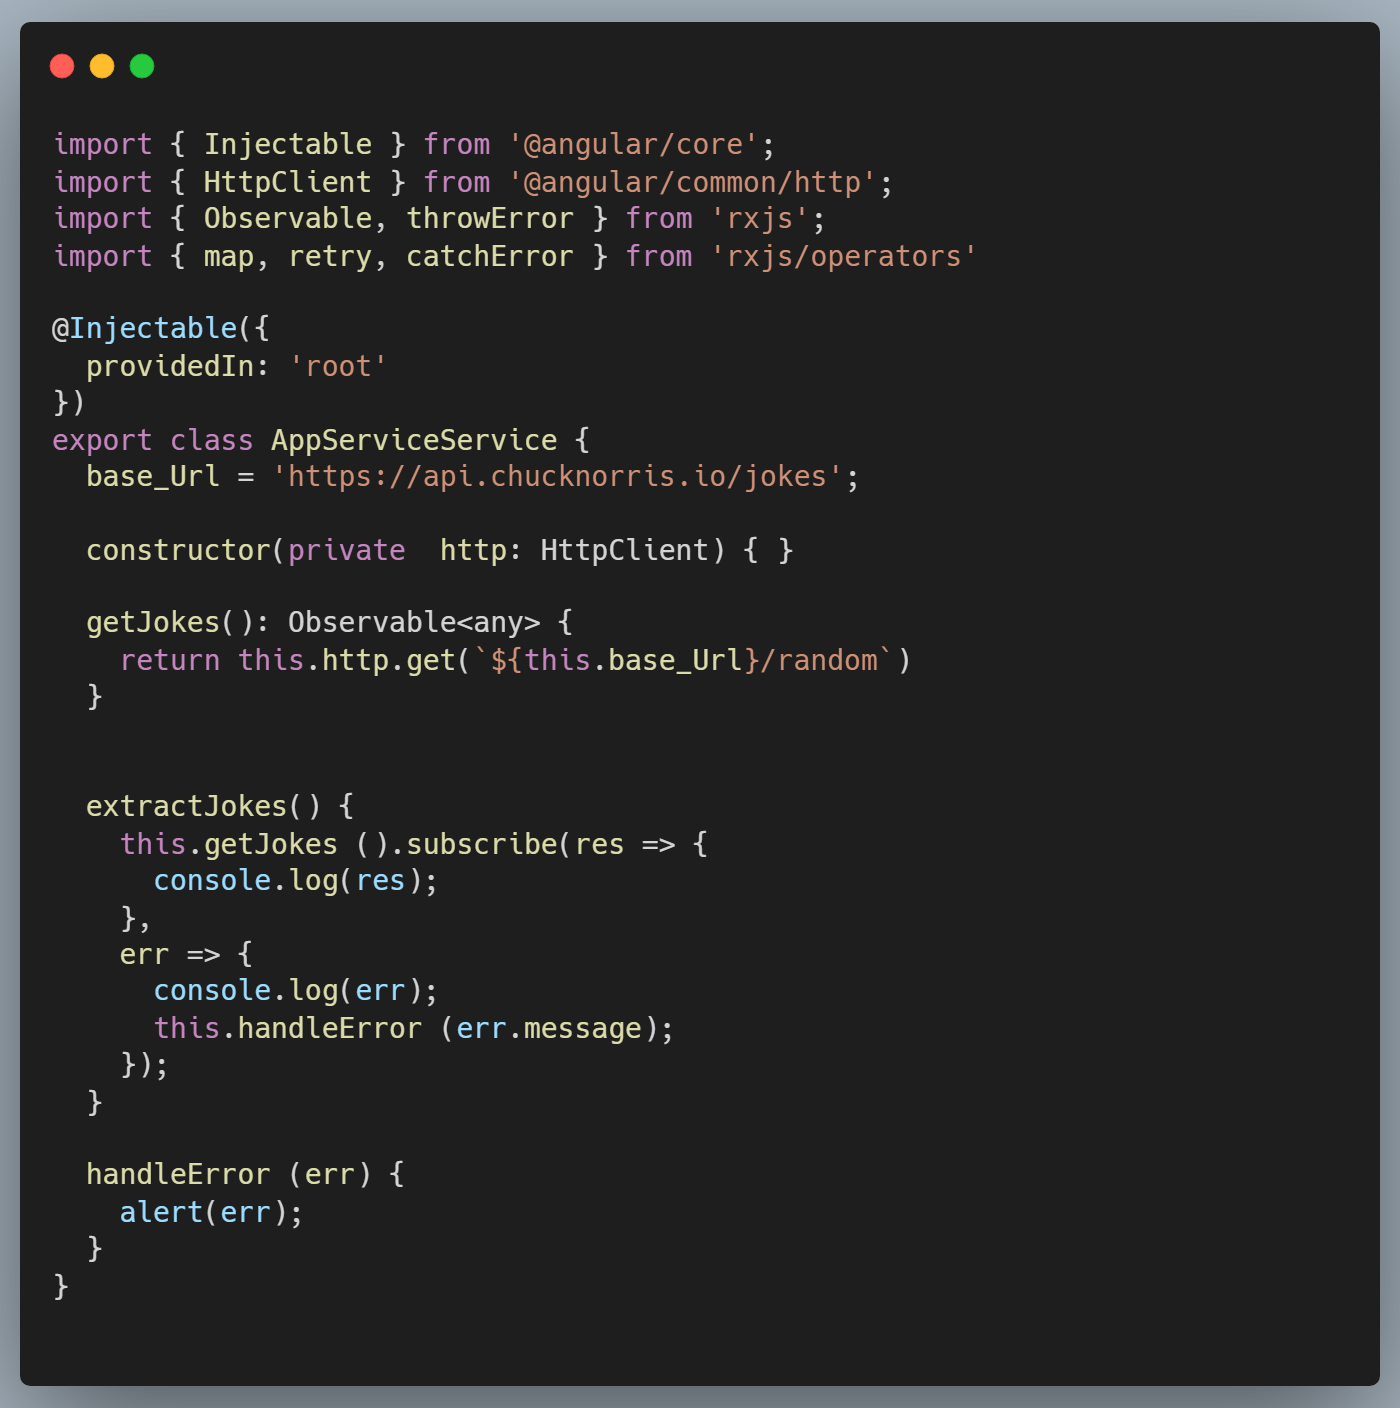
4. Now we need to create a service where we can make an HTTP request. Service is an important component of Angular. When we need codes to be used everywhere in the application, or we need to pass data across the application, services will come in handy.

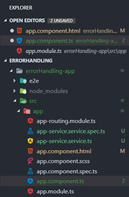
This will create a new Injectable service that can be injected into all our components. We should have this on our folder tree now.
5. After creating the service, we will inject the service into the app component controller (app. component.ts file). Notice how the appService is imported into the component.
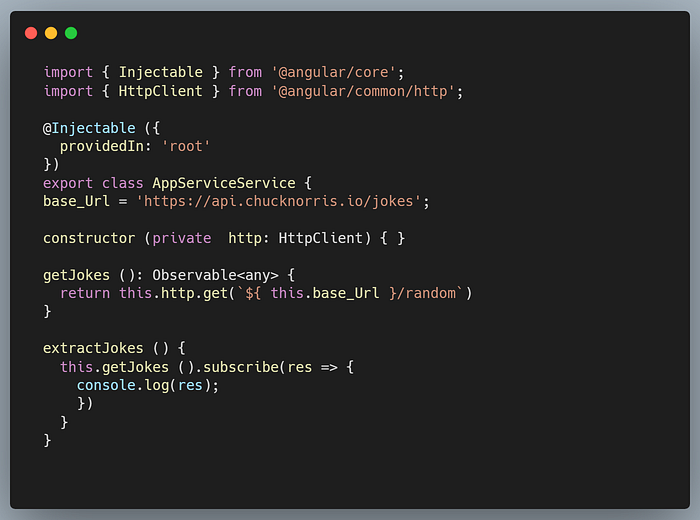
6. In the appService, we will make our HTTP request to chuck Norris open API to get random jokes.
What have I done?
- Set the base URL for our API to https://api.chucknorris.io/jokes
- Injected HttpClient service as a private variable in the constructor function. N.B. You need to import
HttpClientModuleinto app.module.ts from ‘@angular/common/http. - I created a
getJokesthat invokes the HTTP get method to fetch random jokes. This is returned asObservables. - In the
extractJokesmethod, I subscribe to the jokes observable and logging it on the console.
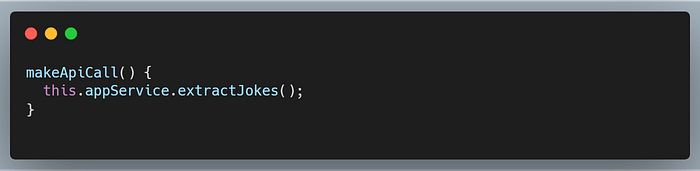
7. The next thing we need to do is to call the extractJokes method from the controller on click of the button. In the makeApi method, insert this;
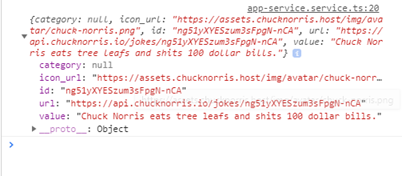
Save your code and click on the button. You should see a joke object on your browser’s console.
Works fine, right?
We’re done with the application and are ready to ship. But wait! What happens if there is an error from our HTTP request? How do we let the user know of the error? How do we handle it? Now there are many ways of doing this, in this tutorial, let’s explore some of them.
Error Handling
We can use an error handler that alerts the user of an error.
I created a new handleError method that alerts the user of the error. I also added a second argument that takes the error, logs it to browser’s console and invokes the handleError function with the error passed as an argument.
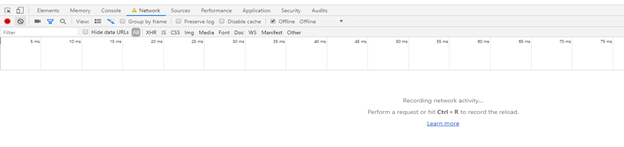
Let’s simulate an error scenario. Take your browser offline and click the button to test:
You should get an alert like this:
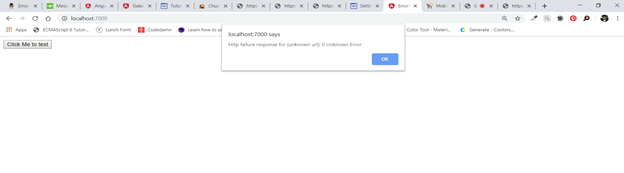
This tells us that there is an HTTP failure response. Now the user knows about the error — an improvement…but we can do better.
Let’s rejig our code. Starting with the getJokes method in our service

We need to import the retry and catchError operators from rxjs/operators. retry will help us retry the HTTP request as many times as specified before throwing an error, catchError will throw the error to the user.
Now modify the getJokes, extractJokes and handleError methods as shown below:
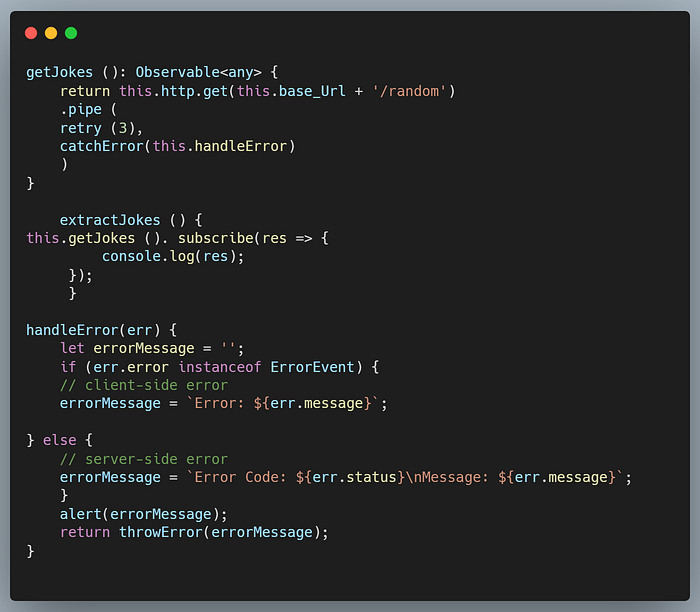
Remember, as I stated earlier — errors can either be on the client or server-side, so we need to catch both. Whenever we click the button to make the HTTP request, we have successfully handled whichever kind of error that occurs.
The second way of handling the error is with the use of HttpInterceptor which was introduced with Angular 4.3.1. HttpInterceptor is used to intercept all HTTP requests and responses and optionally transform it. HttpInterceptor is an interface that can be implemented by a class. It has an intercept method, which takes all the logic to be implemented when the HTTP requests get intercepted. You can read more from the official angular documentation .
- Create a new class
HttpInterceptor.ts:

We need to add the new class to the list of providers in the app module:
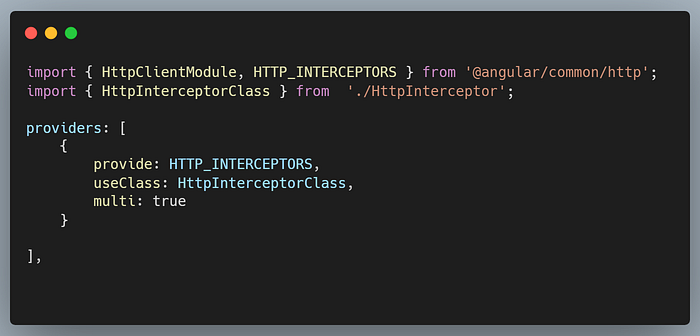
Notice how HTTP_INTERCEPTORS was imported from @angular/common/http. If you click the button to make the HTTP request, the request will be intercepted and ‘intercepted’ will be logged to the browser’s console.
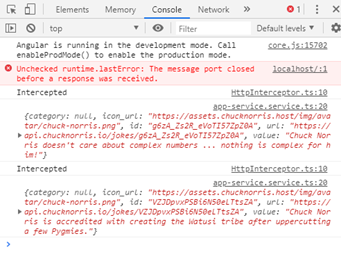
We’ve now been able to intercept all our requests and successfully log a message to the console on every request. With this, we can put in our error handling logic here. Edit the HttpInterceptor file as below:
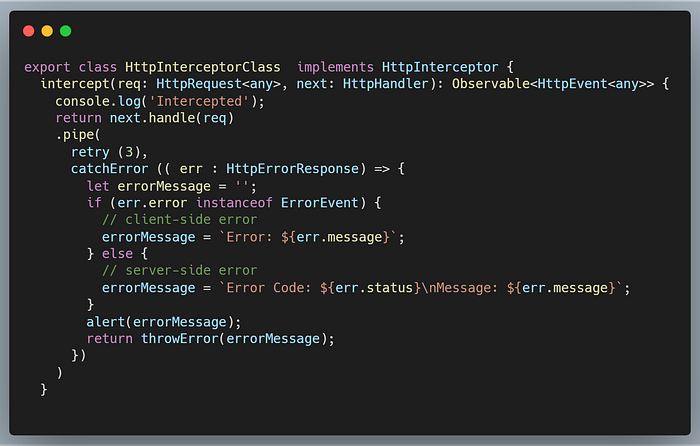
Using HttpInterceptor allows us to have a proper separation of concerns`, which is exactly what Angular preaches as best practice. If we want to change the way we push error to the user in any part of our application, we can simply do that in the Interceptor class created, this way we can handle errors properly and globally within the application.
You can access the source code here
Coding to make a difference.

