How to Build a Camera App With SwiftUI
An effortless SwiftUI camera tutorial
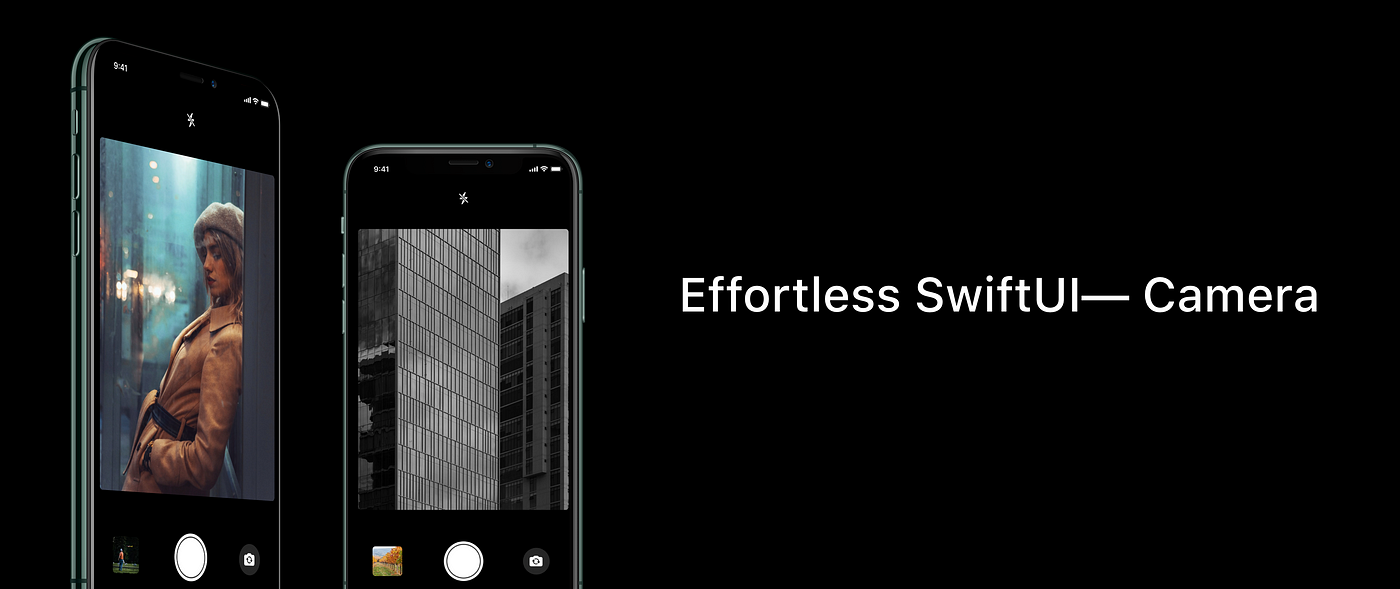
This is the first article in my new series named Effortless SwiftUI.
SwiftUI has proven to be a really awesome new framework in which to build and design apps in a quick and reliable way. Nonetheless, it’s still in its infancy, and Apple needs to add more support for other framework integrations as it did recently with the new Sign In With Apple button in SwiftUI 2.0. In this tutorial, we’ll learn how to integrate AVFoundation’s AVCameraSession with SwiftUI so we can create reusable, extendable modern components for apps that need to use our device’s cameras.
Let’s Get Started
First, let’s create a new project. I named mine SwiftCamera, but you can name yours as you like. Now let’s start with the brain behind our camera’s UI.
The camera service
The camera service will be the component in charge to use all the AVFoundation classes needed to connect to the iPhone’s camera and capture that amazing shot you’ve been waiting for. So, add a new file to your project and name it CameraService.swift. Make sure it’s a class and make it a subclass of NSObject.
Properties. Let’s start with the main properties that will make our camera service work. I’ll enumerate one by one and detail their usage.
First let’s start with the ones the UI will talk to, marked with the Published property wrapper.
flashMode: Tells observers whether the flash is turned ON or OFF.shouldShowAlertView: Tells observers whether the UI should show an alert view or not.shouldShowSpinner: Tells observers whether the UI should show a spinner indicating that work is going on to process the captured photo.willCapturePhoto: Tells observers when a photo is about to be captured. Ideal for flashing the screen or playing an animation just before capturing the shot.isCameraButtonDisabled: Self-explanatory. We start with value set tofalse, and once we configure the camera session successfully, we will set the value totrue.isCameraUnavailable: Self-explanatory. We start with value set tofalse, and once we configure the camera session successfully, we will set the value totrue.photo: The photo output. The structPhotoin this case is pretty simple. Once the photo has been captured and processed, observers will receive a new value.
Now let’s continue with two public properties and some other internal and private properties that only our service will handle.
Privacy. iOS is very edgy about privacy, so make sure to add a camera usage description in your project’s info.plist file. Once we’ve done that, let’s create our first function, checkForPermissions().
Let’s go through this function. We ought to determine what the current privacy configuration for camera access is for our app. For this, AVFoundation provides us with a handy function that returns the current state, AVCaptureDevice.authorizationStatus(.video). Then, based on the returned value, we perform different actions. If the status is authorized, that’s it, we return with success. Otherwise, if the state is not determined, we suspend the sessionQueue so any configuration about to be done is paused, and we ask the user for permission to use the camera. By default, we assume the user has denied access, so we show an alert error with the handy AlertError type we created earlier and tell the UI to disable the camera view and the capture button.
Session configuration. This is essential. To configure our capture session, first we check if we have previously configured it. If so, we return; else we start the configuration by calling beginConfiguration() in our capture session to lock it, we set the session preset to photo, and we start capture device discovery. Once the capture device has been set, we attach our photoCaptureOutput and configure it with maxPhotoQualityPrioritization set to quality. Once all that is done, we commit the changes by calling commitConfiguration() on our capture session. To finalize, let’s store the configuration status by setting isConfigured to true. As the session has been configured successfully, we can now start capturing video from the device by calling start().
Starting preview video capture. Once the capture session has been properly configured, we’re ready to start receiving video preview frames from the camera. To do this, we call startRunning() on our capture session. But first we need to check what the configuration result status is. If the configuration failed, we create an AlertError and publish it to observers via assignation to the shouldShowAlertView property. If configuration succeeded, we should enable the shutter button and tell the UI that the camera is available by changing isCameraButtonDisabled and isCameraUnavailable to false.
Stopping preview video capture. A video capture session runs independently from the object that declares the dependency on it. That means that if we were to have a view with a camera preview and attached to it our CameraService, and then we were to close this view and de-initialize CameraService, the camera capture session will keep running. On iOS14, this is more noticeable since we can see the green dot on our device. Hence we need to stop the capture session once we exit our view or when we no longer need this resource running. For this, we write the following function:
The above function takes an optional closure to be executed as a completion handler in case we need it in the future.
Switching between cameras. Doing this is dead easy. We just need to set a new video device based on the current one. First, we need to disable the shutter button so the configuration process is not interrupted. Then based on the current video capture device, we set a new position, either front or back, and with this new value, init a device discovery session from which we’ll select the one with the position we’re interested in. Once we’ve retrieved the right device, we configure it just as we did in the beginning. After the configuration is done, we commit the changes and enable the shutter button.
Zoom. Zooming is a rather simple task: We just need to set the zoom factor on the device. We’ll take a parameter with the desired zoom factor in the next function and configure the video device.
Capturing the photo
We’re finally here. As mentioned before, our photoOutput object will be in charge of capturing the actual photo. Hence we need to configure a set of settings for each time we capture a photo, settings such as flash, exposure, etc. After that, we need to do one last thing before the actual photo capture, and that is setting the AVCapturePhotoCaptureDelegate in our photoOutput. For this, we’ll create a new class. I named mine PhotoCaptureProcessor. This object will be in charge of handling the various states of the photo capture process as stated by the AVCapturePhotoCaptureDelegate protocol’s methods.
Now that we have a proper object to handle the delegate methods, this is the actual photo capture function in our CameraService class.
The ViewModel
Before entering into UI design with SwiftUI, we need a critical component to make this app composable and reusable, that is, something to link the UI with our CameraService.In this tutorial, we’ll be using MVVM as our design pattern of choice, so each view needs a model. For our CameraView we’ll create a CameraViewModel. This object will be in charge of using the CameraService, configuring it and calling all its methods on behalf of the UI, as well as doing any needed data formatting.
The UI with SwiftUI
Well, that’s enough brains behind our camera app. Now let’s quickly make a nice view for our app. This view will be simple enough to do the following things:
A. Capture a photo with a capture button
B. Set the flash mode for the capture
C. Set the zoom factor
D. Toggle between front- and back-facing cameras
E. Preview the video captured from the camera
F. Show a small thumbnail of the just-captured photo
Okay! Let’s get started. First, we need a way to pass the CameraService capture session data to our view in SwiftUI. For this, we’ll need to create a special view that conforms to theUIViewRepresentable protocol as follows.
So, what's going on here?
- We create a UIView subclass that overrides the UIView’s layer type and sets it to
AVCaptureVideoPreviewLayer, then we create a new get-only property namedvideoPreviewLayerthat returns the UIView’s layer cast asAVCaptureVideoPreviewLayer. This way we can use this newly created view,VideoPreviewView, in SwiftUI and set its frame and size as we like using the.frame()view modifiers, without the need to be passing a CGRect frame in theVideoPreviewViewinit to modify manually the video preview layer, as I’ve seen in other solutions in the community. - We declare a dependency on a
AVCaptureSessionproperty to be provided byCameraService, and we use this session to set it as theAVCaptureViewPreviewLayer’s session so the video preview layer can output what the camera is capturing. - There are two methods that the
UIViewRepresentableprotocol provides,makeUIView()andupdateUIView(). As of now, we only needmakeUIView()to return our view. Here we’ll init an instance of our just-createdVideoPreviewViewand add some configuration.
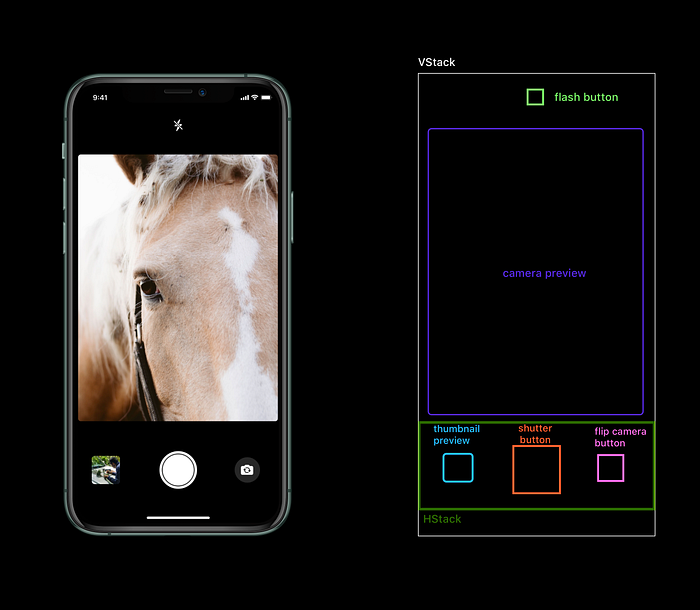
Now on to SwiftUI. create a new SwiftUI View and name it CameraView. Here we’ll declare a few things: a shutter button, a flash button, a preview thumbnail image, and the camera feed preview.
This is the UI structure we’ll need to build in with SwiftUI. It’s asimple UI. If we can tell that the main components are organized vertically, then we should use a VStack. For the bottom area, it is better to use an HStack to hold the thumbnail, the shutter button, and the flip camera button. And that’s it.
And now the SwiftUI code, with all the wiring needed to connect it to CameraViewModel and call its functions as needed.
Conclusions
Camera apps have always been a bit tricky at first try. That’s why I’m very happy to have finally written a rather long but complete article on how to make a basic camera app with SwiftUI.
SwiftUI is an awesome modern framework that will definitely see more adoption in the near future as we create new apps with it and promote its usage in the community. It’s also important to notice that SwiftUI forces developers to apply the separation-of-concerns principle, as we have separated CameraService from CameraViewModel from CameraView in this article, each with its own responsibilities; this will allow us to build reusable, sharable, and composable components in applications. there’s no losing by following this practice.
Resources
If you’d like to take a look at the project’s full code, you can find it here:
https://github.com/rorodriguez116/SwiftCamera
I’ve also made a SwiftPackage to integrate CameraService and VideoPreviewView with whatever custom UI you like in your apps:

