Deploying a Basic Express API on Amazon EC2
A step-by-step guide

Several articles I’ve planned in the future require an express API running over an EC2 instance, so I want to provide a one-stop solution my readers can refer to that will help them deploy a fully functional express API on an AWS EC2 instance.
Prerequisites
You should have an active AWS account.
Note: Initially, AWS provided you with credits to try out its services, but services like EC2, route53, etc., cost now. Please be mindful of that before using any of them and constantly keep track of your costs via AWS’s cost explorer.
Initializing an EC2 Instance on AWS
The first step is to initialize an EC2 instance on AWS. For that, head over to https://aws.amazon.com/ec2/.

Click on “Get started with Amazon EC2.” If you have an AWS account, log in, and you’ll be redirected to the following page:

Click on the “Launch Instance” button as shown below:

On the next page, choose the operating system, “Ubuntu,” and provide a name for your server.
Then select an instance type. I’ve selected t2 micro, which provides us with 1 GB of memory and 1 CPU core.

Next, you’ll need to provide an SSH key pair so that the instance can authenticate your sshrequest. Here’s an image:
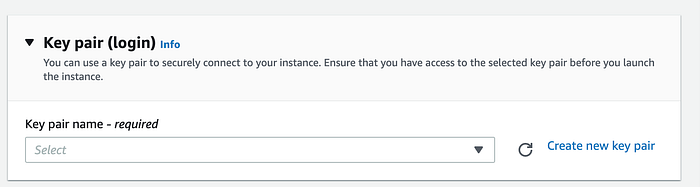
In case you already have an sshkey pair instantiated, you can use that, or click on “Create a new key pair.”
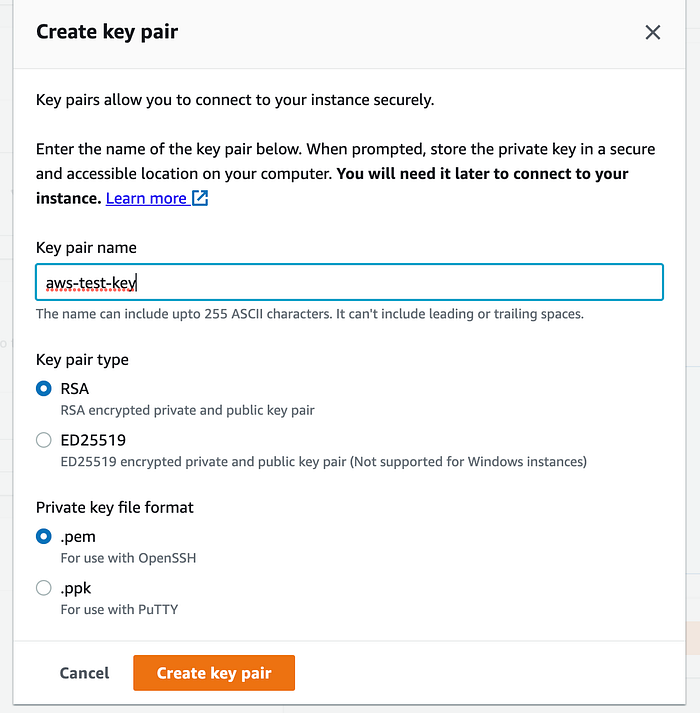
Provide a name for the key, and click create. A zipped file will be downloaded in your system containing the key.
Make sure you extract and save the file locally; it will be used to connect to our remote instance at a later stage.
Then in the network settings, allow traffic via SSH (used to get remote access to your server), HTTP, and HTTPS (used to access our API).
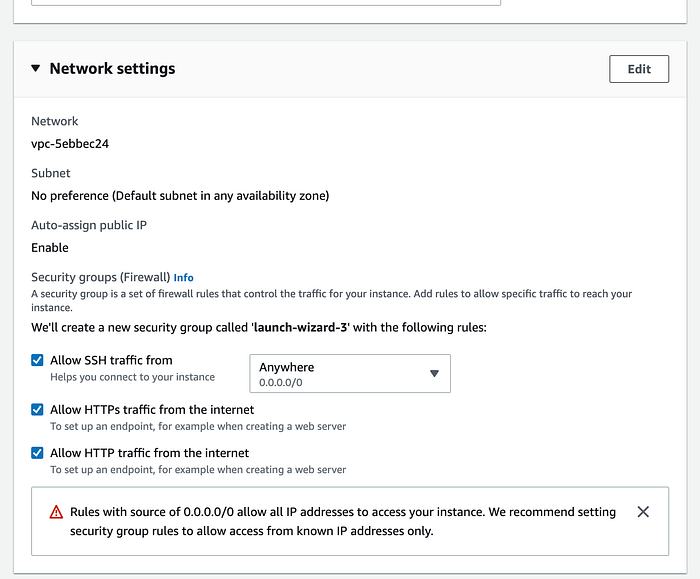
Leave the rest of the settings as the default settings, and click the “Launch Instance” button.

After launch, you’ll see the following screen:

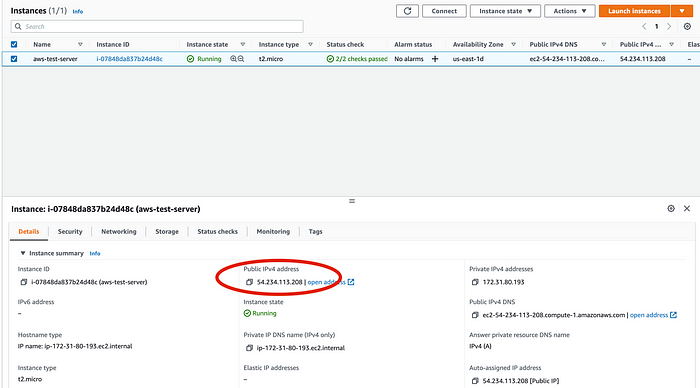
Here, click on “view all instances.” From here, you’ll be redirected to a screen where you can see all instances.
On this screen, copy the public ipv4 address of the instance. We’ll need this address along with the saved .pem file in the next section.
Setting Up the Instance Environment
To set up our instance, we’ll need to connect to it first. For this, we’ll use this ssh protocol.
For that, open the terminal of our operating system, move to the directory which contains our saved .pem file (which we generated in the previous section), and run the following command:
ssh -i aws-test-key.pem ubuntu@54.234.113.208Note that you’ll have to modify the above command as per your context.
ssh -i <PEM_FILE_NAME> OPERATING_SYSTEM@SERVER_IPV4_ADDRESS
You’ll see a similar terminal after logging in.
Now, we’ll have to install NodeJS and a few other dependencies to run our express server on the instance.
To install NodeJS, you can use any of the curl commands (depending on which version you want to install) on the official GitHub page.
For our case, I will use the following:
curl -fsSL https://deb.nodesource.com/setup_18.x | sudo -E bash -
sudo apt-get install -y nodejs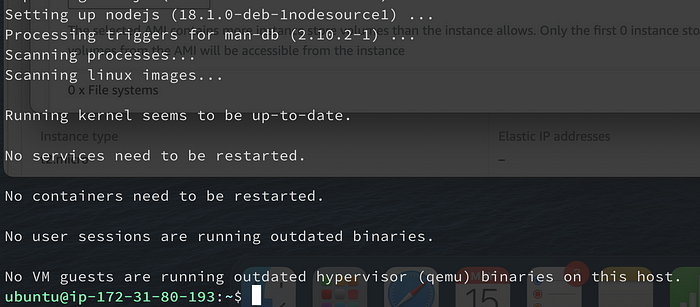
We’ll see the following output post-install.
You can verify whether Node was installed successfully by running this command:
node --version
Next, we’ll install a package manager known as pm2 to manage our NodeJs processes so that they keep on running even when we close the current terminal session.
To install pm2, run the following command:
sudo npm install -g pm2Once again, to verify installation run this:
pm2 --version
Initializing Our Express Server
You can initialize your own express server in the instance, or you can clone the following repository using this command:
git clone https://github.com/AkshayCHD/node-basic.gitEssentially this project contains a index.js file initializing the following express server:
After that, move into the directory and run the following command:
cd node-basic && npm installNow, to spawn a pm2 process, run this command:
pm2 start index.jsAfter running this, you can verify if the process has started correctly by running a short command:
pm2 logs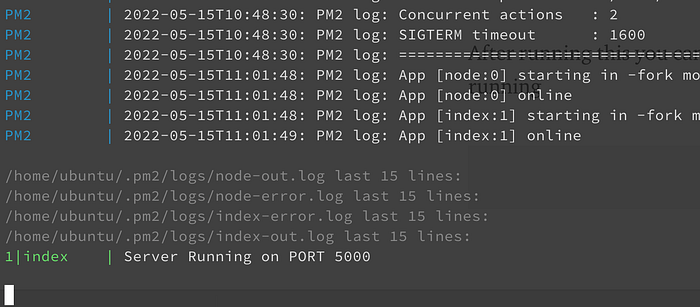
You should see the following output.
Now, if we want to expose our API to the outside world, we’ll have to start our process on port 80, which is the default HTTP port, or we’ll have to map our process (running on port 5000) to port 80 somehow.
The correct way to achieve this is through a reverse proxy like Nginx, which we’ll be using in the next article. For now, we’ll be using a not so ideal way of mapping port 80 to 5000 in our system’s IPtable using the following command:
sudo iptables -t nat -A PREROUTING -p tcp --dport 80 -j REDIRECT --to-ports 5000Now, when you type the IP of your instance in the browser, you’ll see the following message:
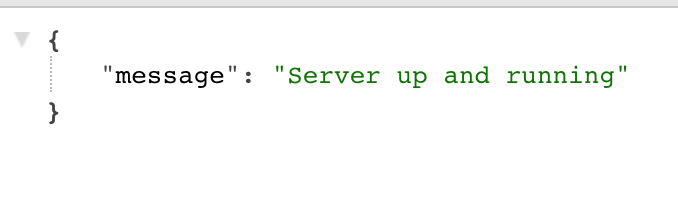
That means our server is running fine.
Conclusion
By following the above steps, you can instantiate a bare metal Ec2 instance, which will run a simple express API exposed to the outside world.
In the next article in this series, we’ll be learning how to set up a reverse proxy for our API so as to make it more efficient, secure, and extensible.
