DALL-E to 3D: How to Turn Your Generative Art Into 3D Meshes
Generate cool 3D meshes using machine learning
These days image generation with deep learning models is all over Twitter. Whether it is DALL-E, Midjourney, Stable Diffusion, or Craiyon, generative art has become a phenomenon even resulting in a segment on Last Week Tonight.
While these models only generate 2D images, there is a relatively straightforward way to turn them into 3D models.
In this short tutorial, we will discuss how we can leverage machine learning (again) to generate cool 3D meshes from 2D images of generative art. The resulting meshes can then be viewed from different angles and used as content in your games, 3D videos etc. Don’t worry if you don’t know how to code — not needed here!
Ok, let’s jump right into this.
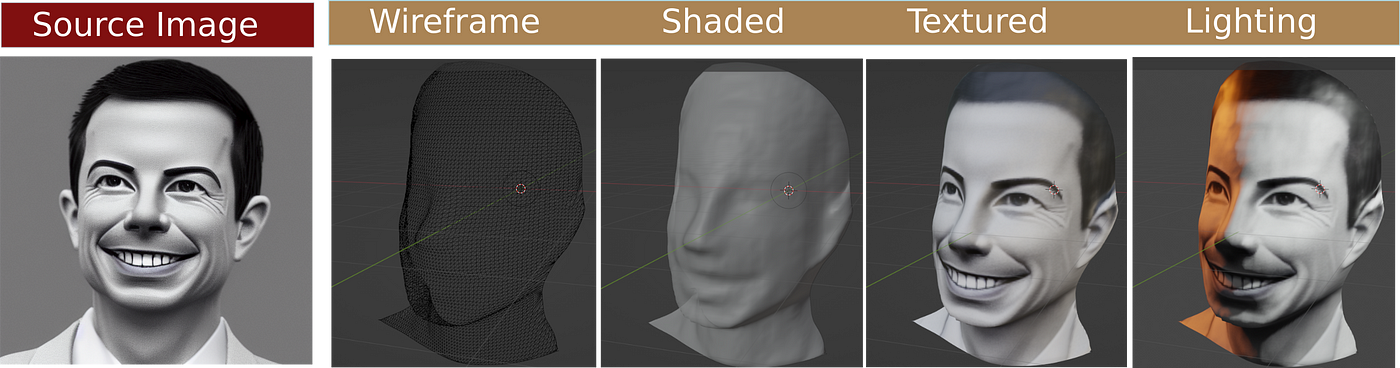
The above image labelled “source image” shows an automatically generated image produced by Stable Diffusion using the prompt “A rendering of Pete Buttigieg.”
The algorithm gave it an artistic or cartoony spin. You can try this out yourself: https://beta.dreamstudio.ai/.
The images on the right show a 3D mesh that was automatically generated from the source image using modern machine learning techniques, which we will explain in a second.
Once we have this mesh, we can visualize it using any 3D modeling software, apply shading to it, and maybe a nice texture. Note that we can reuse the original source image as the texture.
However, it seems I missed explaining how we got from the source image to the mesh. Well, the missing element here is a process called “monocular depth estimation” (MDE).
In order to create a 3D mesh, we need to be able to assign each pixel a depth value that tells us how far it is from the camera.
Think of it as the distance of each point in the image from the camera. Algorithms for MDE do just that. Personally, I have been using DenseDepth and Intel’s MiDaS methods. Below we see an example of the estimated depth of each pixel in an image. We call this the depth channel:

The color of each pixel in the depth channel (middle) tells us the distance to the camera — white pixels are closer to the camera, black pixels are further away. The third image above is a mesh that is generated from information available in both the source image and the depth channel (middle). Roughly speaking, we take each pixel and push it backward or forward based on the depth value. The result is a position in 3D space for each pixel.
The good news is: that there is a cute little website that can help us with all of the above with just a single click. Just open https://picto3d.com/ and upload the picture you would like to turn into a mesh.
In our case, we will take a generated picture of a person that looks like Uncle Walt and turn it into a mesh.

The site allows you to modify the depth intensity, in other words, how deep the scene is. There are a number of other parameters you can play with. Most importantly, the website allows you to store the resulting 3D model in different file formats. I would recommend using .stl since that is widely used. We are finished, right?
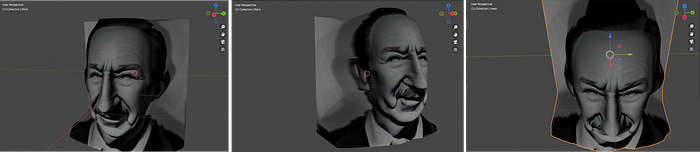
Well, unfortunately not! While it is not visible in the above picture, the heavy lifting is done by the texture and the mesh is not yet that great. We can do something about that, however. For that, let’s clean it up in 3D modeling software. Below I will be using Blender, which is a free software tool available for Windows, Mac, and Linux. Download it here: https://www.blender.org/
Opening Blender and importing the downloaded *.stl file results in something that looks like this.
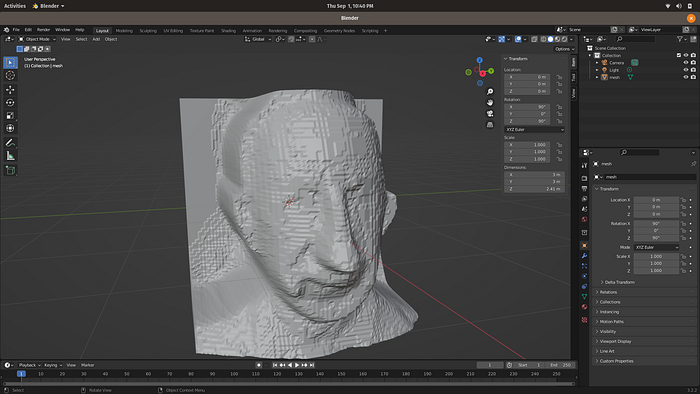
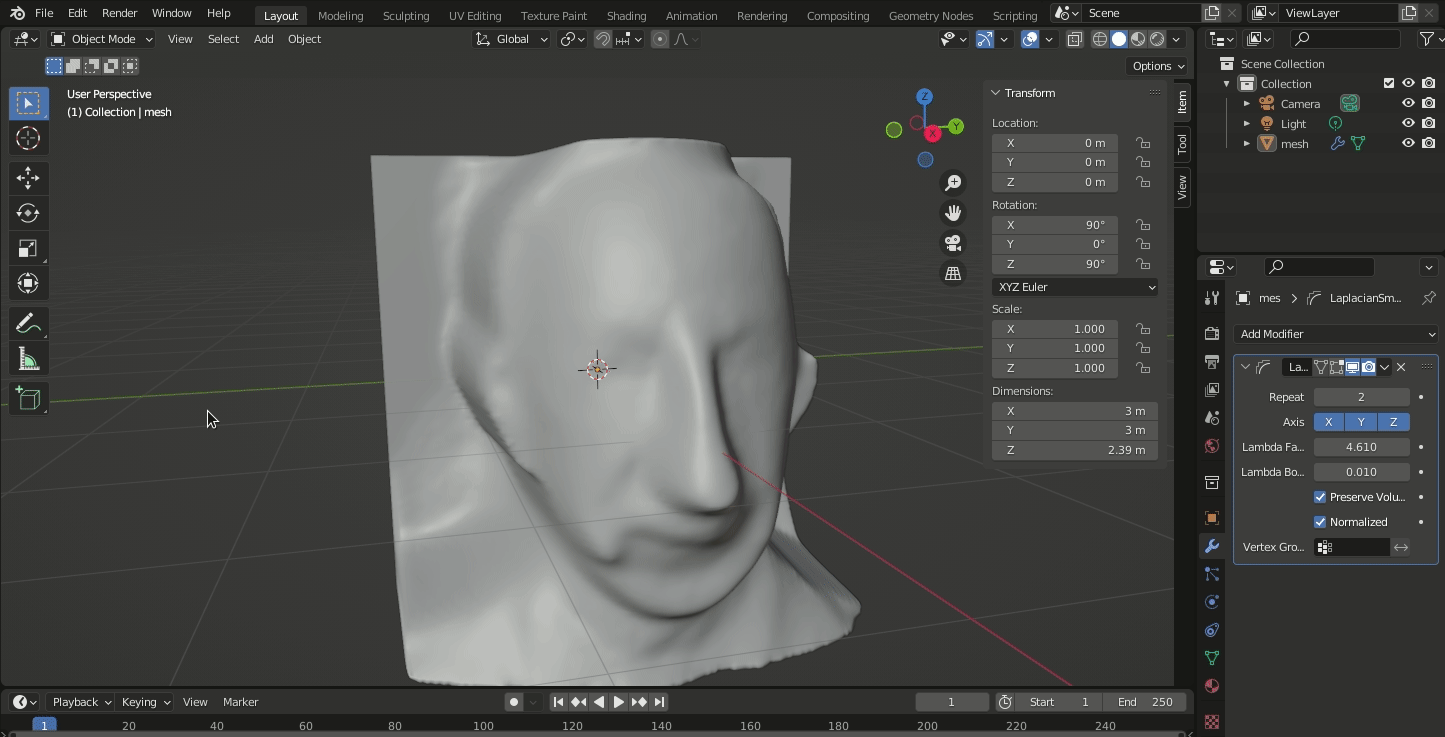
Pretty good, but not good enough. But if you click on the object and then right-click on it a menu will expand. The very first entry in the menu is a command called shade smooth which we will apply here. The result looks already a bit better:

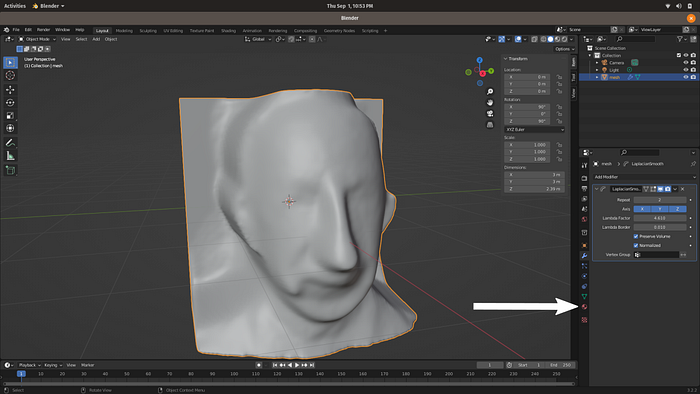
So far, we have not really changed the quality of the model, we only changed the shading from something called flat shading to Gouraud shading (for all the geeks). It’s time to really do something about the ruggedness of the model though. For that, we will apply a modifier. You can find the modifier menu when clicking on the button highlighted by an arrow in the above picture. Just click on the button and then “add modifier”.
We will use the Laplacian Smoothing modifier. After selecting it, let's set repeat to value 2 and Lambda Factor 4.6. The repeat value defines how many times the smoothing will be applied and the lambda value roughly specifies the degree of smoothing applied; higher values mean more smoothing. The result looks like this:
Pretty neat, right? Ok, so now we need some textures.
For that, let’s go to the material properties menu whose button is highlighted by an arrow above.
Clicking on “new” produces a new material. After the new material is created we need to set the Basecolor to the original source image of Uncle Walt. The gif below shows how to do that.
Basically, we just click on the yellow point next to Basecolor and select an Image Texture from a file.
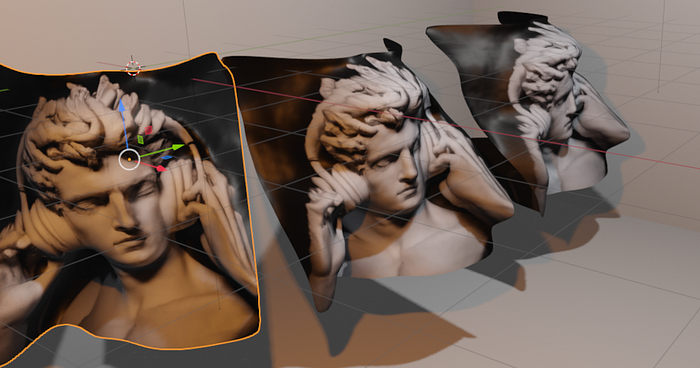
Now the only thing that is left to do is to make sure the texture is in the right place on the model.
For that, we can go to the UV editing menu. In the left part of the UV editor, we select the source image.
In the right part of the UV editor, we select the menu entry “UV -> Project from View”. The following gif visualizes that.

The orange points on top of our texture are the mesh coordinates. We need to ensure that they nicely overlap.
That can be done by pressing the keyboard button “s” for scaling.
Now we can go back to the Layout menu and, voilà, the 3D model.
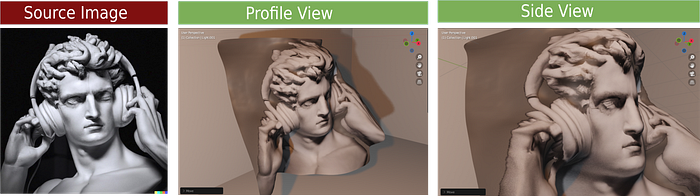
Once the model is in Blender and cleaned up, when can add lights, change the perspective, add other objects etc.
This can yield some really impressive results. See for example the pictures below.
That’s it, I hope you liked the tutorial and its insights. Looking forward to some cool models!