Creating Curved Lines in Google Maps
Sometimes you don’t want to zig and zag, you want to leap
Difficulty: easy | medium | hard.
If you don’t know, Google Maps now costs a lot of money when you use Google Directions APIs to draw a route from location A to location B.
And nowadays, some companies are converting the real route to a straight line as Uber did, or curved lines as Deliveree did.
So, I think this article will be helpful for all of you who:
- Want to create a new style to draw a route.
- Don’t want to lose money, feeding it into Google Maps’ pocket.
What’s the Solution to Draw a Curved Line?
If you want to draw a straight line to connect point A to point B, you need to know point A coordinates and point B coordinates.
OK. With a curved line, it combines many, many tiny points that are combined with straight lines. So, the main solution is to find each point’s coordinates on that curved line.
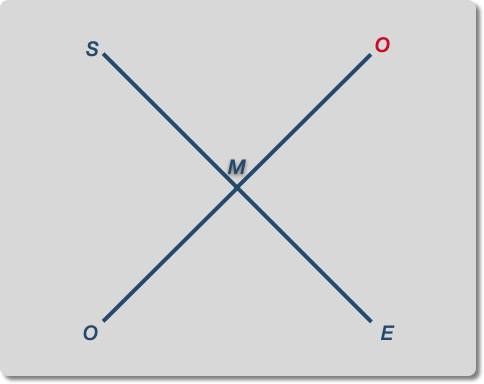
Let’s name these points like in the image below.

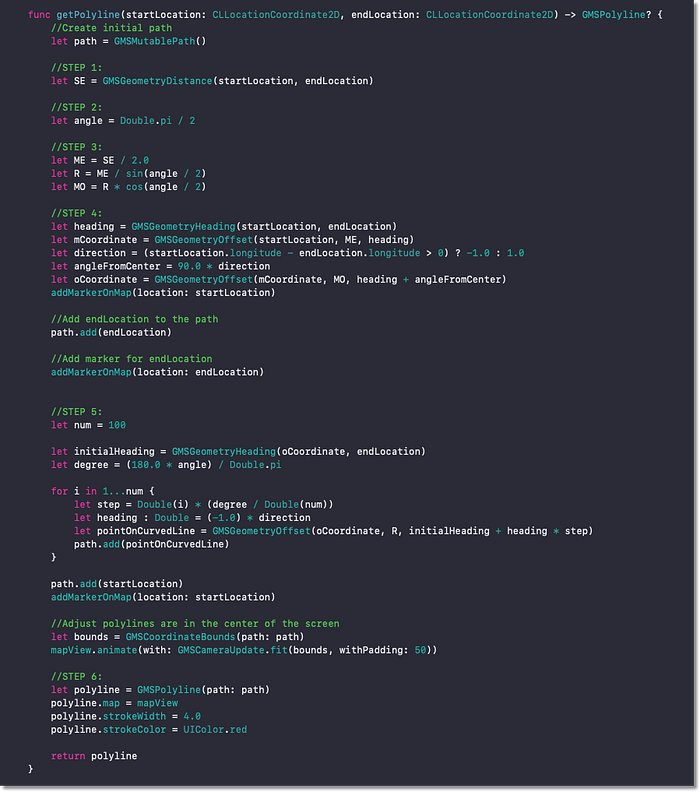
Firstly, create an initial path with:

Step 1. Calculate SE

Google Maps supports us to get the distance between two points on the map with the GMSGeometryDistance function (unit is meters).
Step 2. Define a suitable number for the angle
We must choose a suitable number for the angle. If the angle is too large, O (central point) can be very far away from S or E, and the curved line will look like a straight line instead.
My suggestion is less than Pi /2. The smaller the angle is, the more the curved line can be curved.
Step 3. Calculate MO
Because we must also know the radius, let’s calculate the radius and MO with formulas.

Here are some lines of code to help you calculate R and MO:

Step 4. Calculate O’s coordinates
Google Maps supports us:
GMSGeometryHeading
Returns the initial heading (degrees clockwise of north) at from on the shortest path to to.
The returned value is in the range [0, 360).
And:
GMSGeometryOffset
Returns the destination coordinates when starting at from with initial heading, traveling distance in meters along a great circle arc, on the earth.
The resulting longitude is in the range [-180, 180).
We’ll combine GMSGeometryHeading and GMSGeometryOffset to find M’s coordinate.
Heading from start location to end location:

Because S, M, and E are on the same line, we can find M’s coordinates with:

Next, find O’s coordinates.
There’ll be two coordinates for O, as in the image below, we have the blue O and the red O. For simplification, we can choose one.
For me, I want to choose a direction with the formula that is based on S longitude and E longitude.

Now, we have O’s coordinates with:

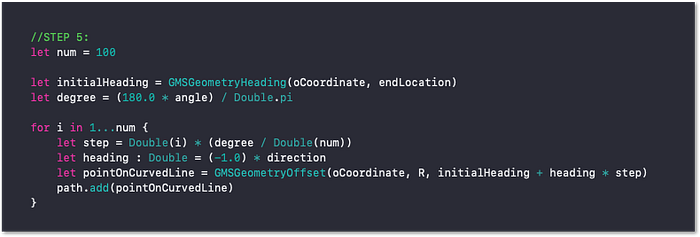
Step 5. Find each location on the curved line with different angles (a1, a2, …an)
Now, this is the main part of drawing the curved line. You need to split the angle into n smaller angle, then combine with R-radius and O’s coordinates to find each point’s coordinates on the curved line.
In my example, the curved line needs to have 100 main points.
Here is my code to define each location on the curved line. Calculate each location’s coordinates and add them to the initial path we created above.
Step 6. Convert GMSMutablePath to GMSPolyline
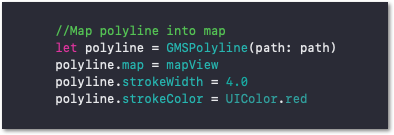
I converted GMSMutablePath to GMSPolyline and added it into a map view, as well as set the stroke width and stroke color.
Yep, just that. Now we have all the code needed to draw a curved line.
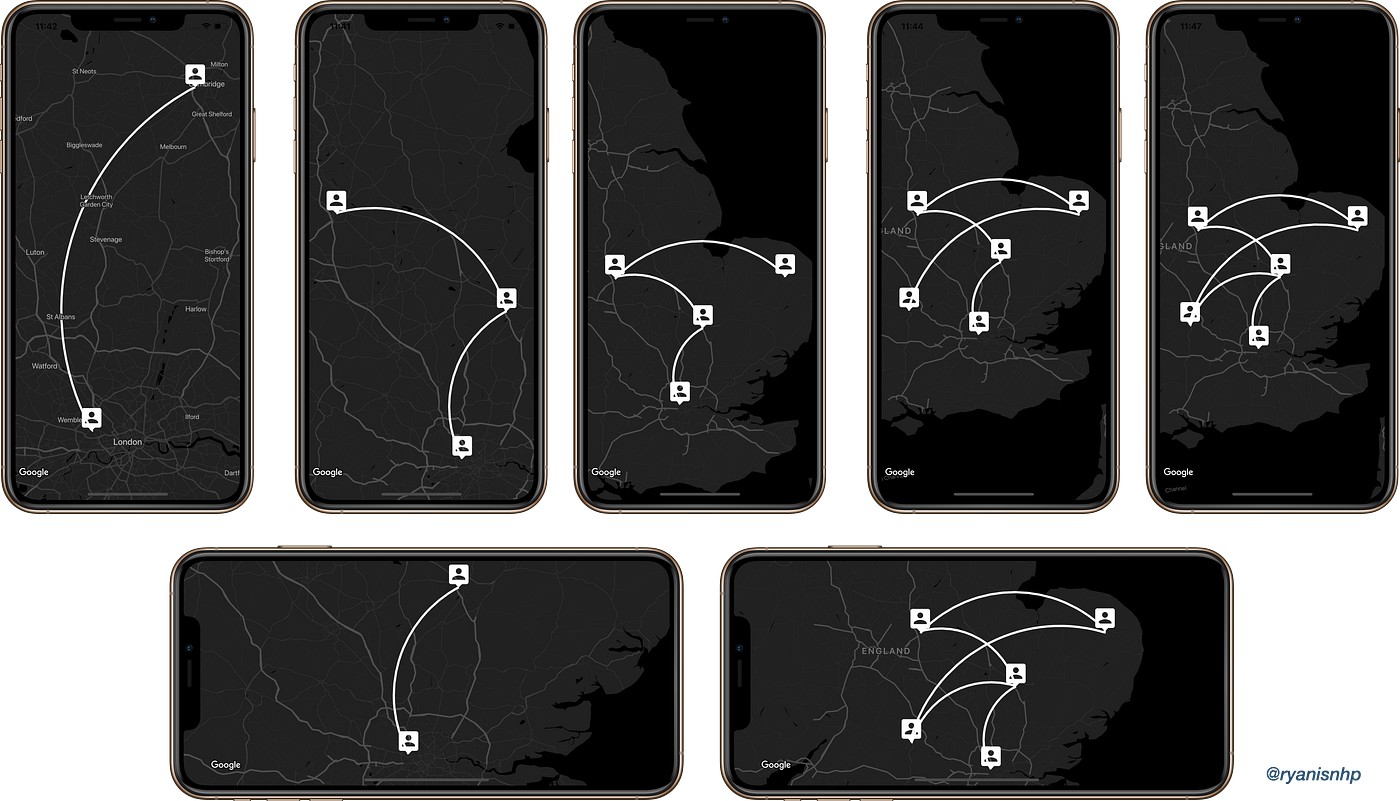
Now, run it, I’ll try to draw a curved line from London to Cambridge and customize it, let’s see what the result is.


