Creating a Serverless Redirect Function Using AWS Lambda and API Gateway
Redirect users to the app store and web landing page accordingly
So you’ve created an app that’s published on the app stores and now you want to redirect your users to their respective stores using a single URL? You’ve come to the right place.
In this article, I’ll be using AWS Lambda and API Gateway to create our serverless function. And in another article, I’ll extend what we build here by storing each user’s visit in a DynamoDB table to create a Jamstack app:
Creating our Lambda Function
Lambda is the service that will take care of the logic of redirecting our visitors based on their OS.

Once we’re on the AWS Console, we’ll head over to the Lambda service. From here, we can create our Lambda using the ‘Create function’ button. Let’s call it redirect and leave the remaining options with their default selections. After we click ‘Next’, we’ll be presented with a method named handler:
exports.handler = async (event) => {
    // TODO implement
    const response = {
        statusCode: 200,
        body: JSON.stringify('Hello from Lambda!'),
    };
    return response;
};
The handler can accept additional parameters:
exports.handler = (event, context, callback) => {}eventcontains the request datacontextcontains user information for authenticationcallbackis a function we can use to create a response
For our purposes, we only require event and callback. What we want to do is, analyse the User-Agent of the client’s request data (event) to determine the redirect URL.
The User-Agent is a request header that allows a characteristic string that allows network protocol peers to identify the Operating System and Browser of the web-server.
And once we’ve determined the redirect, we use a return statement or a callback function to pass this URL to the Location of the response header. Additionally, passing a status code in the response allows us to send additional information to the client - check out the MDN Web Docs to view a list of possible response status codes.
For the purposes of an upcoming part of this project, we’ll be using a 302 code in place of 301. Let’s hit ‘Deploy’ and there we have it, our Redirect Lambda function:
exports.handler = async (event, context) => {
    var redirectURL = "https://www.wali-app.co.uk";    const userAgent = event.headers["User-Agent"];
    switch (true) {
        case userAgent.includes("iPhone"):
            redirectURL = "https://apps.apple.com/gb/app/wali/id1528328161";
            break;
        case userAgent.includes("Android"):
            redirectURL = "https://play.google.com/store/apps/details?id=com.thebutterflynetwork.wali";
            break;
        default:
            break;
    }

    return {
        statusCode: 302,
        headers: { Location: redirectURL }
    };
};
Setting up our API Gateway
API Gateway is the service that will pass the client’s request to our Lambda and define its response.
Head over to the API Gateway service and create a REST API.

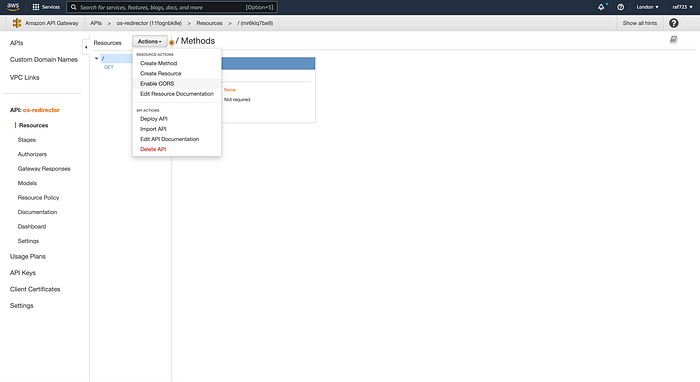
In the following screen, select ‘Create Methods’ from the ‘Actions’ dropdown. In the newly presented dropdown, select ‘GET’ and click the checkmark. This will present us with a form to connect our API to a Lambda function.

As we won’t be configuring our Integration Response, let’s check ‘Use Lambda Proxy Integration’ to quickly bring in our Lambda function (this will make more sense in the next paragraph).
Once we hit ‘Save’, we will be presented with the Method Execution flow.
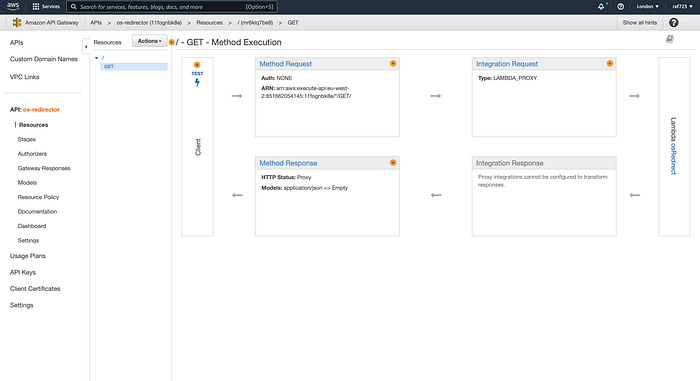
- Method Request: The part of our API that is exposed to our visitors. It handles authentication, input body, headers and query string parameters.
- Integration Request: What the API is integrating with — in our case, a Lambda function.
- Integration Response: Allows us to standardise the response from our integration. This is disabled because our Lambda is already returning a response in the format required by API Gateway.
- Method Response: Defines what the method can return. It’s responsible for defining the status codes and response bodies returned by our API.
Let’s click the ‘Method Response’, expand the 200 HTTP status and add ‘Access-Control-Allow-Origin’ to the ‘Response Headers’ so that we don’t run into CORS errors.
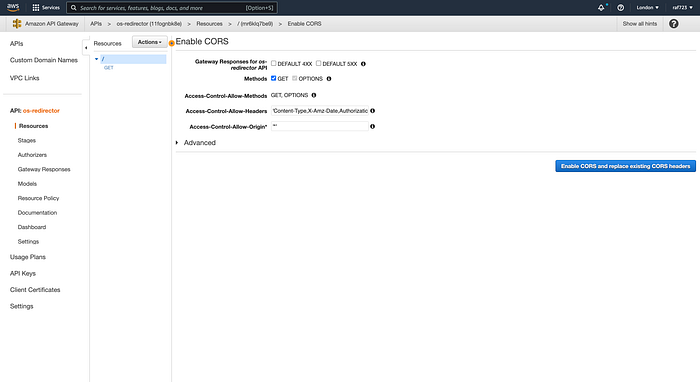
Head back to the previous screen and ‘Enable CORS’ for the top-level resource.
Leave the default selections as-is and click ‘Enable CORS and replace existing CORS headers’.
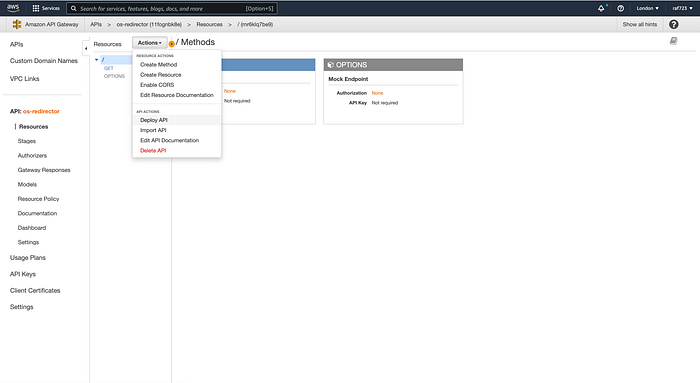
From the Method Execution flow of the GET method, we can test our API and pass in our own query parameters - we’ll skip this step and move onto deploying our API. With the top-level resource selected, let’s click ‘Deploy API’ from the ‘Actions’ dropdown.
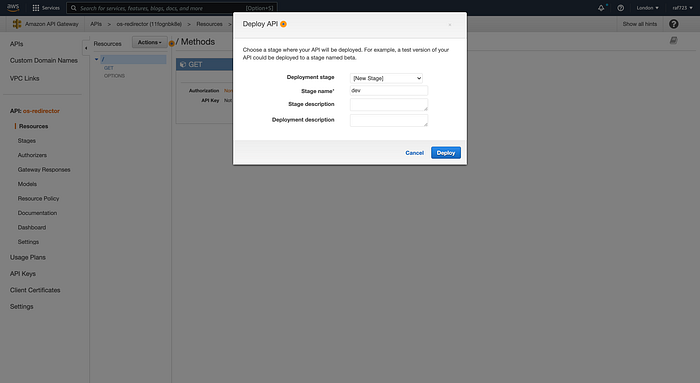
And voila! We’ll be presented with an endpoint (https://11fognbk8e.execute-api.eu-west-2.amazonaws.com/dev) which, if we were to access from a desktop, will redirect us to the application’s landing page.
And if we were to access it from an Android or iOS device, will redirect us to the Play Store or App Store, respectively.
Taking it Further
In the next part of this project, we’ll record all visits to our REST endpoint by writing to a DynamoDB table using our existing Lambda function.
We’ll then create a Jamstack app which calls another REST endpoint integrated to a new Lambda that returns the number of visitors by OS for us to present visually in a dashboard.

