Connecting and Mapping Strava Data With Python and Django
Build a fantastic, interactive app

In May of this year, Strava hit a new milestone with 100 million registered users. Along with those users is over seven billion logged activities. If you’re interested in exploring geographical data like me, the different analyses you can do with this data will get you excited.
Fortunately for us, Strava is a developer-friendly company posting interesting developer and data science articles to a public Medium blog and creating an easy-to-access API.
One way to display the data accessible through the Strava API is using Django to create a website with Python. Although there are a few great resources that helped me connect Strava with Python (such as this one from Matt Ambrogi), I couldn’t find any good resources for connecting that Strava data with Python and Django. This article is my attempt at creating that resource.
This tutorial will cover the following:
- Setting Up Your Django Web App
- Connecting the Web App to the Strava API
- Mapping Users’ Activity Data on an Interactive Map
In the end, you will be able to create a Django website that looks like the one below:

Code
If you’re like me, having the entire code base available from a tutorial makes life much easier. As such, all the code used in this is available on a GitHub repo at https://github.com/VertAdam/StravaWebsite.
Setting up Your Django Web App
Django is a Python-based, open source web framework. Django is used in many well-known websites including YouTube, Instagram, and Spotify along with countless others.
If you aren’t familiar with Django, I always recommend following the steps in the official documentation tutorial Writing your first Django app.
However, this article will give you all the steps you need to get your Django app set up without any prior knowledge. So if you’re short on time and don’t want to go through the official tutorial, no worries I’ve got you covered.
Installing Django
The first thing you are going to want to do is to install Django. You can do this quite easily using pip in your terminal.
$ pip install djangoCreating your Django project
After you have Django installed, you can go ahead and create your Django project. To create the project you want to, navigate to the directory you want the Django project located in and run the following command:
$ django-admin startproject StravaWebsiteThis will use the startproject command to a project titled StravaWebsite.
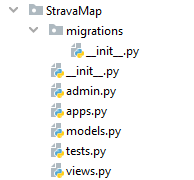
After running this, a number of files will be created as shown in the image below:

I won’t be explaining what each of these files do in depth in this tutorial, but each serves a distinct purpose. If you are not already familiar with the purposes of each file, the official Django tutorial, “Writing your first Django app,” linked above describes each file effectively.
Running the development server
Now that we’ve started the project we can go ahead and run the development server. To do this, we run the following command in the terminal:
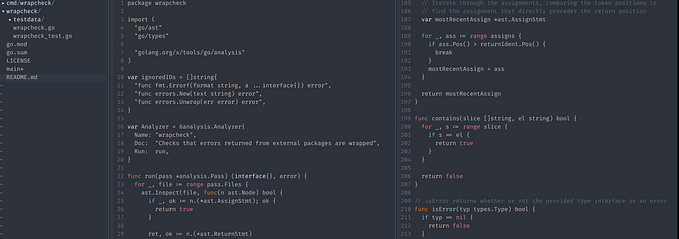
$ python manage.py runserverIf no error messages show up, you should be able to navigate to http://127.0.0.1:8000/ (or whatever URL is given within the console output message) and should see the following page:
If you see this page, your Django project has been set up correctly and is able to run on a local server.
Setting Up the Map App
We now want to create an app within the Django project. In Django, an app is considered anything that does something within your website. This can include creating databases, displaying information, recording data, or countless other things that websites do.
Initializing the app
For this project, we are only going to be using one app, called StravaMap, though a Django project often will have multiple apps.
To create our StravaMap app, we use the terminal to input the command:
$ python manage.py startapp StravaMapThis uses the startapp command to create an app named StravaMap. This app will have a number of files under StravaMap directory.
Creating the structure of the app
Now that we’ve created the StravaMap app we need to add some additional files.
First, we create a new Python file titled urls.py. In this file, which should have the path StravaMap/urls.py, put the following code:
This urls.py file will communicate with your server in order to tell it what URLs to be routed to.
We now go to the similarly named StravaWebsite/urls.py and add one additional URL pattern in order to connect it to our StravaMap app. This urls.py file should look like this:
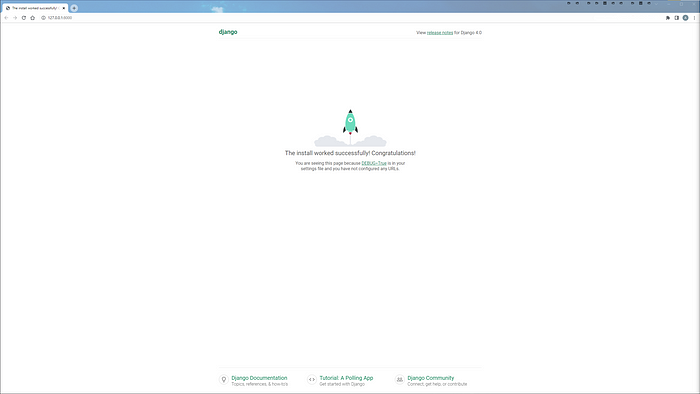
Next, we need to create a templates folder. This should be in your project's root directory. Within this folder, you want to make an HTML file titled index.html. If you are confused, I have attached a picture of what your entire project structure should look like up to this point:
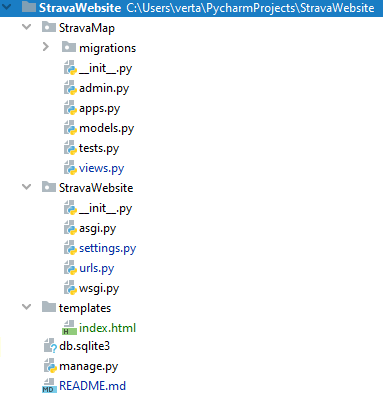
You then want to add the following code to the index.html file:
This HTML contains a Bootstrap starter template and navigation bar. It also includes some additional code that defines the button to connect to Strava as well as the container for where the map will go.
Now that we’ve created the templates folder, we have to tell our Django project where it is. To do this we go into StravaWebsite/settings.py, and within this file, change the update DIRS variable in TEMPLATES to the path of the templates folder. In our case, ‘DIRS’: [BASE_DIR/’templates’].
Setting Up Our Strava App
To use Strava in our app we need to register an API application on their website. You can do this quite simply by going to https://strava.com/settings/api and creating an app. If you have any trouble with this process, the Strava developer guide has a section titled How to Create an account that should help you walk through the steps.
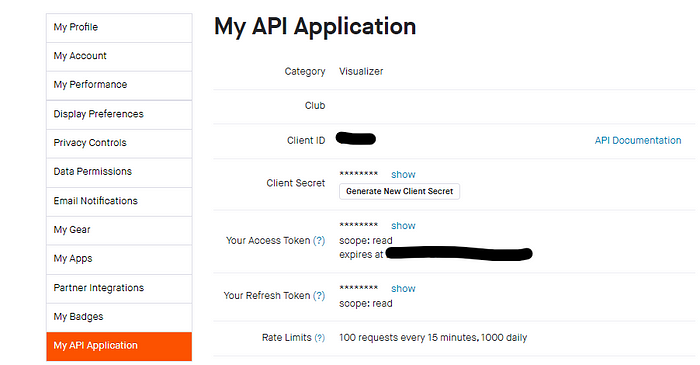
Once you get through creating the app you should arrive at a page that looks like the image above. In this image, we are going to need the Client ID and Client Secret for our next steps.
Setting Django Social Auth with the Strava API
Now that we have the API application we want to connect it with our Django project. To do this, we install the package social-auth-app-django using pip.
$ pip install social-auth-app-djangoWe now want to return to the StravaWebsite/setting.py file.
First, we want to add the social_django app to the INSTALLED_APPS variable in Django.
Next, we need to change the TEMPLATES variable again, this time adding two additional context processors relating to the social_django application. After adding them your TEMPLATES variable should look like this:
We also need to add a variety of new variables to the settings.py file. These variables can go anywhere in the file. The SOCIAL_AUTH_STRAVA_KEY is your Client ID from your Strava API application and the SOCIAL_AUTH_STRAVA_SECRET is the Client Secret from the same place. The SOCIAL_AUTH_LOGIN_REDIRECT_URL states what URL the user should be redirected to after successfully connecting with Strava.
If you are planning on putting this website live or hosting your code on GitHub. I highly recommend you read your secret key into a .env file that has been added to your .gitignore file in order to protect it.
The final step to connect Strava with the Django Social Auth is in the StravaMap/urls.py file. In this file, we want to add an urlpattern that tells our web app what URL to be redirected to in order to connect to Strava. Your file should look like this:
If you’ve followed all those steps, your Django project is now ready to import the Strava data and map it.
Creating the base map
To plot our Strava data on the map, we must first create a map object. To do this, we return to our StravaMap app and create a view in the views.py file.
The views.py file is where we create all the aspects of the app that the users will interact with. In this case, we want to create a view that will create the interactive map used on our site.
For the map, we will be using the folium package. Folium is one of if not the most popular interactive mapping packages. It also has the ability to convert its maps to an HTML-compatible format which is very useful for us. To use folium, install the package with pip.
$ pip install foliumTo start, let’s put an interactive map on our map by creating the view base_map in the views.py file.
This code will create the base map, convert it to HTML using _repr_html_() and then input it into the index.html template as the variable main_map.
In order for the server to know what URLs call this view, we have to return to the StravaMap/urls.py file and add this view. After updating, it should look something like this:
This will call the base_map view for the base path.
At this point, you should be able to finally see something on your server. Just go to http://127.0.0.1:8000/ (or whatever your development server URL is) and you should see the same thing that I have below:
Connecting and Mapping your Strava Data
Because of everything we have already set up, our blue button that says “Connect to Strava” should already be functioning. However, an error will pop up after connecting since Django will be attempting to redirect to the URL /connected which currently does not have any view associated with it.
We now want to create a view, connected_map, that will read in Strava data, put the Strava data on a map and display the map to the URL /connected.
First, let’s go into StravaMap/views.py and create our connected_map view.
The difference between this and the first map is that for this map we have to import Strava data. Fortunately, Django makes this easy for us. I won’t go into too much detail on how I am using the Strava API specifically here but I highly recommend checking out this great article going over different use cases for the Strava API with Python here.
This connected_map view will take all of my activity data from the connected users Strava account and plot the polylines (a combination of lines that make up an activity) onto a folium map. We do this by retrieving the user data, using that user data to retrieve the activity data, and finally decoding the polylines into usable coordinates and plotting them onto our map. The code for all of this should be put into StravaMap/views.py and can be seen here:
Before being able to run this, however, we do have some new packages to install. You can install these using pip.
$ pip install pandas
$ pip install polyline
$ pip install requests
Similar to our base_map view, we have to update StravaMap/urls.py in order to tell our server when to use this view. In this case, we want to use the connected_map view when our server sends us to the /connected URL. To do this, we add the codepath(‘connected/’, connected_map, name=’Connect Map View’) to the urlpatterns resulting in a file that looks like this:
Now save your file, return to your server, and enjoy your map!
Final Thoughts
The Strava API has an incredible amount of data and I have only scratched the surface of how it can be explored. I hope this tutorial is able to demonstrate how one can use Django to aid in displaying this data to a wider audience.
This is the first article I have ever written, and I enjoyed the process of transferring my knowledge to this format. If this helps even one person, my expectations will be exceeded!
Want to Connect?You can find me on LinkedIn at https://www.linkedin.com/in/adam-vert/. I’m always looking to meet more people involved in data science, so feel free to reach out!