Build an iOS Screen Recorder With React Native
It’s much easier than you think

Building a screen recorder with a cross-platform tool like React Native means having to write a lot of native platform-specific code, so it would make sense to skip React Native. However, I implemented this solution as a small feature within a larger app built in React Native.
I may do another tutorial later showing how to implement the same thing in Android.
If you follow this tutorial you’ll also be able to use most of the code to build a screen recorder app for iOS without using React Native.
You will need an iOS device with iOS v12.0+ as screen recording wouldn’t work on a simulator.
Here are the topics we’ll cover in this tutorial:
- How to write Native Modules with React Native.
- iOS Broadcast Upload Extension.
- ReplayKit.
- App Groups — to share data b/w Targets
This tutorial will cover a lot. By the end, it will be more than just a screen recorder you’ll be able to build.
Complete Code
Once you follow through this guide use this repository to have a reference if you face any issues.
Let’s jump right in!
Setup React Native JS Component
Let’s assume that you have a React Native project set up using create-react-app.
First, we create a component to present a UI for a screen recording related operation in your app. We’ll name this component ScreenRecorder.
Now let’s add a state variable, recordings — this will be used to list file paths of all the screen recordings.
Our First Native Module
Now let’s set up a native view manager in Swift. This is used to show the record button.
To do this we use RCTViewManager provided by React Native. It enables our native module to be used in JavaScript components.
Open your project in Xcode using the file ScreenRecordingDemo.xcworkspace. Here ScreenRecordingDemo is my React native project name.

Press Cmd + N to create a new swift file in the selected group. Name it RecordComponent. You’ll be asked to create a Obj-C bridging header — click on “Create Bridging Header.”
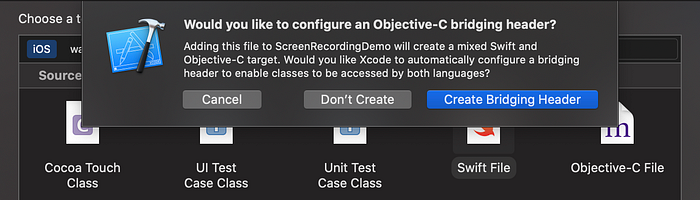
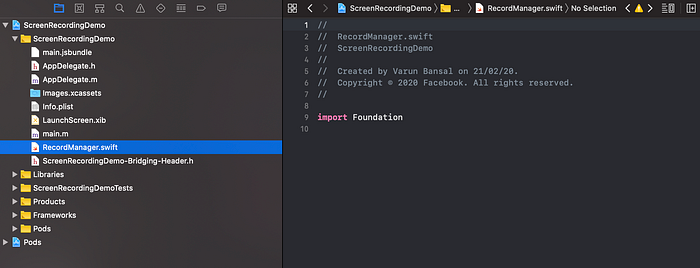
Two new files should be created in the Project Explorer for you — RecordComponent.swift and ScreenRecordingDemo-Bridging-Header.h.
Note: Bridging header is only created once when you create your first native file.
Now let’s write some native code for our RecordComponent!
To use RCTViewManager, we need to import the following header to the ScreenRecordDemo-Bridging-Header.h file.
#import <React/RCTViewManager.h>Now open RecordComponent.swift, and create a new class, RecordComponent, which inherits RCTViewManager.

We add the @objc(RecordComponent) to make the module available in the objective-C files.
The record button that we’ll implement here is not just any button — we’re using RPSystemBroadcastPickerView provided by ReplayKit.
Here’s the code for it:
We’ve overridden the view method of RCTViewManager to return our record button UI. The view method of the RCTViewManager should return an instance of UIView or any class that inherits UIView. Whatever the view method returns is displayed on the screen in the name of RecordComponent.
We create an instance of RPSystemBroadcastPickerView and return it with a few modifications.
One more thing to notice here is the #available(iOS 12.0, *) check. This is necessary because the code that we are writing here is only supported on iOS12.0+.
Now let’s add the RecordComponent to our React Native JS component.
Importing Native Module in JS Component
For React Native to discover RecordComponent (native module) we need to call some functions provided by React Native in objective-C, so it knows that RecordComponent is available to use.
Let’s create a corresponding objective-C file for RecordComponent.swift to call those functions — RecordComponent.m — and add the following code:
RCT_EXTERN_MODULE makes the RecordComponent available in React Native code.
That’s it, RecordComponent is now available to be used in your ReactNative JS code.
Let’s modify our ScreenRecorder.js file to add the Native RecordComponent to it. Here is how the code for ScreenRecorder.js should look once we’re done:
Nothing out of the blue here except the requireNativeComponens. As the name suggests, we’re getting the Native Component that we exported using RCT_EXTERN_MODULE.
Let’s run the app on a device now. You might want to follow this guide if you have never run a React Native app on an iOS device
Here’s how the app should look:
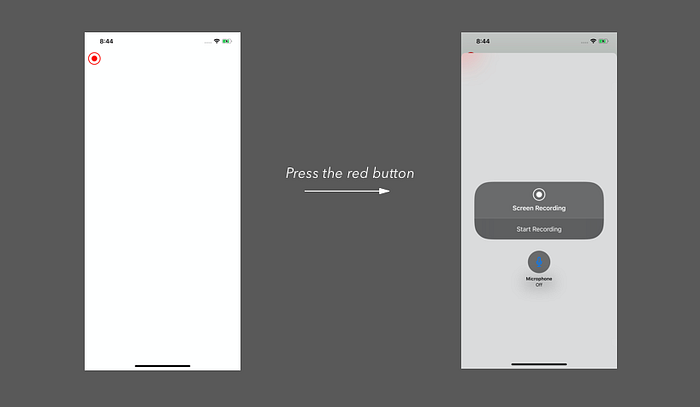
Set Up iOS Broadcast Upload Extension
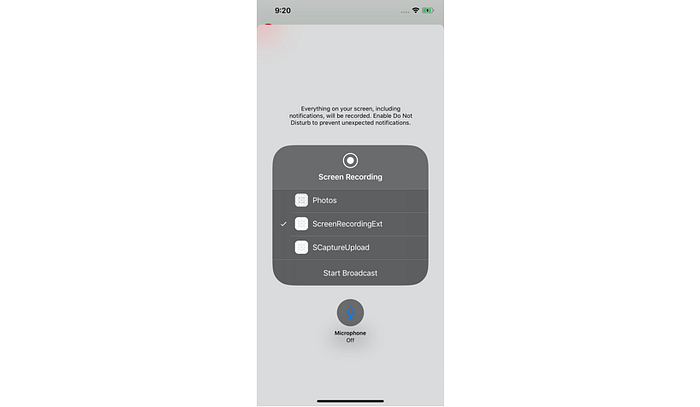
We have the record button in place, now we need to add our app to the Start Recording picker view (screenshot on the right) so that when we start recording, our app can receive the recording sample buffers.
To do that we add a broadcast upload extension to our app.
- Go to Xcode, File -> New -> Target.
- Select “Broadcast Upload Extension” from the list.
- Add
ScreenRecordingExtas the product name.
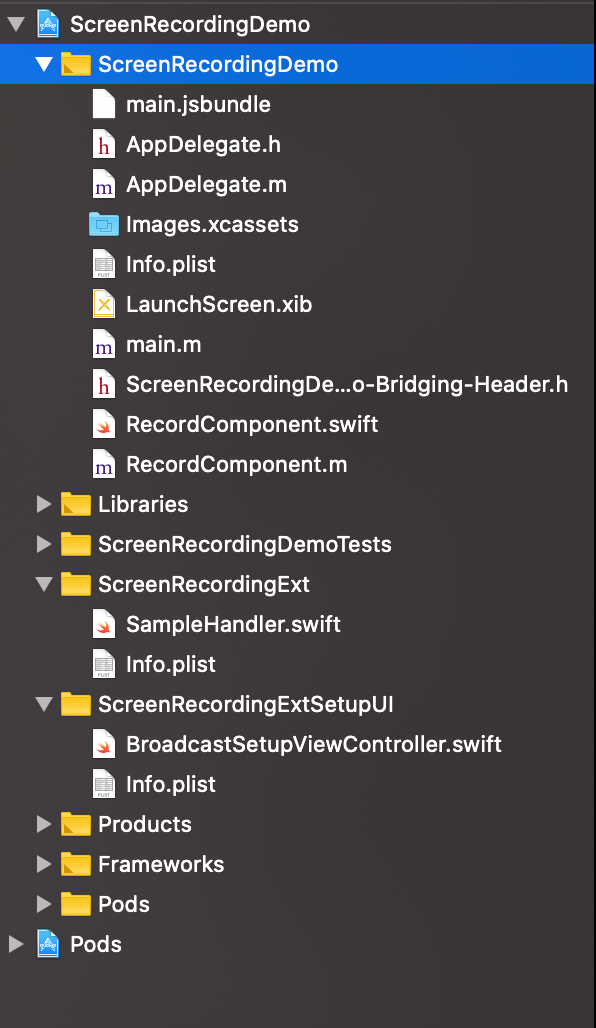
ScreenRecordingExt and ScreenRecordingExtSetupUI should be available in the project explorer now. Let’s run the new extensions with the app and see what’s changed.


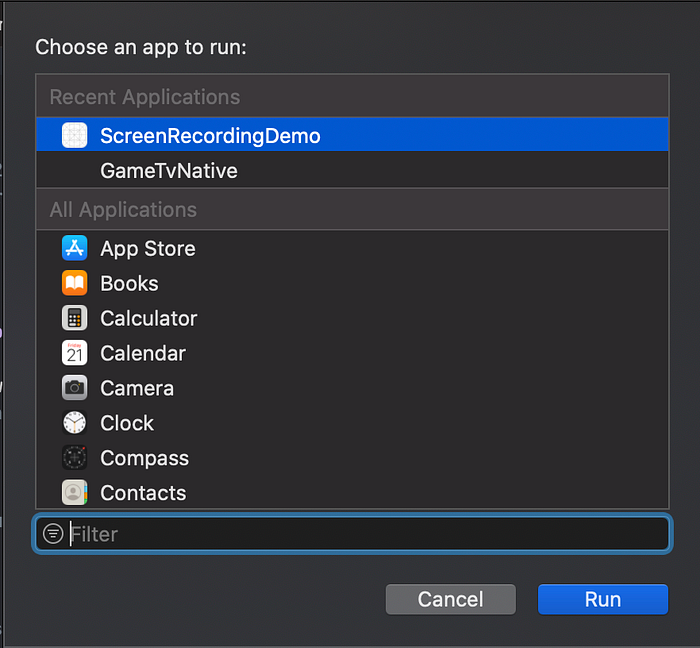
Note: I had to run the build for both the extensions separately to make it work. If you know of a better way to do this do let me know in the comments!
You should now be able to see our broadcast upload extension listed in the picker view:
Let’s start recording!
Using AVAssetWriter to Save Recordings
We’ll be using AVAssetWriter to save the video buffers to a file in the documents directory of our iOS app.
Lets open SampleHandler.swift in ScreenRecordingExt.

Before getting started we’ll create a FileSystemUtil to help with generating file system paths where we’ll be writing our recording. Create a new Swift file targeting our app and extension:
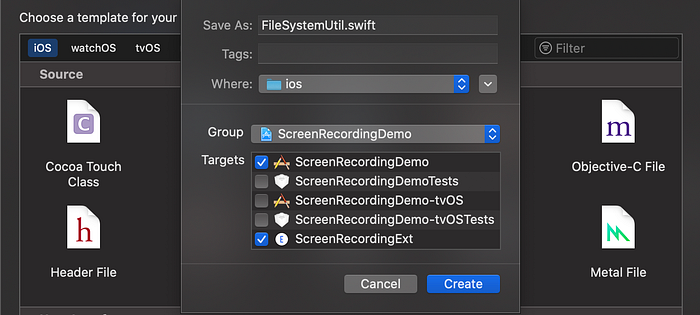
We are targeting both the app and the extension here so that we can use this util in both of the target’s codes
Here’s the code for the FileSystemUtil.swift:
Now we’ll modify the broadcastStarted of SampleHandler.swift in ScreenRecordingExt target, to initialise our AVAssetWriter and get it ready for video input.
Here’s the code:
We’re generating a file URL with a random name here and feeding it to AVAssetWritter. This is the URL where our final output will be saved after the recording has finished. After adding a writer input we call .startWriting() enable AVAssetWriter to accept recording buffers.
Next, we modify processSampleBuffer, this function receives all the following sample buffers for the recording. We need to append these buffers to the AVAssetWriterInput we created in broadcastStarted.
Here’s the code:
For the above code, I had help from the following: https://github.com/giridharvc7/ScreenRecord. This shows the implementation of an in-app screen recorder for iOS.
Now let’s handle the last part of recording — finishing.
You should have the idea by now that we’ll be working with the broadcastFinished function.
Set Up App Groups
We have a file URL where our recording is saved. But it’s no good until we can view the recordings.
To do that we’ll have to use app groups to share data between our app and extension. The recording we saved was in the documents directory of our extension — extension and apps run in their own separate sandbox on iOS so we cannot access the files created by extension from our app directly.
If you want to share data between your app and extension you’ll have to save the file in an app group. For a simple introduction to app groups I recommend this video:
Let’s create our app group.
In Xcode, go to “Signing & Capabilities” and add a new capability: “App Group.”
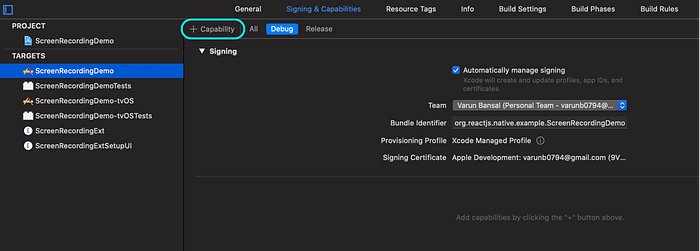
Add a new app group by appending your bundle ID to the group. prefix.

Now go to your ScreenRecordingExtension in the targets list and add “app groups capability.”
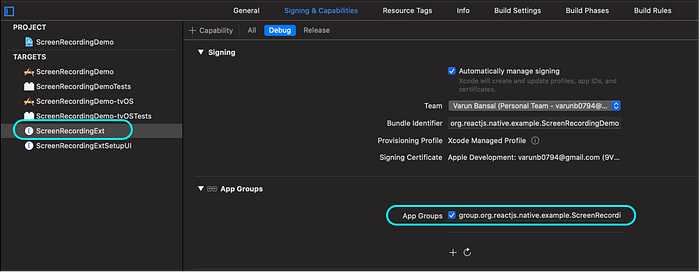
The same app group you added earlier should be visible here. If not, refresh the list and check the box again.
You have now created a shared space between your app and extension. For every recording that we finish, we’ll copy the file to the shared app group, to make it accessible to our app.
Let’s modify the broadcastFinished method.
First you’ll notice we created a DispatchGroup. If you’ve ever worked with threads in any other programming language, they’re here to achieve the same function. Because our extensions run in the background and the code under finishWriting will run asynchronously, the background thread will end before our async code in finishWriting completes. So we create a DispatchGroup to make the background thread wait until the finishWriting has executed.
Now to what finishWriting is doing — it’s just copying the recording file from the sandboxed documents directory of our extension to the shared app group.
List All Recordings
Now that we’ve copied the recording file to the app group shared container, we need to list them in our app.
Let’s create yet another native module to fetch the list of recordings in our app group from our React Native code. We’ll call this module SharedFileSystemRCT. Only create this module for your app, not for the extension.
Here is the code for SharedFileSystemRCT.swift:
The code is quite simple if you’re familiar with the Swift coding paradigm. We fetch the list of files in the shared app group, sort by modified date, and resolve the promise with the final data.
To expose this module and its functions to React Native JS code we need use RCT_EXTERN_METHOD as explained in the beginning of this piece.
Now, let’s set up a FlatList to view all the recordings in ScreenRecorder.js.
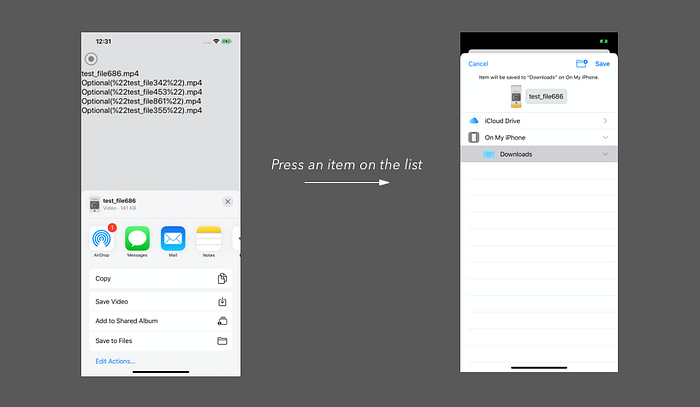
Next, let’s implement viewRecordings, it will be used to open a native UI to save the recordings to the Files app, so you can access it easily.
For this, we’ll create a method in RecordComponent.swift and expose it to the JS component.
Now, let’s call showSaveFile, on click of an item in the list.
Let’s run the app and see if this works!
When you click an item from the list you should be prompted to save the recording.
There you have it — an iOS Screen Recorder. The UI could be better, I agree. You can spend some time styling the UI to your preference if you like.
This was a long piece but I hope that you didn’t just learn to build a screen recorder. Hopefully, you learned a lot of concepts that will be helpful to you for various tasks in the future.

