Build a Slack App To Know What Your Teammates Are Listening on Spotify
A Slack-Spotify integration using Go

I love Discord’s Spotify feature, where you can see what others are listening to. I’ve used it a lot in my previous company, but now I use Slack.
Unfortunately, Slack doesn’t have a native feature like that. So I’ve decided to build my own slack app for it (https://github.com/o-mago/spotify-status).
And this is Discord the feature I’ve inspired to build my own for Slack.

In this article I will show how to build the app from the ground and deploy it with zero cost using these technologies:
Index
- Building the App
- Idea
- Architecture
- Server
- Handlers
- Services
- Repositories
- Entities
- Deployment - Conclusion
- Setup Services
- Heroku
- New Relic
- Spotify for Developers
Building the App
Idea

The idea of the app is to sync the song the user is listening to with his/her Slack status. To do this the app will have a cronjob to run every X seconds. It will verify if the user is listening to something on Spotify and change the status to something like: :spotify-emoji: song_name - singer.
But we must pay attention to some points:
- The app must only change user’ status if the current status is blank. We don’t want to overwrite another status set by the user. I often change my status to “having lunch” but still I like to listen to Spotify and I don’t want my status to change to my song.
- The app must clear the status after stopping Spotify player, but only if the current status was set by our Slack app. We don’t want to clear a status set by the user or another Slack App.
- Slack status text has a maximum limit of 100 characters: https://api.slack.com/docs/presence-and-status#user-presence-and-status__custom-status__reading-statuses
- We must define our cronjob time to an interval that is not too big to keep it in sync with Spotify, but it doesn’t need to be too small since a song will be played for 3 minutes on average. 10 seconds is a good interval
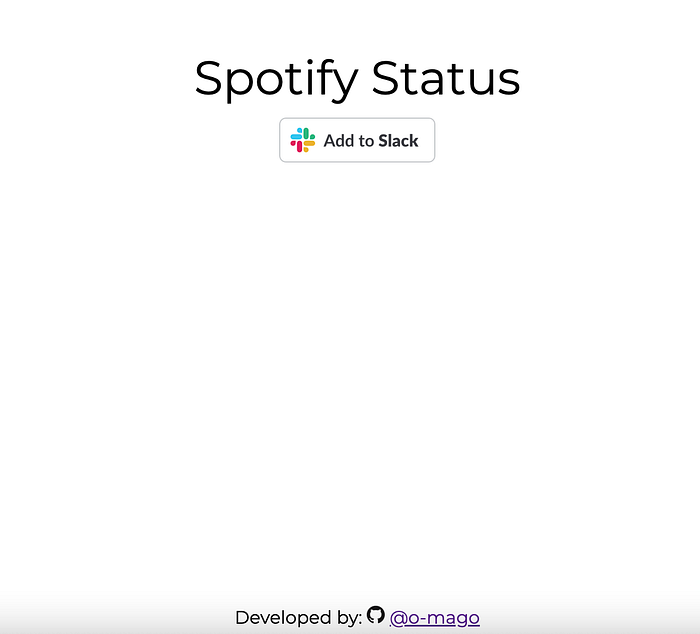
We also will need a landing page for the app, where the user will add the app to his/her workspace and allow the app to connect to the Spotify account.
After the user allows our app to access his/her data, we need to store the user’s info (from slack and spotify) in a database to let the cronjob work.
Let’s get the party started. We will use Go to build our application. The full app can be found here.

We will use the default Go net/http to serve our application and some external libraries:
- GORM: the ORM
- zmb3/spotify: Spotify API library
- oauth2: To handle Spotify access tokens
- robfig/cron: To create our user status update routines
- newrelic/go-agent: New Relic agent for go
- slack-go/slack: Slack API
- google/uuid: to generate the IDs for our users table
Architecture
I tried to reach some level of clean architecture here, splitting the code between layers (allowing a Separation of Concerns, SoC). Our core app is a 3-tier architecture with handlers , services and repositories :
- handlers: they are the frontline that will receive the requests, parse parameters and call services when needed.
- services: they contain our “business” logic (in our case, setting the Slack Status of the user) and call repositories if necessary.
- repositories: they will do the interface between our logic (services) and the data source (our PostgreSQL DB in this case)
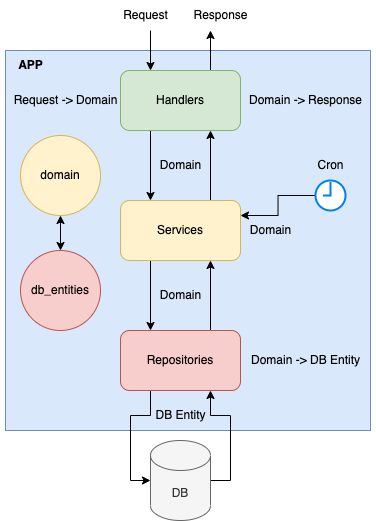
We will create two packages for our entities: domain and db_entities .
- domain: it’s the entities related to our “business” logic, only contains structs with fields that are necessary. The service layer will only receive and send domain entities. It has a more comprehensive language, associated with ou “business” rules
- db_entitites: it’s a model of our DB tables, with all it’s columns and functions to transform db_entities -> domain or domain -> db_entities.
OBS: In our case, the domain and db_entities will have the same structure. But it’s not something that will always happen. It depends on the domain modeling.
Ok… I know it’s getting too complicated for a simple Slack App and it really is.
My first approach was just using a single file, but it was a mess. So I’ve decided to refactor it, for studying purposes, try to create some order to the chaos. Also, I will consider some improvements at the end of this article, and having a more solid architecture will help if we need to put more features on it.
Server
First we will create a src folder and a file called server.go . It will be our main package, the one that will be compiled to an executable program. Inside of it we will do some stuff:
- Get our environment variables:
New Relic, Slack, Spotify and Database credentials will be found after completing their setups in this article next sections. The PORT env var is needed with this exactly name since Heroku assigns a random port for our app.
Setup New Relic:
Setup database and run migration. We will use gorm as our ORM:
Create Spotify Authenticator, in order to get user’s spotify player info:
Create handlers, services and repositories:
Create cron for updating user status:
Create server mux (we don’t need to go default handlers), add handlers and start listening. We need 4 routes:
/slackAuth: callback route called by Slack after the user allows our app/callback: callback route called by Spotify after the user allows our app/users: route used by New Relic to ping our app and keep it from sleep- /: route to serve our static files (landing page)
As you can see, we will serve static files on our server. It’s the landing page on the website’s root path. Instead of creating another project for our frontend, I’ve decided to serve it with our API. It’s not a good practice, but the page is too simple and I didn’t want to add more complexity at this point.
The static website is basically an HTML file and CSS. It’s just a page for our Add to Slack button.
Handlers
As we saw before, we have 4 routers, one is for serving only static files, and the others will need handlers.
- New Relic Health Handler:
It’s just a ping handler
- Slack callback handler:
It will use our slack app credentials and the code generated after the user clicks on Add to Slack button to retrieve user’s data (using a POST request to Slack API): slack user id and access token.
After, the handler will redirect to Spotify Auth URL setting this user info (id and access token) as Cookies. This way, we can retrieve this info inside the Spotify callback handler.
- Spotify callback handler:
It will retrieve Slack user’s data that were set with Cookies. Also we will exchange the Spotify Auth page (that the user was redirected) code for an access token. This method Token(state string, r *http.Request) (*oauth2.Token, error) from Spotify library also checks the state we’ve generated on our server.go file. This way we provide protection against attacks such as cross-site request forgery.
With Slack and Spotify users’ data, we can finally add the user to our database. But if you remember our architecture, we need to call the service layer first.
Services
The app has 2 service methods: AddUser and ChangeUserStatus
AddUser:
Here we generate a UUID (Universally Unique IDentifier) for the users table primary key. After we call the repository to create the user on our database.
ChangeUserStatus:
This is the core feature of our app. It will retrieve all users we have on our database, iterate and then create one goroutine for each.
I know, I know… You are thinking “we might have some problems as the number of users grows”, and you’re right (I will approach this in the final section of this article). But I decided to not deal with it since the idea is to use only this app inside my company, with no more than 100 users.
Inside the goroutine we will check if the user is playing something or not and also check the current slack status. We can only change the status in two situations:
- Update status to Spotify song: if the user is playing a song and status emoji is empty or is
:spotify: - Clear status: if the user is not playing a song and the status emoji is
:spotify:
Repositories
There are 2 repository methods: CreateUser and SearchUsers
CreateUser:
We try to get the user if it exists or create otherwise.
SearchUsers:
This repository retrieves all users from the database
Entities
There will be 2 entities: domain.User and db_entities.User
domain.User:
Used inside services
db_entities.User:
The model of the user's table on our DB. And also contains the transformations from and to domain.User
Running the app
In order to run our app, I’ve created a Dockerfile and docker-compose:
A free tip for the Mac M1 users: add --platform=linux/amd64 on top of your docker file or Heroku will throw an error
So, to run locally, export all the environment variables and run docker compose up .
Deployment
We will deploy our app as a container on Heroku, using Heroku container. So, there are 3 files to be created:
Procfile:
It’s a file to inform Heroku of the command to run when starting the dyno
heroku.yml:
It defines our build options for our app on Heroku
deployHeroku.sh:
A shell script to make it easier the deploy (export the environment vars before running it)
Conclusion
In the end, we have a working, simple, and free slack app that syncs your Slack status with Spotify.
But… we could change some things here. Add features and make it more secure and reliable thinking about scalability. What if our app becomes popular…
New Features
- Share what you’re listening to with others using commands
- Start listening what the others from workspace are listening to
- Control Spotify using commands
Reliability and Security Improvements
- Allow the user to exclude his data from our database when removing the app
- Paginate users to update the status instead of retrieving all
- Create another project for the landing page, with a different deployment for static website. This webpage would contain more info about the app
- Encrypt user’s data inside the database with, for example, an AES encryption (we need to decrypt our data in order to retrieve user’s info from Spotify and Slack)
And now, but not less important, in the next section I describe about how to setup the services we need to make it work (Heroku, New Relic, Spotify For Developers and Slack App).
Setup services
Heroku
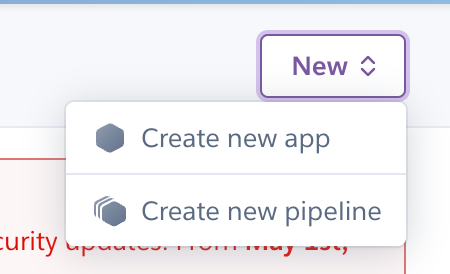
We will create a new free Heroku app. The address it will give us will be like this: <app-name>.herokuapp.com (e.g. spotify-status-slack.herokuapp.com )
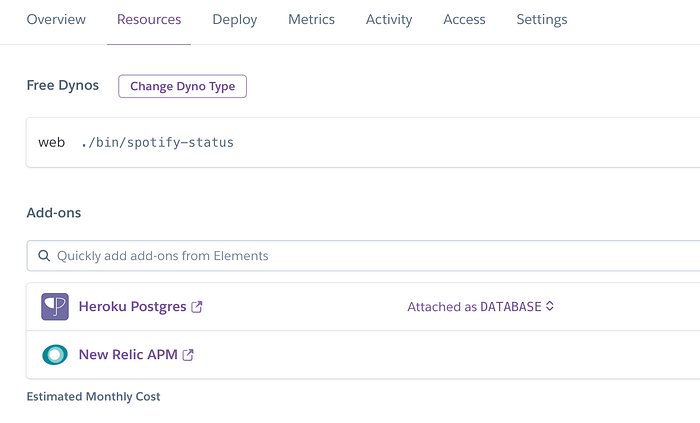
And and two resources:
Heroku Postgres: it creates an aws postgres free DB with limited resources, but it will do for our purposeNew Relic APM: it will be used to ping our app and keep it alive since Heroku, on free plan, puts the app on sleep if it doesn’t receive any request in 30 minutes

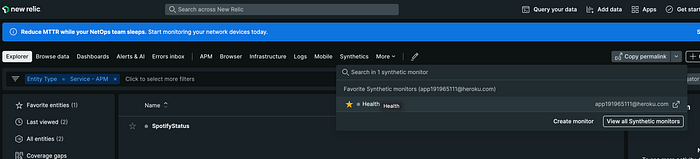
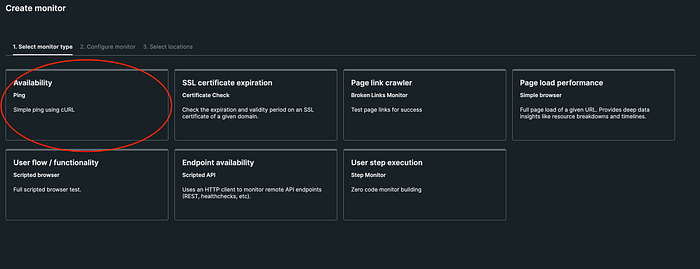
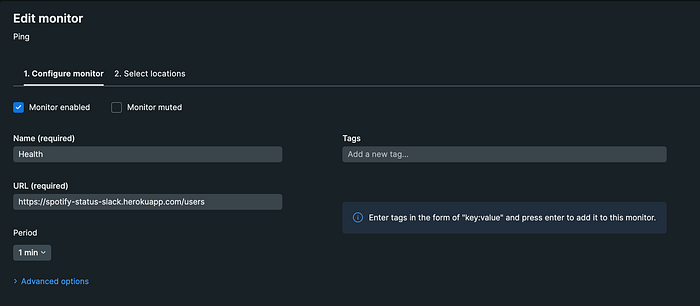
New Relic
We will create a new Synthetic monitor inside New Relic with the type Availability . This monitor will only ping an endpoint we will build for it every 1 minute (it can be any time less than 30 min)
Spotify for Developers
First of all, we have to create our Spotify developer account, and create our app inside the platform in order to obtain our Client ID and Client Secret .
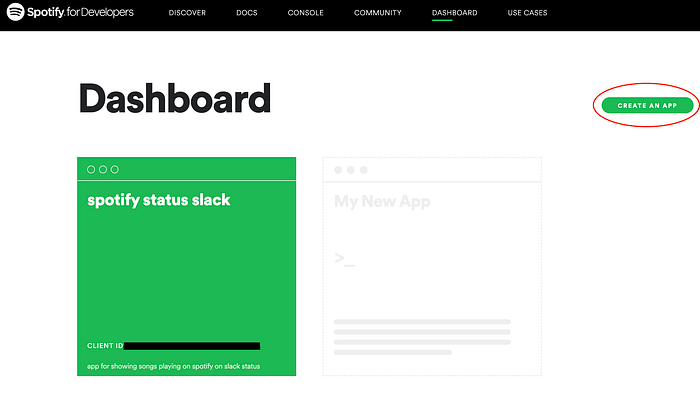
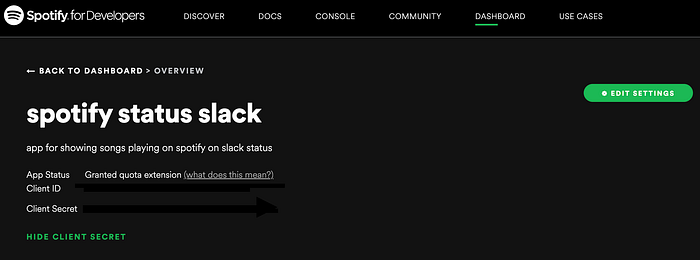
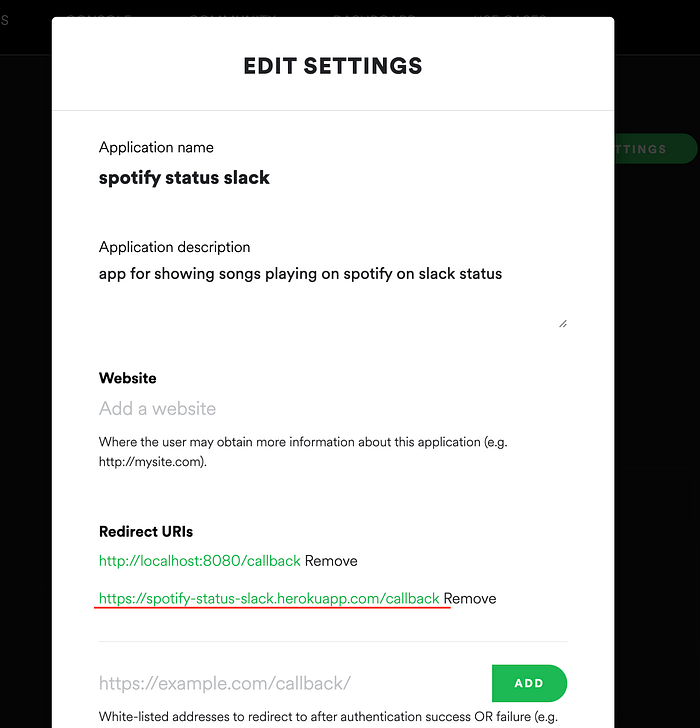
We must also provide a Redirect URL for after the user allows our app to access his/her Spotify account info
Slack App
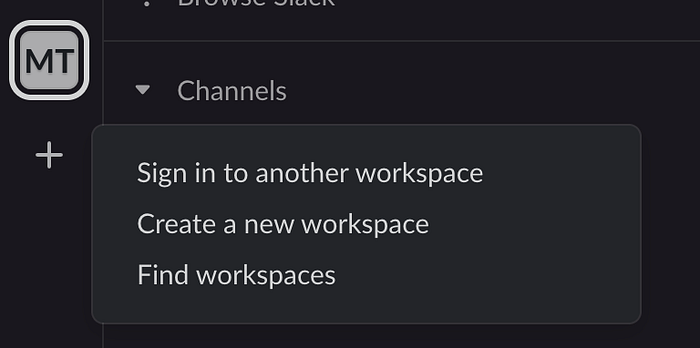
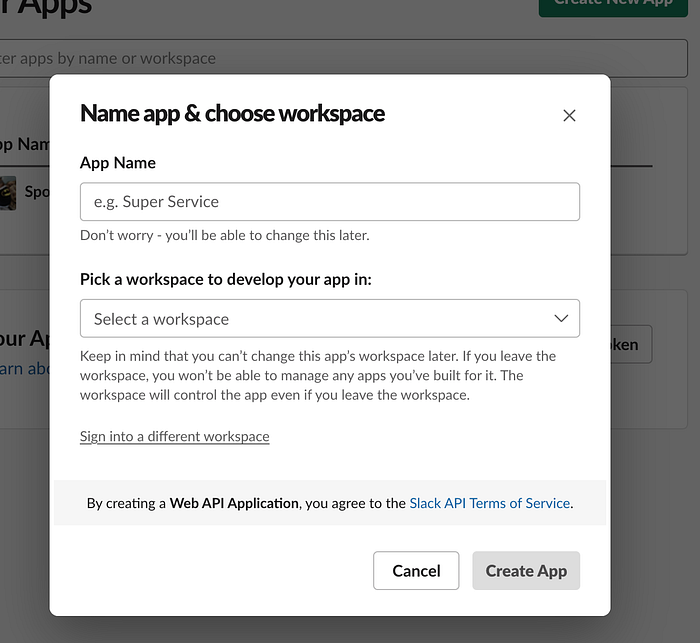
We will start creating a new workspace for development.
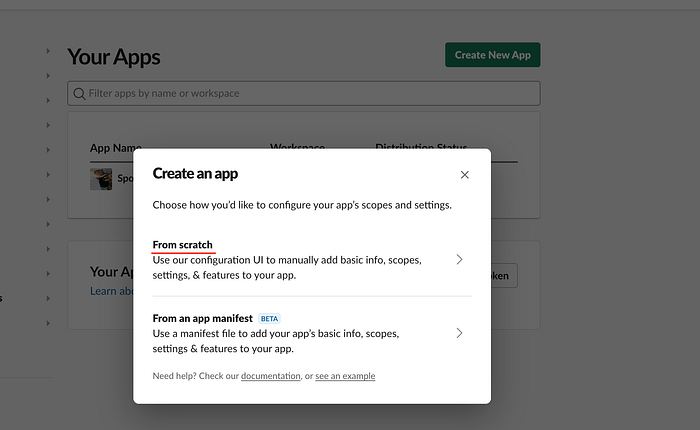
Then, let’s create our app from scratch, naming it and selecting the workspace we created before
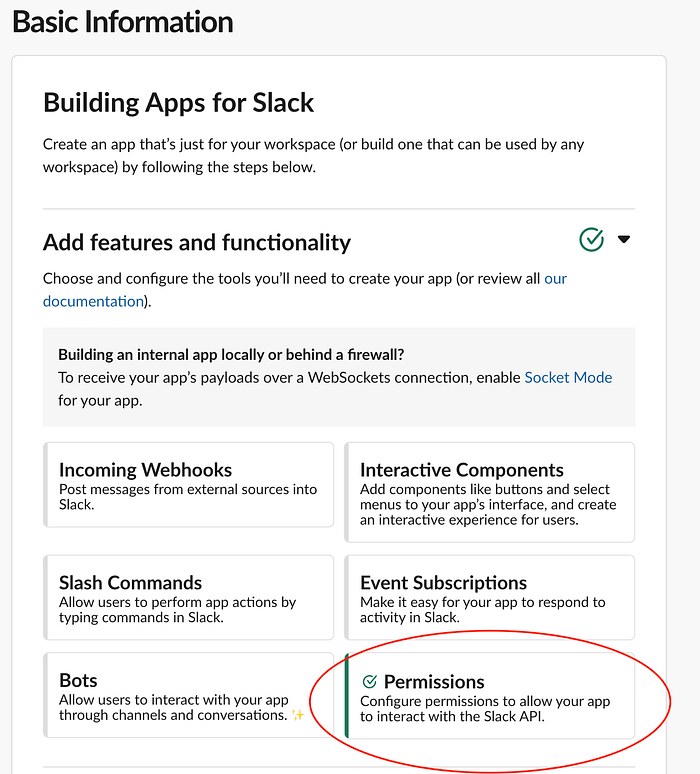
We need to configure our permissions for the app:
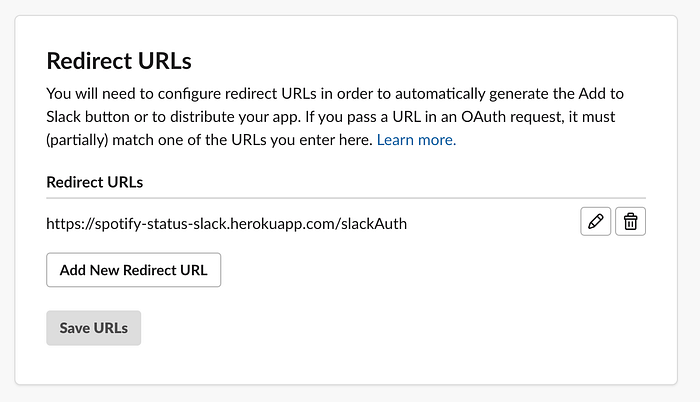
We need to provide a URL to redirect slack permission website after allowing it in the workspace the user is trying to install the app (this will be the final URL after we create our server and deploying it on heroku):
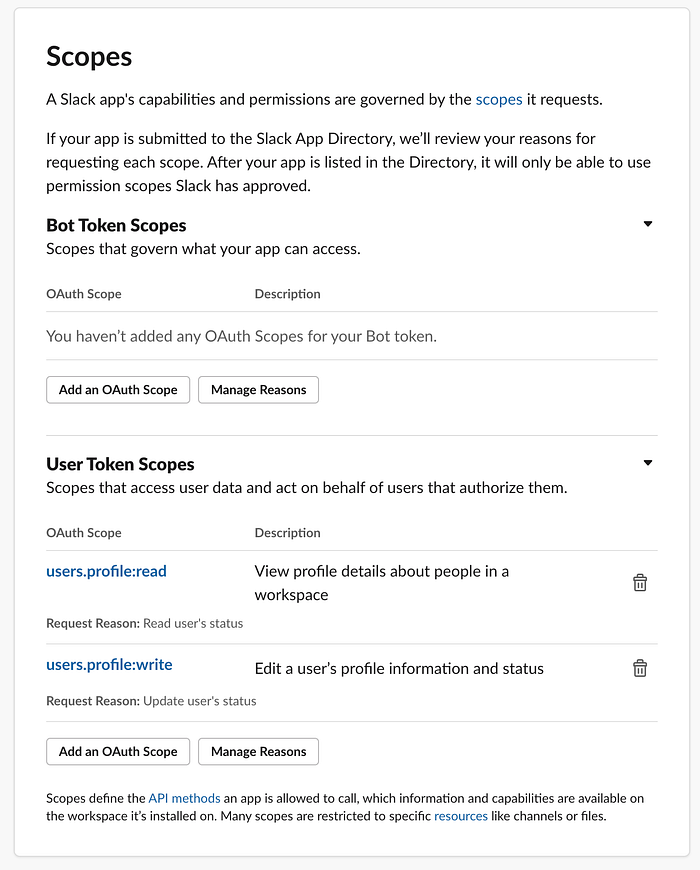
The scopes refer to the permissions we need the user to allow us when installing the app.
user.profile.read: it allows us to get user statususer.profile.write: it allows us to set user status to the song the person is listening to on Spotify
To distribute the app, we will add this pre-made Add to Slack button snippet to our website.
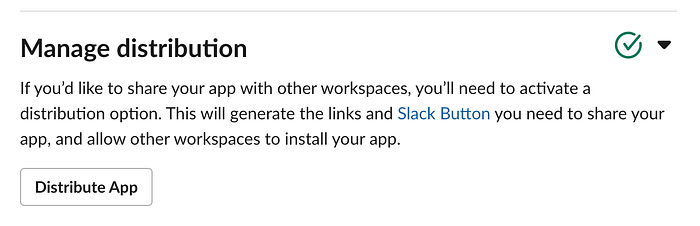
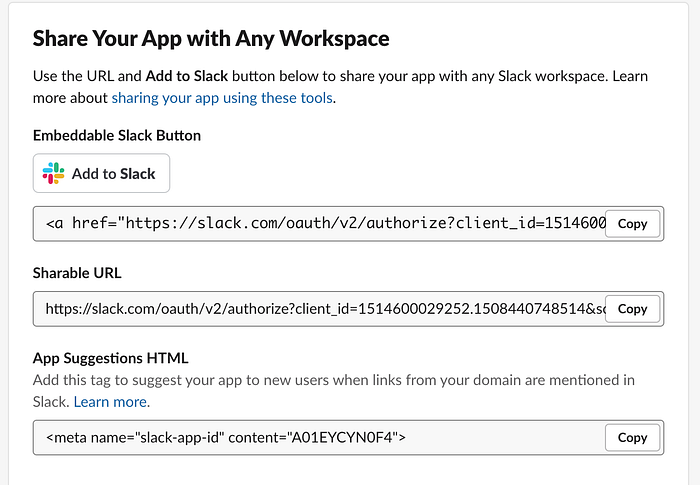
We also need to provide our URLs for the app (the final url generated by heroku for us)
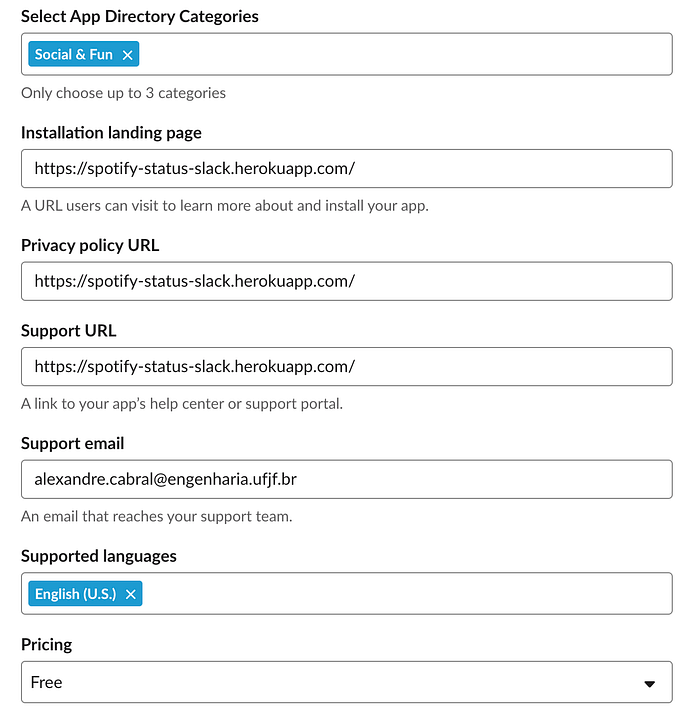
Since we will have a landing page, we will select Install from your landing page .

And…all set!

