How to Build a RESTful API With Go and MongoDB
Let’s use Fiber to build an API

In this tutorial, we’ll learn how to build a RESTful API with Fiber, a Go framework that’s said to be one of the fastest available. We’ll also be using MongoDB to store the data.
Fiber is an Express inspired web framework build on top of Fasthttp, the fastest HTTP engine for Go. Designed to easethings up for fast development with zero memory allocation and performance in mind.
I’ll assume you already have Go installed. If not, it’s pretty easy — just download the package and follow the instructions.
Let’s get started!
Installing and Starting MongoDB Through Docker
We’ll use MongoDB for the database and, for the sake of simplicity, we’ll use a Docker image.
First, download and install Docker.
Then we need to get the MongoDB image. Open your terminal and type the following:
docker pull mongo
When the download is completed, just start the docker container with the following command:
docker run --name mongo-db -p 27017:27017 -d mongo:latestThe port parameter, -p 27017:27017, is very important. It tells the Docker container to expose this port to be accessed from outside the container. Without this, you will not be able to connect to the database from the application.
That’s it. With the container running, we can now access the MongoDB instance with the URL mongodb://localhost:27017.
Creating a Go Project
Now that we have our DataBase running, it’s time to start creating our application.
Create a folder in the $HOME/go/src directory. In this tutorial we will call it my-rest-api.
mkdir my-rest-apiInside this folder, to tell Go we will use Go Modules, we need to run the following command:
go mod init my-rest-apiThis command will create the go.mod file. This file holds information about the packages used in this application. Go Modules were introduced in Go version 1.11 and gave us an easy way to deal with packages.
Now, create the main.go file, this file will be the entry point of our application with its main method.
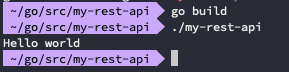
This file only prints the text “Hello world.” Now go back to the console and build your go application and run it, just to test whether it’s all working.
$ go build
$ ./my-rest-api
The first command builds the application and generates a file with the name of the application — in our case, my-rest-api. The second command runs it. It should print the text “Hello world.” If it’s printed, it’s all good.
Getting Go libraries
Now we start getting the libraries we need to build our project. We’ll be using Fiber for the web framework and MongoDB as a database.
$ go get github.com/gofiber/fiber$ go get go.mongodb.org/mongo-driver/mongo
These commands will download the libraries and store them in our Go directory, so we can use these in any project we need from now on.
Note that when we run these commands within our project root directory, Go will update our go.mod file with these packages and generate a go.sum file that holds the checksum of each package downloaded.
Set Up the HTTP Routes
Now that we have the MongoDB instance running, have created our Go project and downloaded the dependencies, it’s time to start coding our API itself.
First, import the Fiber library, just after the package declaration.
import “github.com/gofiber/fiber”Then write the main method:
func main() {
  app := fiber.New()
  app.Get("/person/:id?", getPerson)
  app.Post("/person", createPerson)
  app.Put("/person/:id", updatePerson)
  app.Delete("/person/:id", deletePerson)
  app.Listen(port)
}
The main function instantiates a Fiber instance, declares which routes will be served and its handlers, and starts listening on port 8000.
These handlers are functions that receive a fiber.Ctx as a parameter. This object holds all the information about the request and response and has functions that we can use to interact with them.
func getPerson(c *fiber.Ctx) {}func createPerson(c *fiber.Ctx) {}func updatePerson(c *fiber.Ctx) {}func deletePerson(c *fiber.Ctx) {}
Connecting to MongoDB
To avoid duplicated code, we’ll write separate functions to handle the interactions with the database. Mainly we need two functions — the first is responsible for the connection with the database, the second will return a Collection object in which we can execute the operations.
Writing the Logic of the Handlers
The operations are the simplest ones.
Get: Returns one or multiple results.Post: Adds one entry to the database.Put: Updates one entry.Delete: Removes one entry.
The only method that has a bit more logic is GetPerson because it returns one result if an id is passed, or multiple results if not.
Before the functions we declare our constants. That's good practice to avoid mistyping and is practical — if we need to change these values, we only change them in one place.
const dbName = “personsdb”const collectionName = “person”const port = 800
This is the Person struct we will use to persist on the database:
type Person struct {_id string `json:”id,omitempty”`FirstName string `json:”firstname,omitempty”`LastName string `json:”lastname,omitempty”`Email string `json:”email,omitempty”`Age int `json:”age,omitempty”`}
POST
We will start with the POST method because of how the MongoDB works. The database is only really created when the first document is inserted, so we need to insert at least one person to create the database itself.
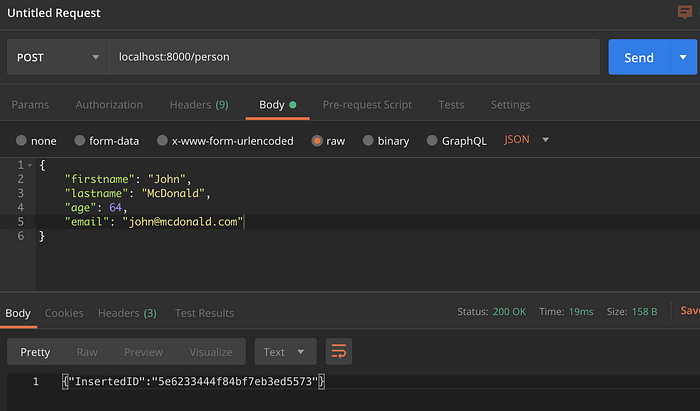
In the context variable, we have access to the body of the request through the function Body, so we need to call it and parse to our Person object . Then we call MongoDB to insert it in the database. If there’s an error, we return the status code 500, which means “internal server error,” and send the description of the error that the MongoDB returns. If the insert operations run successfully, we parse the response to JSON and send it back with the response.
Below you can see the response, which is the id of the inserted document.
GET
After we insert our first Person, we can retrieve it with the GET method.
We declared its routes in the way it can have an id as a parameter or not — that's why we put the ? after :id on the route declaration.
app.Get("/person/:id?", getPerson)We have access to the URL parameters with the function Params() — passing the name of the parameter. In our case, that’s its id, so we call c.Params("id"). Since the parameter here is optional, we need to check if it was passed or not. If it was, we pass it as a filter to our query to the database, if it was not we retrieve all results without filter.

PUT
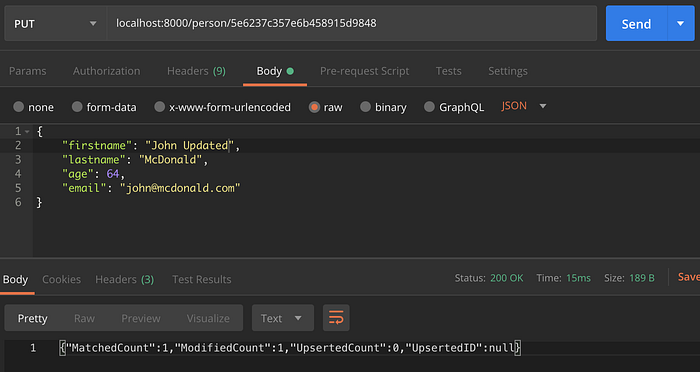
The update is almost the same as the create function. The difference is in the way we send it to the MongoDB.
What MongoDB returns to us is also different. Now, it returns information about how many documents were found and updated.
DELETE
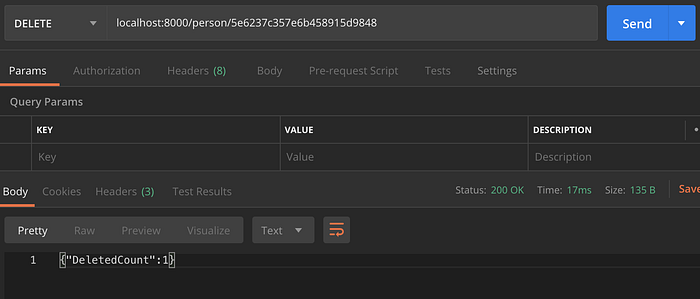
Finally, the delete function, which is also very simple.
This time MongoDB returns the count of the deleted documents to us.
Conclusion
You can see the complete code on GIT.


