Build and Deploy an NFT Whitelist App With React and Solidity
This is an NFT whitelisting use case. Learn how to interact with a deployed Solidity smart contract using React.js and ethers.js

Working on the technical components of NFTs might result in a plethora of features that must be implemented, and these capabilities are coded into the smart contract and the project’s minting/roadmap website.
Consider starting an NFT and granting exclusive access to specific art or incentives through a limited whitelist. You can create your whitelist using the smart contract. The website then allows users to connect with and join the Whitelist Smart Contract.
Essentially, a DApp in which users can communicate with the smart contract via the frontend.
This project demonstrates a basic whitelisting use case.
Introduction
In this post, we will create a full-fledged DApp that will be deployed on Ethereum.
Solidity is our smart contract’s tech stack, Alchemy is our RPC, and Hardhat is our local development environment.
To handle all of our blockchain interaction functionality, we will use React.js and ethers.js on the front end.
Prerequisites
All that is necessary is a basic knowledge of the Solidity programming language and an intermediate grasp of React.js.
Let’s Build Something
The plan is to construct and deploy the smart contract first, and then the frontend subsequently.
In the following lines, we will set up our Hardhat environment and then write some Solidity code.
Finally, we will fund our wallet with test tokens and launch our contract on the testnet!
We’ll go ahead and receive our contract address and contract abi. It will act as a route of communication with the blockchain contract.
Let’s get our hands a little muddy.
Setting Up Our Environment
We will construct and deploy our smart contract locally using the Hardhat environment.
- Make a folder for your smart contract in the root or anywhere you want it.
- To configure the environment,
cdinto the root folder and run the following commands.
// in this order, run these commandsnpm init --yes
npm install --save-dev hardhat
npx hardhat
Once you run npx hardhat, you will be given a few configurations to set up:
- Select Create a basic sample project
- Press enter for the already specified Hardhat Project root
- Press enter for the question if you want to add a
.gitignore
Complete the hardhat installation by installing these packages.
Copy and paste this into your terminal:
npm install --save-dev @nomiclabs/hardhat-waffle ethereum-waffle chai @nomiclabs/hardhat-ethers ethersThat’s it! We can start writing some code.
The Whitelist Smart Contract
After installing Hardhat and the other required dependencies, we can see that the contracts, scripts, and test folders include the Greeting.sol sample smart contract, as well as its deploy and test scripts.
Make sure all of these folders are empty because we will be creating a fresh smart contract from start!
Create a new file in the contracts folder and name it Whitelist.sol
- The contract will include a
uint public maxWhitelistedAddressesthat represents the maximum number of accounts that can be on our whitelist. No one can join the whitelist if this number is achieved. We will set the value for this entity with a constructor function when we are deploying. - The contract will include a
uint public numAddressesWhitelistedthat represents the current number of accounts we already have on our whitelist. Upon deployment, the value for this value will be zero and it will be increased until the maximum is reached. - The contract will include a
mapping(address => bool) public whitelistedAddresses. This logic sets a particular address totrue, and immediately it joins the whitelist. It will also be used to ensure that no account can join the whitelist twice! - Moreover, we will have a
constructorfunction that will be used to set the value of the maximum accounts that can join the whitelist, i.e.,maxWhitelistedAddress. The value will be set upon deployment.
Now that we have all our types, a mapping, and a constructor, we need to complete this contract by adding the most important function addAddressToWhitelist().
This function will be called when the user wants to join the whitelist:
Putting Our Entire Contract Together
Configuring the Deploy Script
In the scripts folder, create a deploy.js file. It is within this file that we will have all our deployment logic and set values constructors.
Funding Our Wallet and Getting Our RPC
Funding our wallet
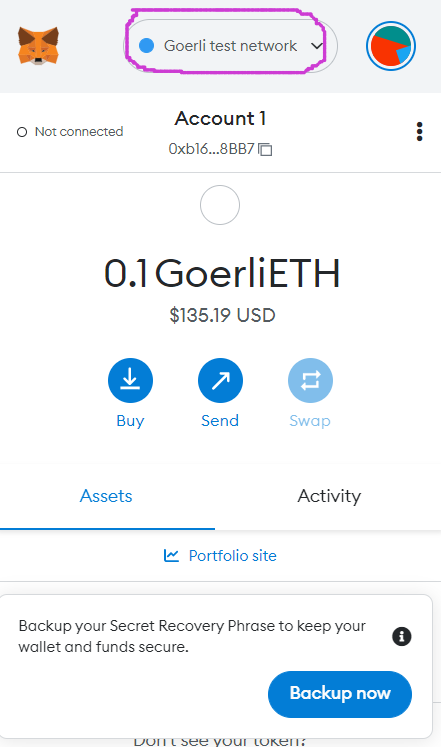
To launch our smart contract, we will fund our Metamask wallet with some testnet (fake) coins for development reasons.
- Visit this link to fund your wallet with some fake ETH
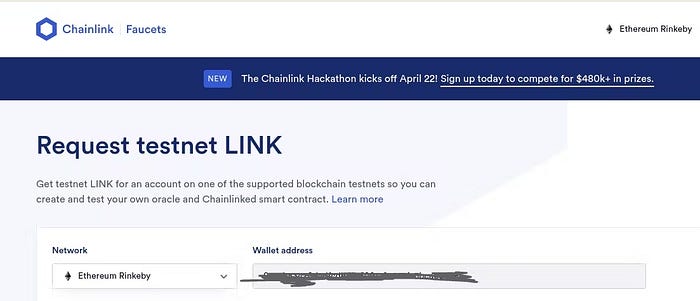
- Before making the request, launch Metamask and switch to the Goerli test network (Due to the protocol changes of Ethereum: Rinkeby, Ropsten, and Kovan test networks may not work as reliably and will be deprecated soon. Learn more).
Getting our RPC
Alchemy is a blockchain API service that will allow us to easily deploy our smart contract!
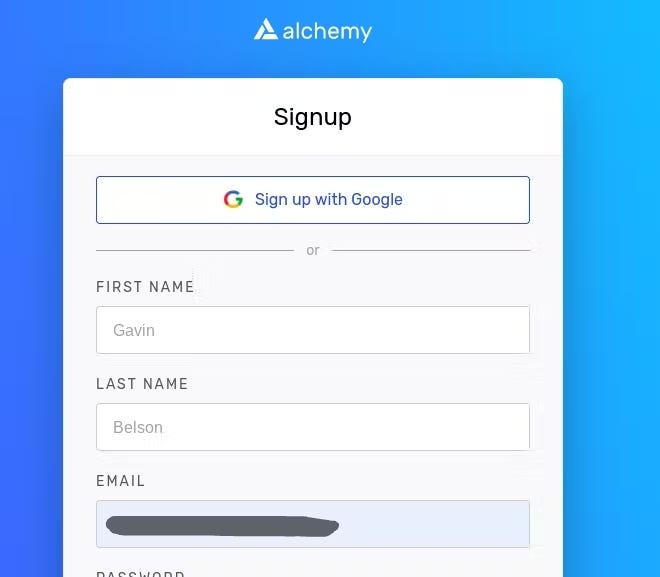
Sign up, and then let’s go over to create our app and acquire our API keys.
- After successful signup, create an app from the dashboard.

- Fill in some pertinent data to finish your app setup. Select Ethereum and the Goerli Test Network.

- View details of your app and copy your HTTP endpoint. We will use this endpoint for the deployment of the contract soon.

Let’s Finish the Deployment
- Create a
.envfile in the root of your smart contract folder. This file will contain your Alchemy HTTP endpoint as well as your Goerli Private Key.
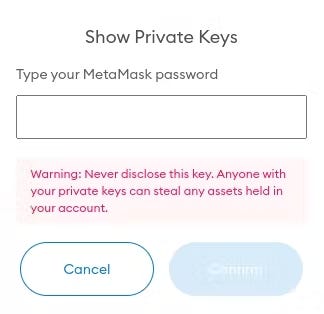
Switch to the Rinkeby test network in Metamask, and copy the private key.
- In your .env file:
ALCHEMY_API_KEY_URL="add-your-alchemy-endpoint-url-here"GOERLI_PRIVATE_KEY="add-your-goerli-private-key-here"
- To be able to import our keys into our final config file, we need an npm package called dotenv.
npm install dotenvFinal Config Before Deployment
- Navigate to the
hardhat.config.jsfile. This file will be used to configure our networks and API keys for the deployment process.
Copy and paste the following lines of code into the file for convenience.
Compile the contract
npx hardhat compileDeploy the contract
npx hardhat run scripts/deploy.js --network goerli- Voila! Our contract is successfully deployed on the Ethereum RInkeby Test Network!
- Take note of the contract address that was entered into the console. It will be required on the frontend in order to communicate with the smart contract.
- A new
artifactsfolder is created after a successful deployment. This folder contains a .json file with our contract's ABI. Copy it and save it because we'll need it along with the contract address.
The Whitelist Frontend Development
Now that we’ve completed the difficult aspect, let’s build our front. Communicating directly with a smart contract is difficult for the typical person.
It is our responsibility as developers to create an interactive interface from which users may send requests to the smart contract.
In the second and last part of this tutorial, we will create a React app, connect it to Metamask, and use ethers.js to call functions.
Essentially, our app will leverage basic React principles such as managing and updating states and calling transactions through functions. Nothing too complicated. I’ve got you covered.
Installing React.js and ethers.js
- Visit the official docs to install and set up
React.json your computer. - After successfully installing React, install
ethers.jsas a dependency by running this code:
npm install ethers- For the sake of simplicity and convenience, I’m going to do all of my reasoning in the
srcfile's root. You can arrange the folder structure as you see fit.

Building the frontend
In the Whitelist.js file:
Now that you have the unfiltered app, let us implement all of the blockchain functions and update the states.
What are Providers and Signers?
- A Provider is an abstraction of an Ethereum network connection that provides a clear, consistent interface to regular Ethereum node functions.
- A Signer in ethers is an abstraction of an Ethereum Account that may be used to sign messages and transactions and submit signed transactions to the Ethereum Network to perform state changes.
Getting the number of whitelisted accounts and joining the whitelist
Putting the Frontend Together
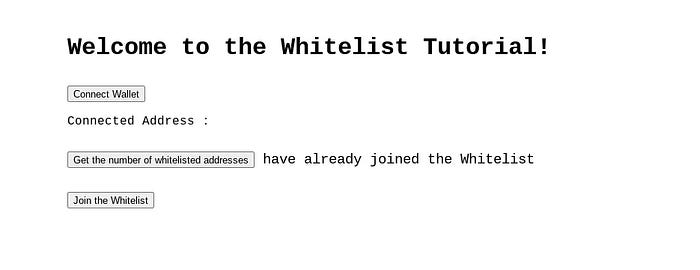
Before connecting to Metamask
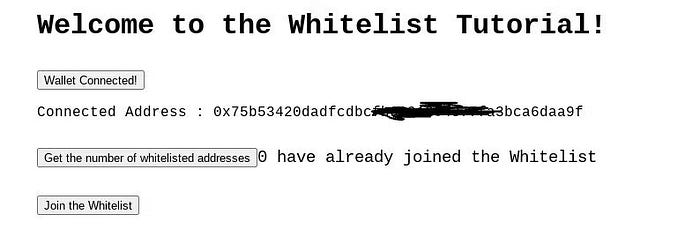
After connecting to Metamask
Before You Leave
With further understanding of React, you’ll notice that there are several best practices, such as the Custom Hooks, ContextAPI, and the useReducer hook that may be used to make our code more clean and efficient.
What are some of the features that you can implement on your own?
I’ve created a repository for this lesson, with a separate folder for the smart contract and the frontend. You can look into it.

