AWS: Creating a VPC With an Auto-scaling Group Using T2.micro Instances
Maintain a self-healing architecture

In this walkthrough, we will discuss the architecture of VPCs within AWS (Amazon Web Services) and the use of auto-scaling groups in EC2 to help maintain a self-healing architecture.
Objectives
- Create a custom VPC with a CIDR 10.10.0.0/16
- In EC2, create Launch Configurations in order to define launch specifications that include the custom VPC — each instance will also need to have the Apache webserver installed with the ability to check random IP addresses and produce a test page
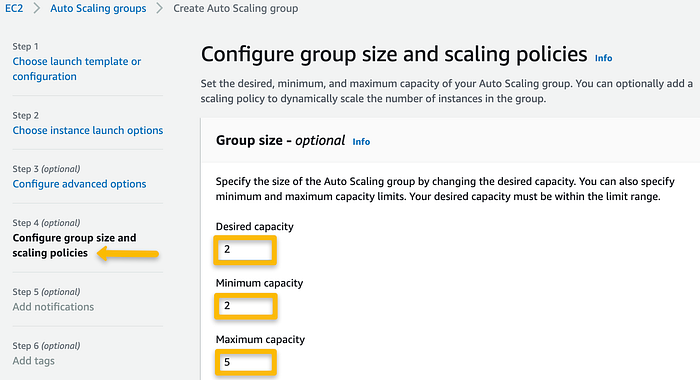
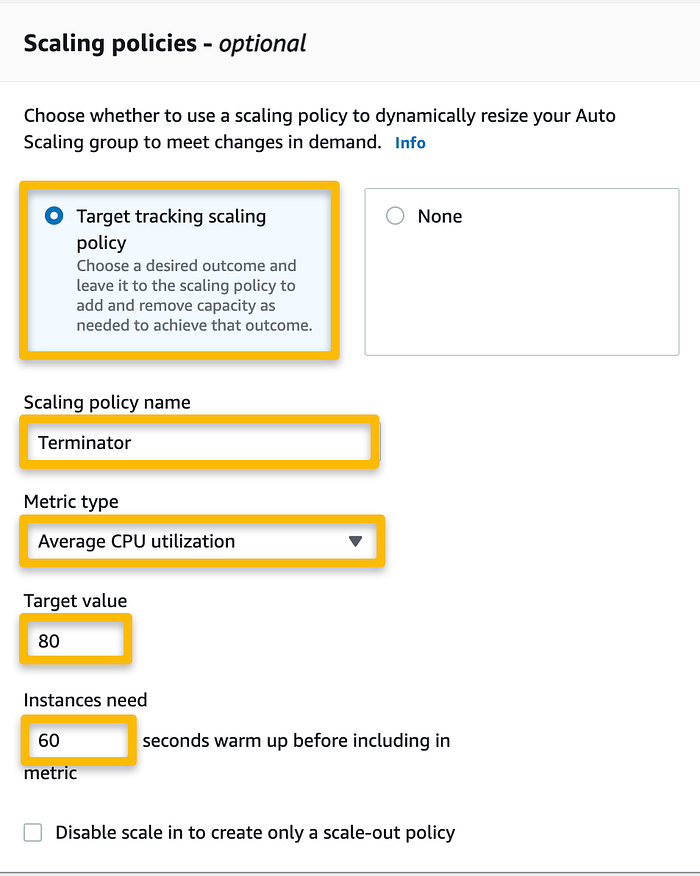
- While in EC2, configure an auto-scaling group for the instances with an instance minimum of 2 and a maximum of 5. The scaling policy will use CloudWatch to scale after the CPU Utilization is above 80%
- After the auto-scaling group is created, a stress tool will be used to stress an instance above 80% CPU Utilization to make sure the above scaling policy works.
Note: For the purposes of this exercise, I am also using the new AWS Management Console. I will be configuring a custom VPC rather than using the default created by AWS. My region is set to us-east-1.
Creating a custom VPC with a CIDR of 10.10.0.0/16
- From the AWS Management Console, use the search bar to navigate to VPC. From this page, you have the ability to configure the VPC and all network settings from the Dashboard options or us the Launch wizard to guide you through the creation of all settings at once.
- Using Launch Wizard: Select VPC, subnets, etc., name the VPC, and ensure the CIDR is set to 10.10.0.0/16. Keep all other defaults and click Create VPC.


EC2 and Launch Configurations with Apache Installation

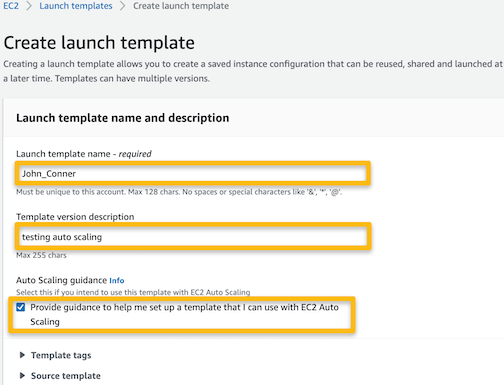
- From the AWS Management Console, use the search bar to navigate to EC2. From the Dashboard, scroll down to Instances and select Launch Templates.
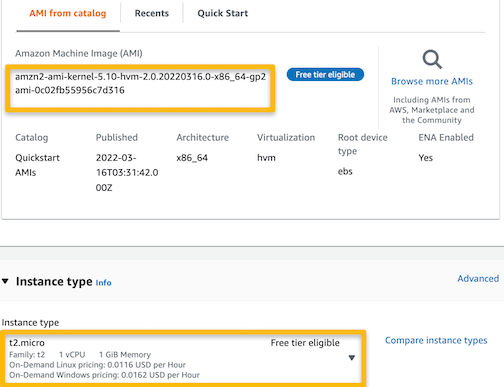
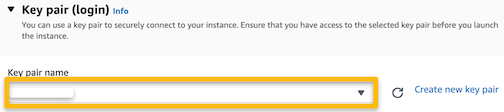
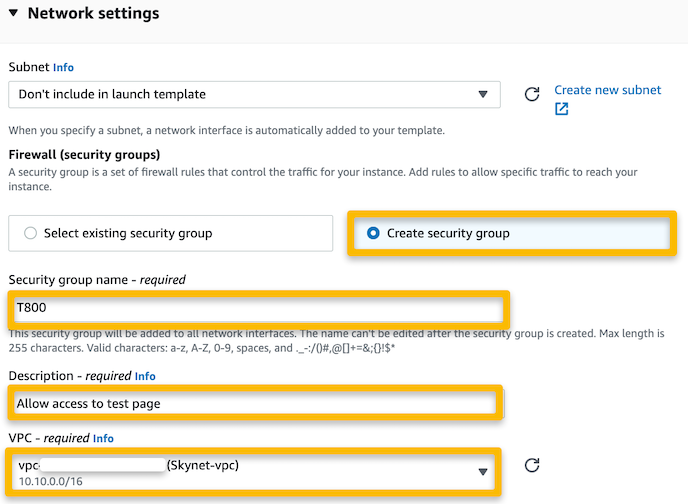
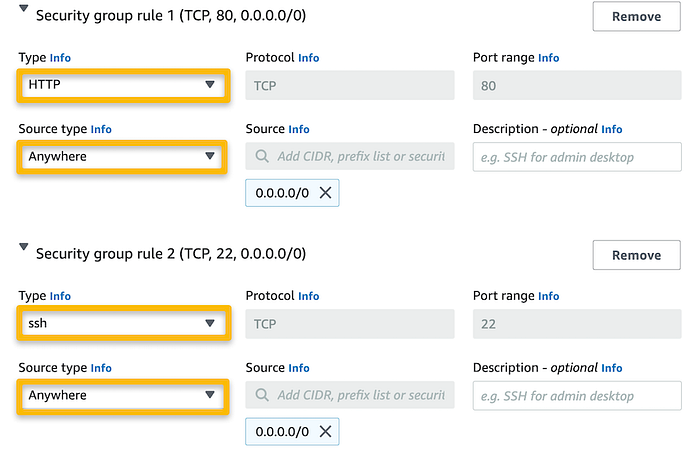
- Include the following settings for each section of the template:


#!/bin/bash
yum update -y
yum install httpd -y
systemctl start httpd
systemctl enable httpd
amazon-linux-extras install epel -y
yum install stress -y
3. After all settings have been configured, click “Launch Template”. From the next screen, you should be able to select the option to “Create an Auto Scaling group from your template”.
Create an Auto Scaling group

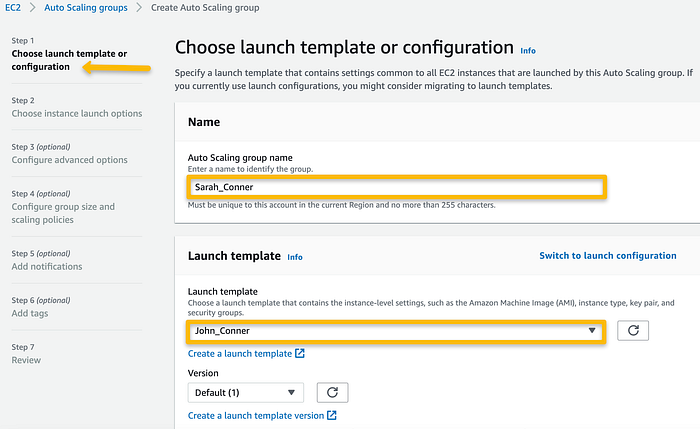
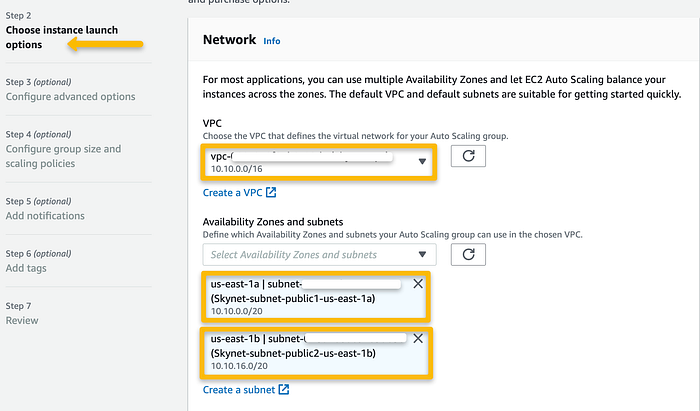
- After clicking “Create an Auto Scaling group from your template”, complete steps 1–7 with the specifications listed below.

Confirming the success of the Auto Scaling group and using a stress tool
- Confirm Apache has been installed on each instance: After a few minutes after launching the Auto Scaling group, the instances will begin to initialize and launch. Once an instance is running and has passed both status checks, select the instance id to view the details and copy the public ip. In the search bar of the browser, type
http://<public_ip>and hit “Enter”. If you reach the Apache test page, the installation from the bootstrap was a success.

2. From the AWS Management Console, use the search bar to navigate to CloudWatch. Because we checked off options earlier in the process to track the CPU Utilization metric in CloudWatch, there should already be alarms created for the Auto Scaling group in the CloudWatch dashboard.
3. To run the stress tool we bootstrapped into the Auto Scaling group instances, open the terminal, change directory using $ cd <name_of_directory> to make sure you are in the same directory as the keypair .pem file. If necessary, use the command $chmod 400 <nameofkeypair>.pem to secure it from being viewable. Then, log into one of the running EC2 instances using the following code:
$ ssh -i "<nameofkeypair>.pem" ec2-user@<public_ip_of_instance>$ sudo stress --cpu 1 --timeout 300
- Since my instances will require 60 seconds to warm up (as configured in the Auto Scaling group), the stress tool will need to have enough stress on the CPU to max out and trigger the CloudWatch alarm configured in the Target Tracking Policy. The
--timeoutvalue represents the length of the stress test. The stress test will end and produce the following result:

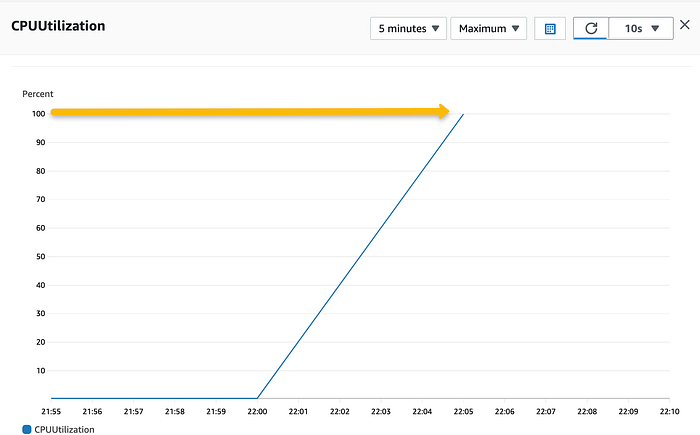
** I spent a lot of time adjusting the stress test with different values to see how CloudWatch adjusted the graphs. I also experimented with the values for monitoring for the same purpose. During this stage of the exercise, it was helpful to see how these adjustments affected the outcome.

