Member-only story
Auto-Documenting a Python Project Using Sphinx
A step-by-step guide to auto-documenting your Python code

While thorough documentation is necessary, it’s often put on the back burner and looked upon as a chore and a low-priority task. As a developer, it’s easy to fall back on the mindset of “why document the code when you, the author, know exactly what it’s doing?” When the code is rapidly changing, keeping the docs up to date becomes an even more substantial burden.
Luckily, manually writing out documentation is not required due to the capabilities of Sphinx, a tool that automatically generates documentation from the docstrings in your code.
Below is a step-by-step guide to easily auto-generate clean and well-organized documentation from Python code using Sphinx.
1. Install Sphinx
Sphinx can be installed using pip by opening up the terminal and running pip install -U Sphinx, or by downloading the official Python package.
Here is the official page outlining other ways of installing Sphinx, depending on your platform.
2. Initialize the Sphinx Configuration
In the root directory of your project, run sphinx-quickstart to initialize the sphinx source directory to create a default configuration. Running this command will prompt you to fill out some basic configuration properties such as whether to create separate source and build directories, the project name, author name, and project version.
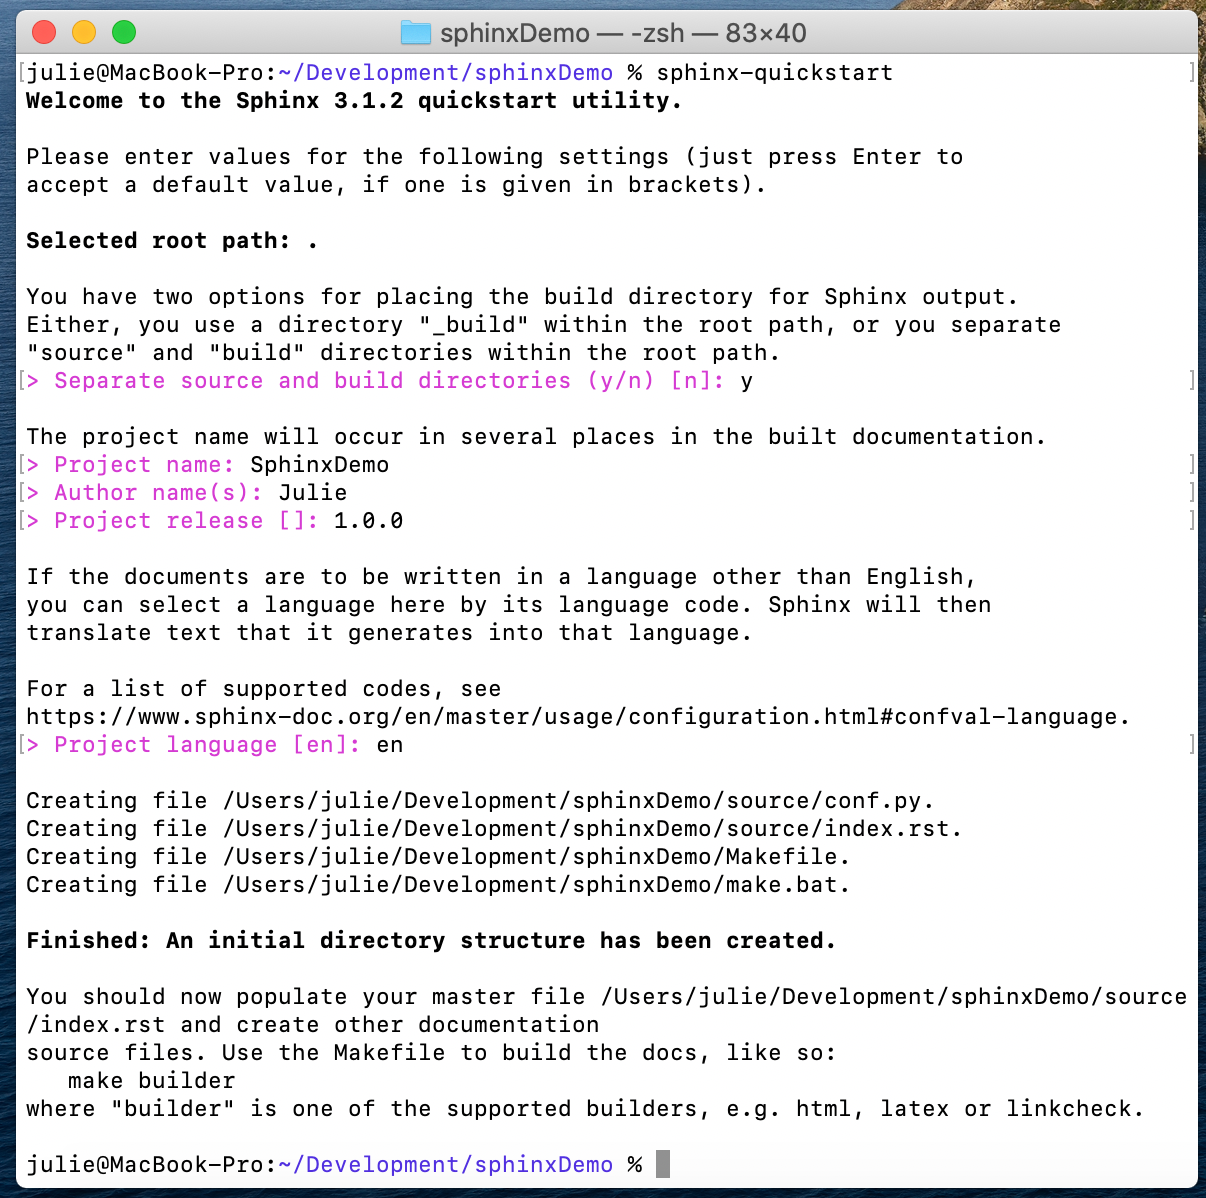
As shown above, running the sphinx-build command creates a Makefile, a make.bat file, as well as build and source directories.
3. Update the conf.py File
The conf.py file inside the source folder describes the Sphinx configuration, which controls how Sphinx builds the documentation. If you wish to override the theme, version, or module directory, you’ll need to override these changes here. Below are some recommended overrides:

