Apache Airflow on Docker With AWS S3
Write your first DAG
This blog is for someone who wants to get started with Apache Airflow quickly. This blog assumes you have a basic understanding of Apache Airflow, Docker, and AWS.
By the end of this blog, you will have your first DAG written and orchestrated in Airflow.
The main focus is on how to launch the Airflow using an extended image on Docker, construct a DAG with PythonOperator-focused tasks, utilize XComs (a technique that allows Tasks to communicate with one another), use Python modules, and finally publish and retrieve data from an AWS S3 bucket.
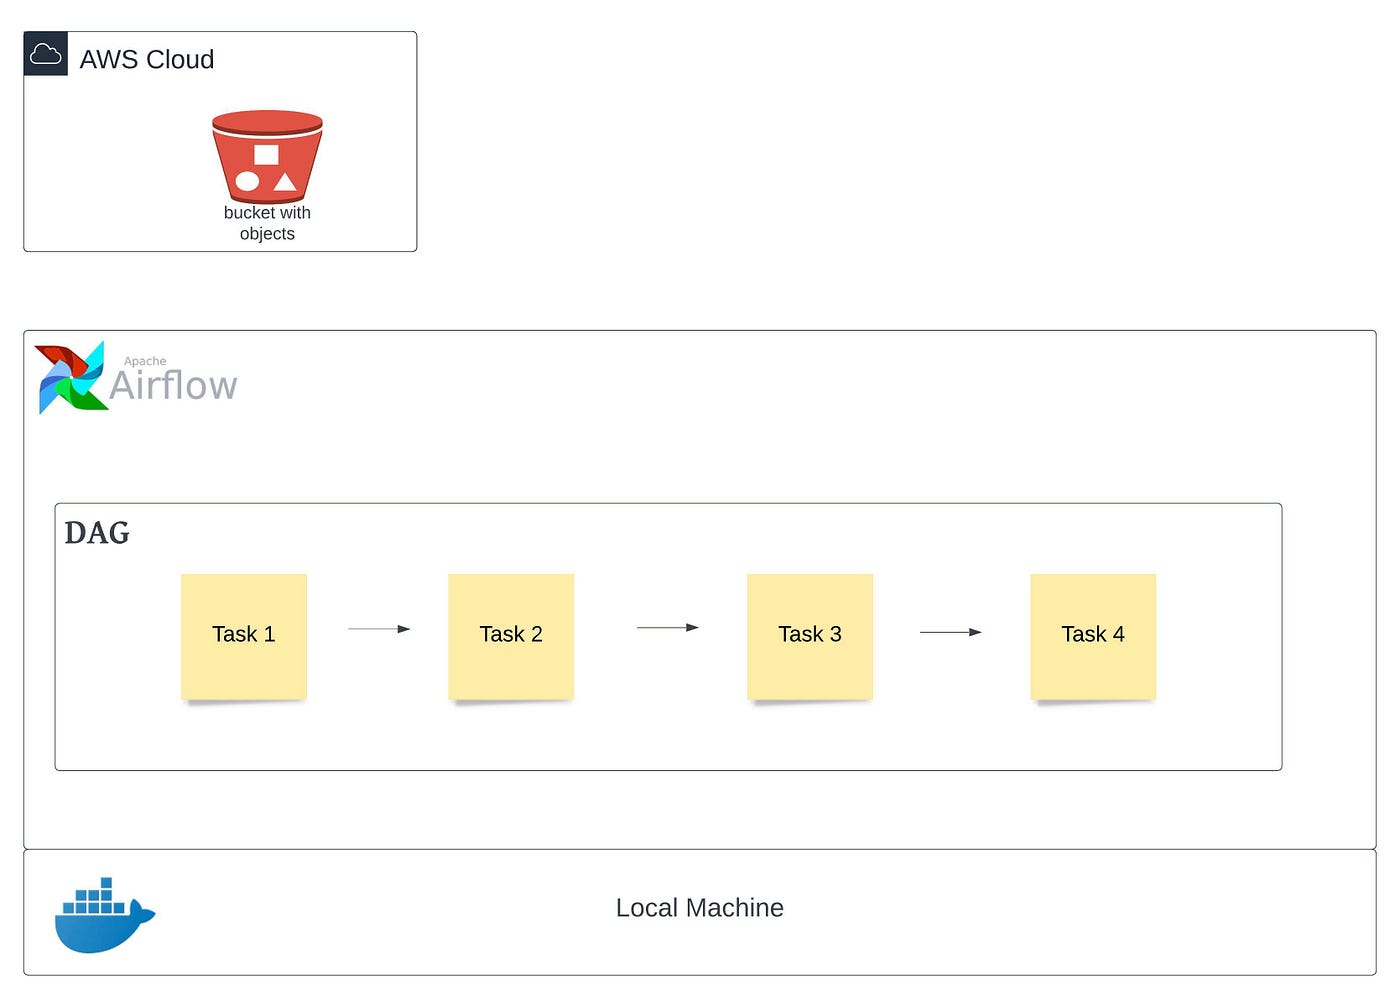
We’ll perform a small project with the following tasks to better understand this:
a) Create a weblog file using Python script
b) Upload the file to an AWS S3 bucket created in the previous step
c) Connect to AWS S3 using AWS CLI for object validation
We’ll complete our Airflow set up and start the docker by following the steps below, after which we’ll be able to run our pipeline in Airflow and retrieve the data.
- Docker configuration for Airflow
- Docker configuration for Airflow’s extended image
- Docker configuration for AWS
- Executing docker image to create container
- DAG and Tasks creation in Airflow
- Executing DAG from Airflow UI
- Accessing S3 bucket / objects using AWS CLI
1. Docker configuration for Airflow
We’ll use docker on macOS to run containers for the Airflow setup. We will use docker-compose.yaml file from Airflow documentation as a base and add the required configuration on top of it. Here is the link and some information from the Airflow official website.
curl -LfO ‘https://airflow.apache.org/docs/apache-airflow/2.2.5/docker-compose.yaml'
airflow-scheduler- The scheduler monitors all tasks and DAGs, then triggers the task instances once their dependencies are complete.airflow-webserver— The webserver is available athttp://localhost:8080airflow-worker— The worker that executes the tasks given by the scheduler.airflow-init— The initialization service.flower— The flower app for monitoring the environment. It is available athttp://localhost:5555.postgres— The database.redis— The redis - broker that forwards messages from scheduler to worker.
2. Docker configuration for Airflow’s extended image
The next step is to create a Dockerfile that will allow us to extend our Airflow base image to include Python packages that are not included in the original image (apache/airflow:2.2.5).
Create a file called “Dockerfile” in the same directory as the docker-compose.yaml file and paste the below lines into it.
FROM apache/airflow:2.2.5
RUN pip3 install Faker numpy boto3 botocore
Here we are using Airflow’s base image and then extending it using additional libraries, packages, modules, etc. which are required for our use case. You can add/remove packages based on your data-processing requirement.
There are a couple of ways Dockerfile can be executed -
- Comment the base image and uncomment the building line in
docker-compose.yamlfile - Do not make any changes to
docker-compose.yamlfile at this stage and force its execution while running the docker (explained in Section 4).
# image: ${AIRFLOW_IMAGE_NAME:-apache/airflow:2.2.5}
build: .
3. Docker configuration for AWS
The next step is to add your AWS credentials as ENV variables in docker-compose.yaml file.
Add the below variables under the environment section and put the credentials from your AWS account.
AWS_ACCESS_KEY_ID: <>
AWS_SECRET_ACCESS_KEY: <>
AWS_DEFAULT_REGION: <>
Let’s also include the AWS CLI image in the docker-compose.yaml file, which can be used to access AWS S3 objects to verify if required data has been stored on S3 or not.
awscli:
  image: amazon/aws-cli
  entrypoint: tail -f /dev/null
  environment:
    <<: *airflow-common-env
entrypoint → This will keep the cli container running
environment → Passing Airflow environment to AWS CLI to use AWS credentials
4. Executing docker image to create the container
Now run the following command to initialise the environment, verify if the Airflow image is not too old and unsupported, if the UID is configured, and if the requisite RAM, disc space, and resources are available.
docker-compose up airflow-initLet’s run the docker-compose.yaml file now, which will produce all of the images specified in the file (including Dockerfile), and then run the containers using these images.
docker-compose up -d-d → run containers in the background (detached mode)
or
If you haven’t commented on the image line and uncommented the building line in the docker-compose.yaml file, run this command.
docker-compose up --build -d--build → run Dockerfile
Once this has been completed successfully, you can verify the status of the images using the following command or by clicking on the newly formed Containers / Apps in the Docker UI.
docker ps
Use the command below to login into any of these containers using CLI.
docker exec -ti <Container ID> /bin/bash5. DAG and Tasks creation in Airflow:
Place weblog_gen.py (from the Github link - https://github.com/narotam333/de-project-1) under dags folder. This script is used to generate weblog data and is imported into our DAG as a module.
Let’s import the required libraries, packages, or modules we will need for our first dag.
# The DAG object; we'll need this to instantiate a DAG
from airflow import DAG# Pendulum is a Python package to ease datetimes manipulation
import pendulum# Operators; we need this to operate!
from airflow.operators.python import PythonOperator# Python module for data weblog generation
from weblog_gen import generate_log# Other packages for AWS connection and data processing
import os
import boto3
from botocore.exceptions import ClientError
import logging
DAG: A DAG (Directed Acyclic Graph) is the core concept of Airflow, collecting Tasks together, organized with dependencies and relationships to say how they should run.
Let’s start writing our first DAG…
# [START instantiate_dag]with DAG(
    ‘my_first_dag’,
    default_args={‘retries’: 2},
    description=’ETL DAG tutorial’,
    schedule_interval=None,
    start_date=pendulum.datetime(2022, 1, 1, tz=”UTC”),
    catchup=False,
    tags=[‘example’],
) as dag:# [END instantiate_dag]
my_first_dag → This is the DAG ID and must consist exclusively of alphanumeric characters, dashes, dots and underscores (all ASCII). All the different DAG’s must have unique id.
default_args → A dictionary of default parameters to be used as constructor keyword parameters when initialising operators (Optional)
description → The description for the DAG to e.g. be shown on the webserver (Optional)
schedule_interval → Defines how often that DAG runs, this timedelta object gets added to your latest task instance’s execution_date to figure out the next schedule.
start_date → The timestamp from which the scheduler will attempt to backfill (Optional)
catchup → Perform scheduler catchup (or only run latest)? Defaults to True
tags → List of tags to help filtering DAGs in the UI (Optional)
Next, we will write our first Task using PythonOperator.
Task: A Task is the basic unit of execution in Airflow. Tasks are arranged into DAGs, and then have upstream and downstream dependencies set between them in order to express the order they should run in.
Operator: An Operator is conceptually a template for a predefined Task, that you can just define declaratively inside your DAG.
In this Task, we will call the function called f_generate_log and pass the required argument to it. When running our callable, Airflow will pass a set of arguments/keyword arguments that can be used in our function.
# [START weblog_function]def f_generate_log(*op_args, **kwargs):
    ti = kwargs[‘ti’]
    lines = op_args[0]
    logFile = generate_log(lines)
    ti.xcom_push(key=’logFileName’, value=logFile)# [END weblog_function]# [Start weblog task]create_weblog_task = PythonOperator(
    task_id=’weblog’,
    python_callable=f_generate_log,
    op_args = [30],
)# [End weblog task]
task_id → This should be unique for all the tasks within a DAG
python_callable → A reference to an object that is callable
op_args → A list of positional arguments that will get unpacked when calling your callable
op_kwargs → A dictionary of keyword arguments that will get unpacked in your function
generate_log → This is the module that generates the weblog data file. Please go through the weblog_gen.py script to see how it works, but it basically generates weblog data in a file and number of lines will be equal to the number passed as an argument. It will return the log file name once it has been created.
ti.xcom_push() → Value for the key logFileName is pushed into the XCom using taskInstance (ti) keyword argument as a key-value pair
key=’logFileName’ → This holds the key name
value = logFile → This holds the returned value (name of the log file) from generate_log module
Let’s go on to the second task in our DAG.
# [START s3_upload_file function]def s3_upload_file(**kwargs):
    ti = kwargs[‘ti’]
    bucketName = kwargs[‘bucketName’]    fileName = ti.xcom_pull(task_ids='weblog', key='logFileName')
    objectName = os.path.basename(fileName)
    s3_client = boto3.client(‘s3’)    try:
        response = s3_client.upload_file(fileName, bucketName, objectName)
    except ClientError as e:
        return False
    return True# [END s3_upload_file function]# [Start s3 upload task]s3_upload_log_file_task = PythonOperator(
    task_id = ‘s3_upload_log_file’,
    python_callable=s3_upload_file,
    op_kwargs = {‘bucketName’: <>},
)# [End s3 upload task]
We’re using keyword arguments in this Task since we need to pass the AWS S3 bucket name. Please provide the name of the bucket you created or that is available in your AWS account.
We’re calling the s3_upload_file function in this Task and passing the required keyword arguments.
ti.xcom_pull() → Using the XCom taskInstance (ti) keyword argument, the value for the key logFileName is retrieved
task_ids = ‘weblog’ → Passing the task id name from previous task
key=’logFileName’ → Passing the key that holds the generated weblog file name
The next step is to establish the flow of newly created Tasks.
create_weblog_task >> s3_upload_log_file_taskThis completes the development of a DAG file for our use case, which includes a DAG object, Tasks, and Operators, as well as the orchestration of the tasks stated at the end.
6. Executing DAG from Airflow UI
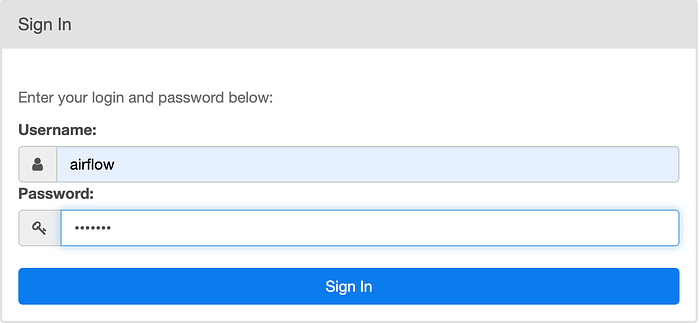
To begin, log in to the Airflow UI with the credentials listed below.
Link → http://localhost:8080/
Username / Password → airflow
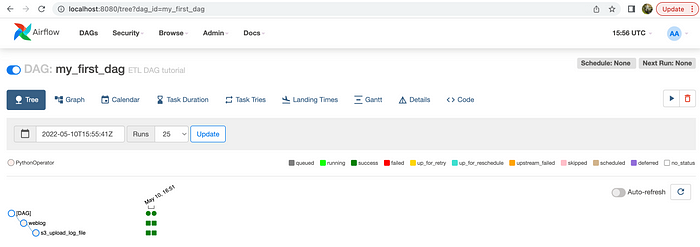
You should be able to see the DAG that we created under the DAG’s menu.

Let’s run our DAG now by hitting the play button under Actions on the right-hand side. If you click on DAG, you’ll be able to see the DAG’s and Tasks’ progress using colour coding.
You can also see the logs at any time by selecting Task, then Log.
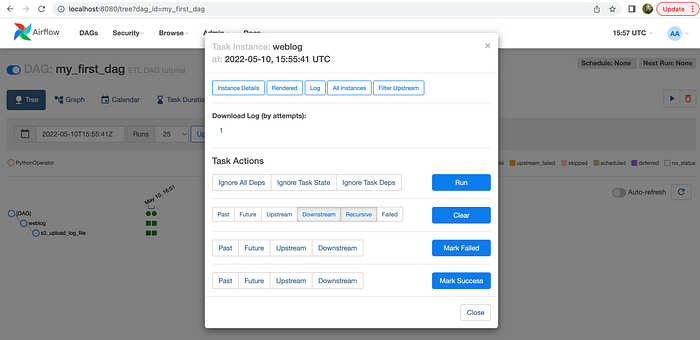
Once Log is open, click XCom to see what is the value of key variable we transmitted from one Task to the next.
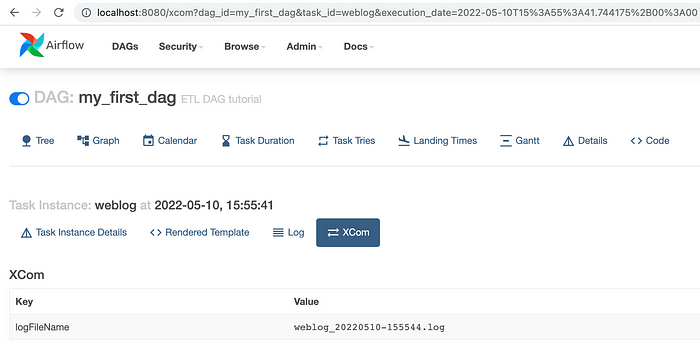
So that concludes our DAG’s successful execution in Airflow.
7. Accessing S3 bucket/objects using AWS CLI
Let’s take a quick peek at the AWS S3 bucket to see if the appropriate file or object has been generated. To do so, use the below command to log into the AWS CLI container and perform the s3 command to display all objects.
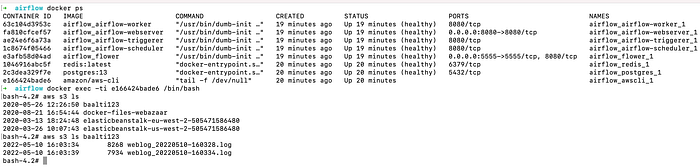
Here it is! The file was successfully uploaded to the S3 bucket. This marks the completion of our first DAG run in Airflow, as well as its successful validation.
GitHub link for complete code:
https://github.com/narotam333/de-project-1
I hope this blog will help someone who is in search of a quick hands-on article for Apache Airflow and will help them begin their journey with this awesome open-source tool.
Thank you for reading.

