Part of Android Jetpack.
Complete Android Data Binding Tutorial (Part one)
No more findViewById()

“Never Stop Learning; For When We Stop Learning, We Stop Growing”
Data binding has made developers’ lives a lot easier and heralds is a new era in android app development.
I’ve talked about data binding is my previous pieces, like “How to Make RecyclerView Items That Expand With Animation”, but if you don’t know anything about data binding, read on as I will walk you through every aspect.
What is Data Binding?
Android data binding is part of an android jetpack — a set of tools that helps developers make high-quality apps. If you’re a developer with some experience of android app development, you’ll be familiar with findViewById(), the method of declaring views in an activity. Let’s say I’m making an app which is showing my name in the textView . Here I am showing both ways of defining a view, with and without data binding.
Note: I’m omitting the details of XML and activity for the sake of brevity.
Without Data Binding
TextView myName = findViewById(R.id.m);
myName.setText(“Mustufa Ansari”)
With Data Binding
<TextView
    android:text="@{modelClass.userName}" />
You’re probably finding it difficult to understand what’s going on above — that’s totally fine. It’s a small piece of code related to data binding just to give you an idea.
You can see clearly that, in the data binding part of the above code, I have declared my username in the XML file using modelClass in our activity directly. After this, you don’t need to add findViewById() in your activity to find textview and then set the userName in it.
Getting Started
First, I add a small line of code in your build.gradle to enable data binding in your project:
dataBinding{
   enabled true
}
Next, I make a simple app that shows some text in the textViews. I’ll show you both ways of presenting data in textView, with and without data binding, so you can understand the process.
I have added data binding dependency in my build.gradle file:
Now let’s make a model class. As I mentioned earlier, data binding works with model class. It’s a good practice to have a model class while using data binding — that is the complete way of using data binding in your app.
I’m making a model class called Person.java in which I’m defining two variables: name and age .
Now let’s show some data in our app. I’ll split this into two steps — with data binding and without data binding.
Without DataBinding
My activity_main.xml looks like this:
My MainActivity.java looks like this:
This is the old fashion way of declaring views and binding views with data.
Hit run and you’ll get this result:

With DataBinding
In order to implement data binding, we need to wrap the whole layout in <layout></layout> tag, like this:
Now, in data binding, we can bind our views with data directly. But for this, we have to introduce another term of data binding: the<data></data> tag. In this data tag, we can import our required model class, which needs to be bound with views:
<data>
    <variable
        name="person"
        type="com.codixlab.databinding.Person" />
</data>
This means we will attach this model class with our layout. Here you can see we have a variable tag, which has two attributes: name and type.
name : What you call this model class is your decision, but it's good practice to give it the same name as your model class.
type : This is a type of name variable. Here we’re attaching Person class with the layout, so the type is classpath of Person.java .
Now our activity_main.xml looks like this:
The next part is to bind our views with data. To do this, there is a way of a binding layout with data by using '@{}' with views. Let’s see how to implement this:
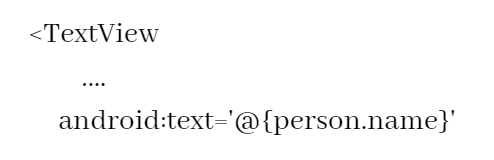
Here I’m binding my TextView text property with the model class property name so that whatever the name comes from the activity it will show in this textView. Does this make sense?
Now everything’s fine in the layout, it’s time to edit our MainActivity.java.
First, we need to tell our activity that we will use data binding because it doesn’t know anything that we’ve done in the XML file. For this, data binding generates a class when we include our layout under <layout> tag. It’s simple to import that class to the pattern. Whatever the name of your activity’s layout is, your binding class name would be according to that layout file. Let’s take a look.

The word “Binding” will be attached by the data binding library itself.
Note: If you are unable to import your data binding activity class just rebuild your project.

In this line, we’re storing our whole XML in the variable bi . We can access the whole layout and each view present in it with this variable. Name it whatever you like — I just called itbi for instant use.
Now it’s time to attach the data to the view.
Do you remember what we did for the data in the XML file?
That’s right, we set the model class with the name person . Data binding is very handy — it generates the setter method for the data. If you call bi and press . then you will see something like setPerson(), in which you can set your model class. Then it will attach with a view:
Now hit run and you will see the result:
Let’s compare the code with and without data binding:


You can see clearly the lines of code in both examples. Data binding has made it a lot easier for developers to make complex apps and it saves us from boilerplate code.
This is part one of a series — there’s a lot more to learn, we haven’t finished with data binding yet!
Click Here for Part -2
Follow CodixLab for more tech knowledge.
Found this article useful? Check out my most read articles on Better Programming below:

