All Hail the Monolith — Celebrating the Verbosity of the Unified Architecture in Terraform
Exploring the monolithic architecture

As you can probably tell, I have feelings about monolithic architectures in tech.
On one hand, everything is so neatly packaged in a single file that it’s difficult not to love the apparent simplicity of it all.
However, the services that are tied together can also fail together — as I have learned attempting to cobble together a simple backend consisting of an RDS MySQL instance and frontend of web-facing instances managed by an application load balancer. Easy, right?
Objective

For my first Terraform project, I have created a monolithic structure containing a VPC with public and private subnets, an application load balancer, and an RDS MySQL instance.
My goal in this approach was to not only explore the capabilities of Terraform, but also to determine the benefits and challenges of this type of unified structure. As an extra level of challenge, I opted not to include outputs or set known variables in this document.
Tasks
In order to achieve the objective, I needed to complete the steps detailed below:
1. Using an I.D.E. of choice, install Terraform.
2. Utilize the official documentation to compose a single file containing the code for the following specifications:
— VPC with CIDR 10.0.0.0/16
— 2 public subnets with CIDR 10.0.1.0/24 and 10.0.2.0/24 in two availability zones
— 2 private subnet with CIDR ‘10.0.3.0/24’ and ‘10.0.4.0/24’ in two availability zones with an RDS MySQL instance (micro) in one of the subnets
— A load balancer that will direct traffic to the public subnets
— 1 EC2 t2.micro instance in each public subnet
Environment and Specifications
Device— MacBook Pro, 14-inch, 2021, M1 ProAWSaccount and credentialsI.D.E.— AWS Cloud9 running on Amazon Linux 2, t2.micro instance (free tier)Terraformv. 1.2.3 (comes pre-installed with Cloud9)
Analyzing the Main Configuration File of the Monolith

The monolith, according to filmmaker, Stanley Kubrick, represents the collective unconscious. The eerie and intimidating structure contains everything and persists, unchanging, since before the dawn of humankind. While this kind of commitment may seem comforting,— or unsettling, depending on how you view it — it’s usefulness and practicality render it little more than a demonstration of artistry.
I have similar sentiments about the lone configuration file in Terraform — main.tf. The potentially unwieldy file contains all of the configuration and values to deploy an application. Unfortunately, it also carries the potential for security breaches and performance issues.
Providers: AWS
The first portion of the main configuration file should contain a declaration of the provider(s). Providers allow Terraform to manage resources or data sources. In the example below, I have declared AWS as the provider, hard-coding credentials ( — seriously, don’t do this!*) and my working region so that the resources can be created and managed.
- **Sensitive values or information should never be included in the
main.tffile as that information can, and probably will, be used to commandeer your accounts and rack up charges or destroy all that you know and love in your digital space. → Try instead: Use HashiCorp’s suggestion of setting variables to protect sensitive data.
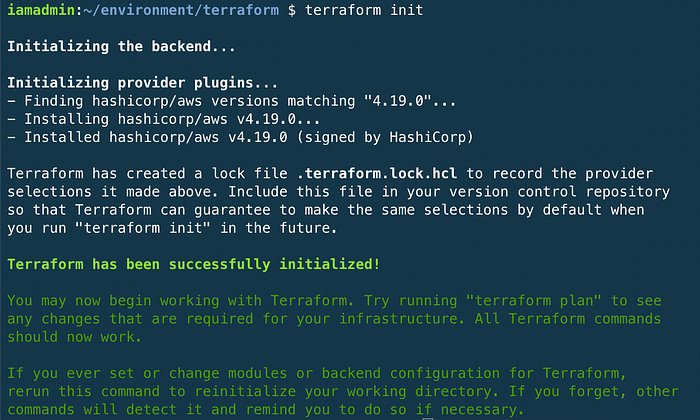
After this step, save the file and run a $ terraform init to initialize the working directory and backend.
Resources: VPC et al.
The configuration below details the specifications associated with the VPC and its subnets. Listing out all of my VPC resources including the VPC itself, public and private subnets, routing table, routing table associations*, and Internet gateway.
- *Since I chose the long-hand approach, I was limited to a single subnet per
aws_route_table_associationresource. This expanded the code for every subnet I needed to explicitly associate. → Try instead: Usecount = length(var.subnets)under the resource to specify the number of desired subnets.
App Tier — Resources: EC2, Security Groups, Application Load Balancer
This portion of the code represents a set of public instances running Amazon Linux 2, bootstrapped with an Apache web server installation. The security group rules allow ssh access from port 22as well as access to the Internet via port 80. The EOF designation present around the user data allows multiline strings in the Terraform configuration.
The load balancer, specified to be the type “application” — which is the default — is associated with the public subnets and distributes the web traffic between the instances in this tier.
Database Tier — Resources: Database Subnet Group, Security Group, Database Instance
This final section of this configuration contains a list of resources that make up the database tier of the application. The subnet group must contain at least two private subnets for high availability. The resource will show an error if only one subnet is listed.
The security group is similar to the app tier group, but must specify port 3306 for the RDS MySQL database client. Additionally, only the security group from the tier above has access to this instance.
The database instance is created in RDS using the specified subnet group and security group. I could have added a number of options, such as adding log information, but as this is not a production-stage application, I am not really interested in collecting logs just yet.
That’s all! All there is to do now is plan and apply this configuration to see how everything comes together.
The Moment of Truth…
I ran the command $ terraform plan to run the list of all desired specifications of the configuration. Many values were marked as “known after apply” because the resources had not yet been created.

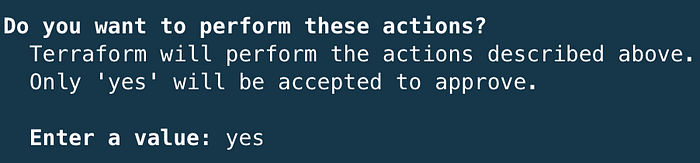
After reviewing the plan, I went ahead with $ terraform apply to make the listed resources and hope for the best — no errors.
Terraform checks in one last time to make sure I understand what I’m about to do..
After a few short minutes, all declared resources should have been created. I was sure to check the AWS Console for each resource, comparing it to the configuration I specified.

Reflection
Overall, using Terraform was vastly more efficient than using the AWS Console and switching back and forth between various tabs and windows to create a two-tiered structure.
While I found a benefit in using a unified structure for simplicity rather than needing to refer to multiple files, the security risk and practicality — or lack thereof — just aren’t worth it.
So what’s next? I used $ terraform destroy to clean up all of the newly-created resources just as easily as I had created them. There is peace of mind for the busy cloud engineer when a single command can quickly deploy and destroy resources without forgetting about that one resource that continues to incur charges.
Now that I have an understanding of Terraform at the most basic level, I will be exploring some more advanced features of Terraform — modules! Stay tuned, Earthlings.


