A Step-by-step Walkthrough to Create Your First SSH Config File
SSH config file for remote connection and public<>private key pair management

This post dives into two common scenarios faced by developers when using SSH and how to configure the SSH client config file (.ssh/config) to overcome the roadblocks.
Scenario 1: Multiple Public and Private Key Pairs

In the workspace, a developer might have more than one pair of public & private keys. For example, I have different key pairs for Github and Bitbucket, one for personal use and another for organization use.
The native path of .ssh/id_rsa and .ssh/id_rsa.pub only saves a pair of keys. The creation of a .ssh/config file allows the user to systematically configure the paths of multiple key pairs where the right one will be identified when running the command.
Scenario 2: One or More Connections to the Remote System

A developer’s daily work includes connecting to remote systems to perform heavy computing, run testings on different OS, and many other tasks.
Ssh with a user name and IP address is the most common method to log in to the remote system, where the rest of the operations are run purely with terminal commands, without the GUI.
ssh <user-name>@<ip-address>To remember the details of the login, the developer would have to write down the information somewhere such as sticky notes. It’s not entirely the most effective practice and I have lost count of time in which I forget about where these things were jotted down.
Instead, all these IP addresses, usernames, and other configurations can be saved in the SSH client config file. Subsequently, each login can be performed with the alias which replaced the verbose login details.
Let’s dive into the details on where and how to set up the SSH client config file for the two scenarios above.
Contents
- Path of the SSH client config file
- Setup of the config file for scenarios 1 and 2
Path of the SSH client config file
SSH client config file with the filename config sits in the .ssh folder under the home directory. Each user of a system owns an individual config file.
/
│
├── root/.ssh
|   ├── ...
│   └── config
│
├── home/<user_name_1>/.ssh
|   ├── ...
│   └── config
│
├── home/<user_name_2>/.ssh
│   ├── ...
│   └── config
│
└── ...
If the file does not exist in the first place, create it with the following commands:
Windows (with command prompt)
cd %HOMEPATH%/.ssh
type nul > config
Linux (with terminal)
cd ~/.ssh
touch config
Alternatively, to set configurations that apply to all users, create the config file ssh_config in the path /etc/.ssh/.
Setup of the Config File for Scenarios 1 and 2
Sample format for .ssh/config file
Host <host_identifier>
  <ssh_config_key> <ssh_config_value>
  <ssh_config_key> <ssh_config_value>
  <ssh_config_key> <ssh_config_value>
Each key and value are separated by a single space. Alternatively, a single equal sign works too.
Host=<host_identifier>
  <ssh_config_key>=<ssh_config_value>
  <ssh_config_key>=<ssh_config_value>
  <ssh_config_key>=<ssh_config_value>
Indentation after <host_identifier>, as well as a blank line to separate each block of configurations, is optional but recommended for readability.
<host_identifier> is the key to identify which block of configurations to be used in the ssh command. It’s the element pointed to when typing in command prompt/terminal. Examples are shown in the screenshots below.
Scenario 1: Multiple public & private key pairs
Scenario 2: One or more connections to the remote system
The rest of the configurations listed in a block, in the following manner:
<ssh_config_key> <ssh_config value>are the optional configuration to be added while making the connection.
Scenario 1: Multiple public and private key pairs
To store multiple key pairs of .ssh, simply create new key pairs with:
ssh-keygen -t rsa -b 4096 -C <email>Explicitly save the key pair to a sub-path in the .ssh folder.

Then append to .ssh/config file with snippet as shown below and make changes accordingly:
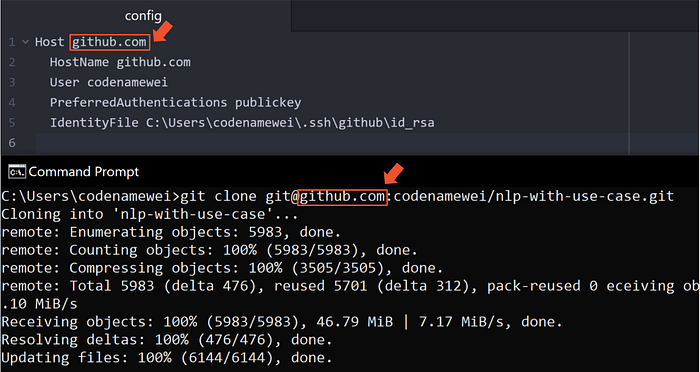
Host github.com
  HostName github.com
  User codenamewei
  PreferredAuthentications publickey
  IdentityFile C:\Users\codenamewei\.ssh\new_folder\id_rsa
An elaboration of each keyword can be found here.
Note: The keywords Host and HostName might be confusing. Host represents the alias used in the terminal, while HostName specifies the real hostname to login. In this scenario, keeping both the same makes it straightforward.
Scenario 2: One or more connections to the remote system
To store configurations for connecting to a remote system, append the following snippet to the config file and make changes accordingly.
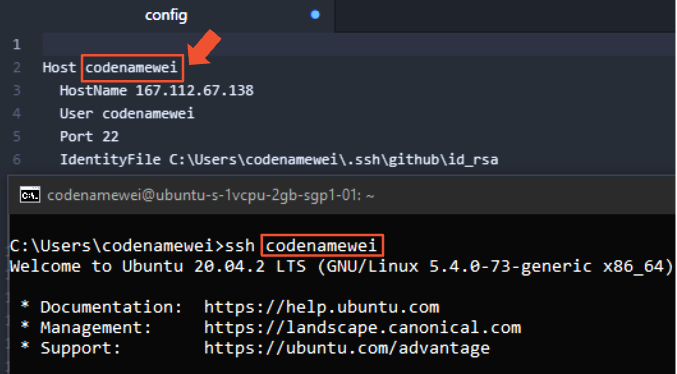
Host codenamewei
  HostName 40.81.206.144
  User codenamewei
  Port 22
In this example, codenamewei is the alias:
ssh codenameweiwhich translates into:
ssh codenamewei@40.81.206.144 -p22Note: the key Port is optional when default port number 22 is used. Otherwise, there’s a need to explicitly set the port number.
With configuration done right, connect to the remote system can now be done with:
ssh <host_identifier>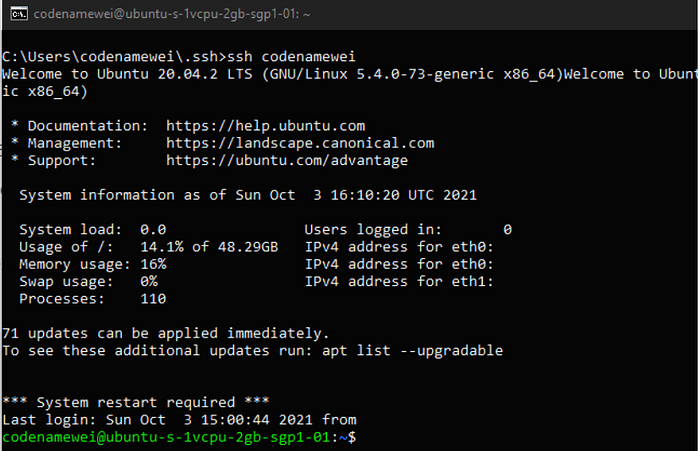
With the examples shown, the end representation of the .ssh/config is as below:
Host github.com
  HostName github.com
  User codenamewei
  PreferredAuthentications publickey
  IdentityFile C:\Users\codenamewei\.ssh\new_folder\id_rsaHost codenamewei
  HostName 40.81.206.144
  User codenamewei
  Port 22
Append the file when there are more connections to be made.
More about configuration options for SSH config file:
Thanks for reading. Until next time!

